


Remember that the dust generated during operation of the brake mechanisms may contain asbestos, which is extremely harmful to human health. Never blow off dust with compressed air or inhale it - wear a protective mask or respirator when servicing the mechanisms. Never use gasoline or petroleum-based solvents to wipe brake system components - use only branded cleaning agents or methyl alcohol!
The calipers of both brake mechanisms of one axle must be changed at the same time.
Removal
1. Set the parking brake, jack up the front of the vehicle and place it on supports, remove the corresponding front wheel.
2. Remove the cap from the brake master cylinder reservoir, place a piece of polyethylene film underneath it and screw it back into place - placing the film underneath will seal the cap and prevent fluid from leaking when the flexible brake hose nipple is released. Alternatively, the hose can be clamped with a suitable clamp.
3. Thoroughly wipe the hose union on the caliper. Unscrew the hollow bolt of the connector and remove the copper sealing washers - the washers must be replaced without fail. Immediately plug the open end of the hose and the union to prevent dirt from getting into the system.
4. Remove the brake pads (see Replacing the front disc brake pads). Remove the caliper.
5. On ABS-equipped and 2.0-liter models, disconnect the caliper anchor bracket from the hub carriage if necessary.
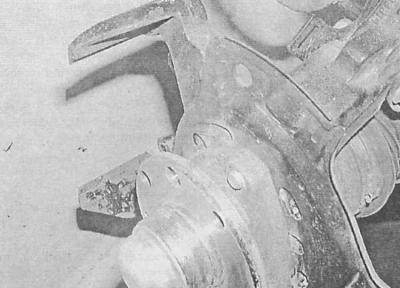
On other models, the bracket is formed by casting the carriage.
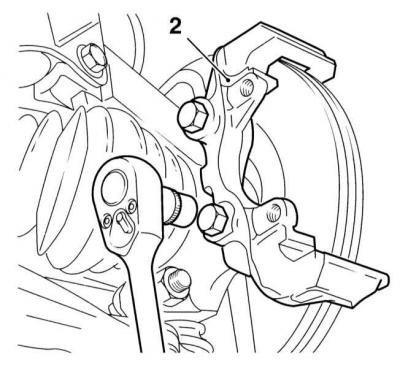
Repair
The calipers used on 1.7 l and 2.0 l diesel models are not subject to repair and, in the event of malfunction, are replaced as a whole.
1. Transfer the caliper to a workbench and thoroughly clean it from dirt and rust using a special cleaner or methyl alcohol.
Never use petroleum-based solvents to clean brake mechanisms!
2. Remove the piston from the caliper cylinder and remove the dust boot. The piston should be easily removed by hand - if necessary, connect a source of compressed air with low supply pressure to its nipple (it is most reasonable to use a foot pump) and place a wooden block between the piston and the caliper bracket.
On models with a monolithic anchor bracket, the piston is made of plastic.
3. Using a plastic applicator, remove the piston cuff from the cylinder - try not to damage the cylinder mirror.
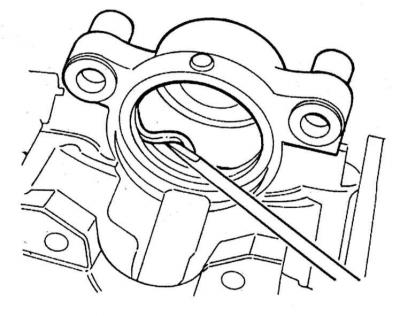
4. Press the guide bushings out of the caliper body.
5. Thoroughly wash all components with a special cleaner and dry them with compressed air - do not forget to wear safety glasses.
6. Replace damaged and worn parts. Carefully examine the condition of the working surfaces of the piston and cylinder; if defects are detected, replace the corresponding components. Check the condition of the guide pins and the holes for their fit - the pins must be free from damage and move easily enough in their seating sockets. If you are not sure of the condition of the components, replace them.
7. If you plan to install the old caliper in place, prepare all the necessary repair parts. The sealing cuffs and piston dust boots must be replaced without fail.
8. Before assembly, make sure that all components are absolutely clean and dry.
9. Place the piston and new sealing cuff in clean brake fluid, and lubricate the cylinder bore with it.
10. Use your fingers to insert the cuff into the cylinder groove - using any tools may damage the working surface! Attach a new dust boot to the piston, turn it with the outer edge facing up, then insert the piston into the cylinder.
11. Carefully press the piston into the cylinder, making rotary and reciprocating movements to avoid distortion - the outer edge of the dust cover should enter the receiving groove on the caliper.
12. Insert the guide bushings into the caliper housing.
Installation
1. On 1.7L models with ABS and all 2L models install the caliper anchor bracket onto the hub carriage, screw in the mounting bolts and tighten them to the required torque - before installation, the threaded portion of the bolts should be lubricated with a fixing sealant.
2. Install new copper sealing washers on the hollow bolt of the union connector and connect the hose to the caliper. Make sure that the hose is correctly seated in the recess of the caliper, then tighten the union bolt to the required torque.
3. Remove the clamp that is squeezing the hose, or remove the polyethylene from under the brake master cylinder reservoir cap and bleed the brake system (see Bleeding the brake system).
It is enough to bleed only the circuit whose support was removed.
4. Install the wheel, lower the vehicle to the ground and tighten the wheel bolts to the required torque.
Visitor comments