
Status check
1. Loosen the wheel bolts, jack up the vehicle and place it on jack stands. Remove the corresponding wheel, then replace a pair of wheel bolts to secure the brake disc (if the disk fixing screw is not yet turned out, there is no need to install bolts). When checking the rear brake disc, be sure to release the parking brake.
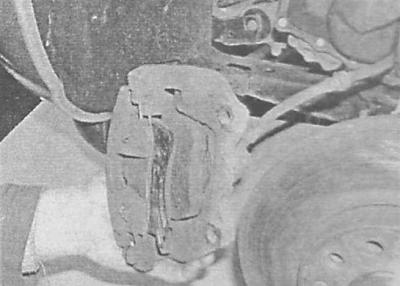
2. Remove the brake caliper (see Replacing the pads of the disc brake mechanisms of the front wheels or Replacing the pads of the disc brake mechanisms of the rear wheels) and tie it aside with a wire to the suspension element without disconnecting the brake hose.
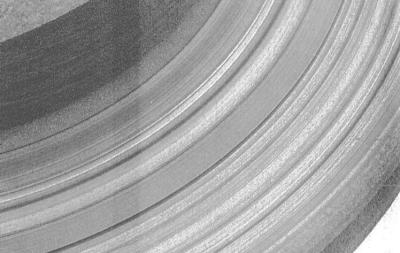
3. Make a visual check of the state of the working surface of the disc. With excessive wear of the brake pads, the heads of the rivets fastening the friction linings make deep grooves on the surface of the brake disc - a disc damaged in this way must be replaced without fail. Light defects can be removed with fine-grained sandpaper. To remove grooves deeper than 0.38 mm, the disc should be machined. Remember that the disc must be inspected from both sides.
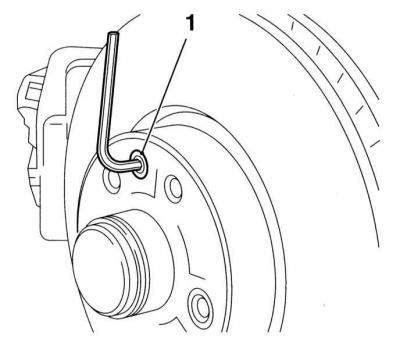
4. If during braking pulsations of the foot brake pedal were noticed, the magnitude of the lateral runout of the brake disc should be assessed. Attach a plunger-type dial gauge about 12.7 mm from the outer edge of the disc. Zero the instrument and start spinning the dial. The result of the measurement should not go beyond the limits specified in Specifications allowable range, otherwise the disk must be given to the groove.

The compilers of this Guide recommend turning the discs, regardless of their condition, in order to remove all kinds of defects from the working surfaces. In extreme cases, you can limit yourself to processing the disk with fine-grained sandpaper.
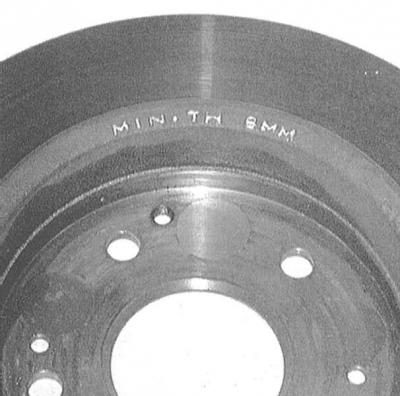
5. When turning a disc, special attention should be paid to compliance with the requirements Specifications to its minimum allowable thickness. The corresponding marking is provided on the end surface of the disk.
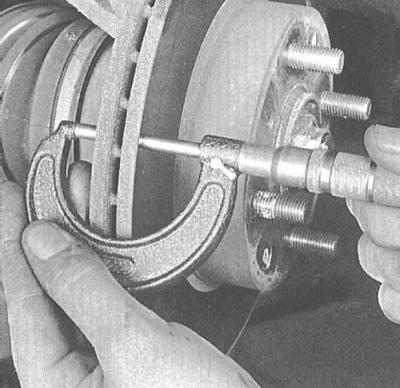
6. Measuring the thickness of the disk is made using a micrometer.
Removing
Front brakes
1. Turn out the wheel bolts established at check of a disk.
2. Remove the front caliper with brake pads and mounting bracket and take it to the side, tying it to the rack.
3. On models with ABS and 2 liter models, remove the anchor brace (see Removal, refurbishment and installation of front wheel disc brake calipers) and release the brake hose from the support bracket on the suspension strut.
4. Turn out the fixing screw and remove a brake disk from a nave of a wheel.
Rear brakes
1. Turn out the wheel bolts established at check of a disk.
2. Remove the brake pads (see Replacing the pads of the disc brake mechanisms of the rear wheels). Remove the caliper from the upper guide bearing. Take the caliper to the side and tie it with wire without disconnecting the brake hose.
3. Turn out bolts of strengthening of an anchor bracket of a support to the lower suspension arm.
4. Turn out the fixing screw and remove a brake disk from a nave of a wheel.
Installation
Front brakes
Installation is carried out in the reverse order to the dismantling of the components.
1. Before installation, make sure that the mating surfaces of the disc and hub are absolutely clean and dry. Lightly lubricate the threaded portion of the disc fixing screw with locking compound.
2. Finally install the brake pads and brake caliper (see Replacing the pads of the disc brake mechanisms of the front wheels).
Rear brakes
Installation is carried out in the reverse order to the dismantling of the components.
1. Before installation, make sure that the mating surfaces of the disc and hub are absolutely clean and dry. Lightly lubricate the threaded portion of the disc fixing screw with locking compound.
2. Establish a support arm of a support and tighten bolts of its fastening with the demanded effort. Clean the top pin of the caliper and lubricate it with silicone grease. Put the caliper on your finger and install the pads (see Replacing the pads of the disc brake mechanisms of the rear wheels).
Visitor comments