


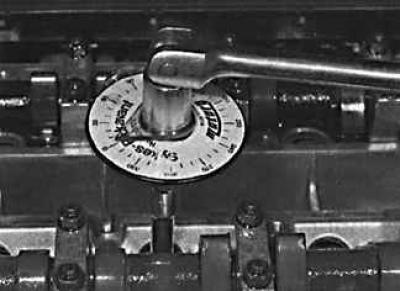
Tightening the cylinder head mounting bolts to the required torque
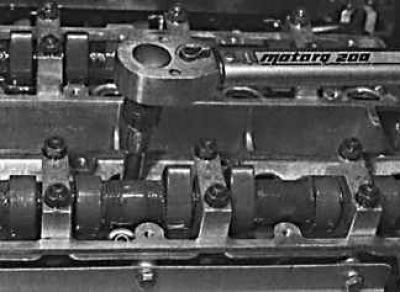
Tightening the cylinder block mounting bolts by turning them to a certain angle
Removal
Warning! The cylinder head must be removed when the engine is cold. When installing the head, new head mounting bolts must be used.
1. Depressurize the fuel system. Remove the ground wire from the battery.
2. Drain the coolant from the cooling system and unscrew the spark plugs.
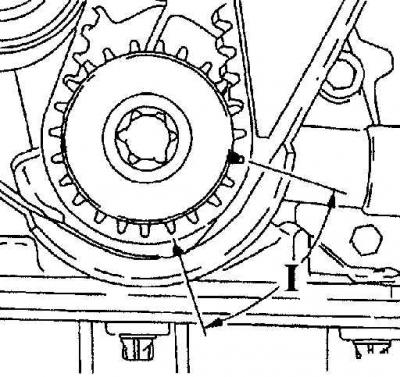
3. Remove the timing belt. Before removing the timing belt, turn the engine crankshaft back approximately 60° (4 teeth), which will allow the camshafts to be positioned so that the valve spring pressure is uniform along the entire length of the camshaft.
1.6L engines
4. Remove the intake and exhaust manifolds. If the cylinder head will not be disassembled, it can be removed together with the manifolds by performing the following steps:
- disconnect the exhaust pipe from the exhaust manifold;
- disconnect the electrical connector from the oxygen sensor;
- disconnect the air pipe and vacuum hose from the air injector valve.
5. Remove the camshaft covers.
6. Remove the camshaft pulleys and timing belt idler pulleys.
7. Unscrew the bolts securing the rear timing belt cover to the cylinder head.
8. Remove the power steering pump bolt and move it away from the head.
9. Disconnect the electrical connectors from the DIS unit and the coolant temperature sensor on the cylinder head.
10. Loosen the clamps and disconnect the upper coolant hose that connects the cylinder head to the radiator. Loosen the clamp and disconnect the coolant hose that connects the cylinder head to the expansion tank.
11. Disconnect the coolant supply hoses to the heater from the engine compartment bulkhead to drain the coolant from the cylinder block. After draining the coolant, reconnect both hoses going to the heater.
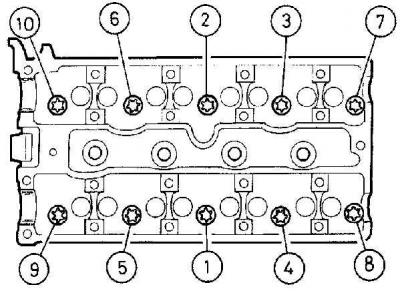
12. Working in a specific sequence, loosen the cylinder head mounting bolts by 1/3 turn at each pass until the bolts are completely loose (see Fig. Cylinder Head Bolt Tightening Sequence).
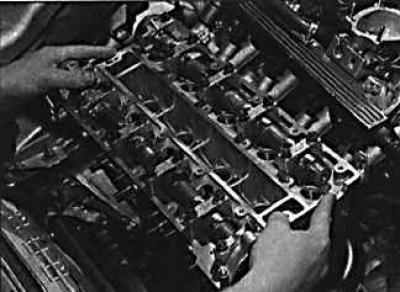
13. Remove the cylinder head from the cylinder block.
14. Remove the cylinder head gasket.
Engines 1.8 and 2.0 l
15. Remove the intake and exhaust manifolds. If the cylinder head is not disassembled, it can be removed together with the manifolds after disconnecting all hoses and electrical wires.
16. Remove the cylinder head cover.
17. Remove the pulleys from the camshafts.
18. Unscrew the torque compensator rod mounting bolt from the end of the cylinder head.
19. Unscrew the bolts securing the rear timing belt cover to the cylinder head.
20. Loosen the clamps and disconnect the upper coolant hose that connects the cylinder head to the radiator. Loosen the clamp and disconnect the coolant hose that connects the cylinder head to the expansion tank.
21. Disconnect the coolant supply hoses to the heater from the engine compartment bulkhead to drain the coolant from the cylinder block. After draining the coolant, reconnect both hoses going to the heater.
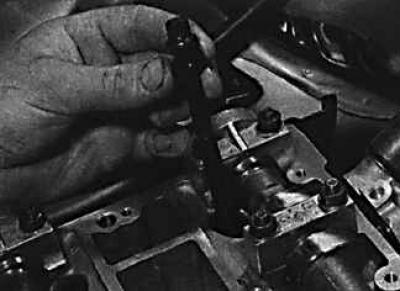
22. Working in a certain sequence (see Fig. Cylinder Head Bolt Tightening Sequence), loosen the cylinder head mounting bolts by 1/3 turn per pass until the bolts are completely loose.
23. Remove the cylinder head from the cylinder block.
24. Remove the cylinder head gasket.
Preparing the head for installation
1. The mating surfaces of the cylinder head and block must be completely clean. Use a hard plastic or wooden scraper to clean them. Be careful when cleaning, as the aluminum alloy is very easy to damage. Check that carbon deposits do not get into the oil and water channels. This is especially important for the lubrication system, as carbon deposits can block the oil supply to the engine components. If necessary, clean the channels, check the mating surfaces of the head and cylinder block for nicks, deep scratches and other damage. If the defects are small, they can be removed by mechanical processing. But if the defects are significant, the parts must be replaced.
2. Using a metal ruler and feeler gauge, check the flatness of the mating surfaces.
3. Clean the bolt holes in the block. Driving a bolt into an oil filled hole can cause the block to burst due to hydraulic pressure.
Installation
1. Check that the crankshaft is set to a position 60° back from the top dead center of the piston of the first cylinder. Wipe the mating surfaces of the head and cylinder block.
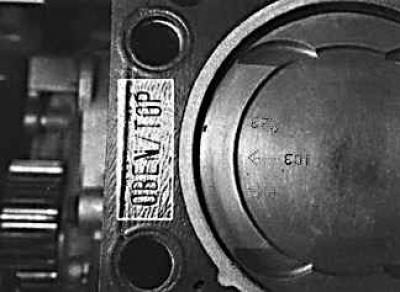
2. Check that the new cylinder head gasket is the same type as the original and that the TOP or OPEN marking is facing upwards.
3. Install the cylinder head onto the guide pins.
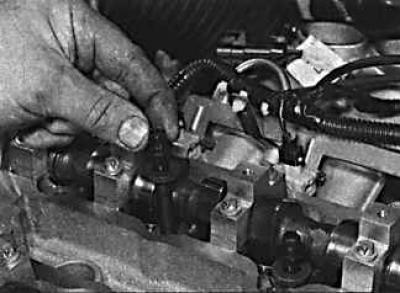
4. Install new cylinder head bolts and tighten them finger tight at this stage.
5. Gradually and consistently (see Fig. Cylinder Head Bolt Tightening Sequence) tighten all cylinder head mounting bolts to the required torque in several stages.
Engine 1.6 l
6. Connect the cooling system hoses and secure them with clamps.
7. Connect the electrical connectors to the cylinder head.
8. Install the power steering pump.
9. Install the rear timing belt cover and secure with bolts, tightening them to the required torque.
10. Install the pulleys on the camshafts and idler pulleys.
11. Align all pulley timing marks with the pointers and install the timing belt.
12. Install the cylinder head cover and timing belt cover.
13. Install the intake and exhaust manifolds.
14. Install the wheel and lower the vehicle.
15. Check that all pipes and hoses are securely connected and fill the cooling system with coolant and screw in the spark plugs.
16. Connect the battery, start the engine and check for leaks.
Engines 1.8 and 2.0 l
17. Connect the cooling system hoses and secure them with clamps.
18. Install the rear timing belt cover and secure with bolts, tightening them to the required torque.
19. Connect the torque compensator rod to the cylinder head and tighten the mounting bolt to the specified torque.
20. Install the camshaft pulleys.
21. Align all pulley timing marks with the pointers and install the timing belt.
22. Install the cylinder head cover and timing belt cover.
23. Install the intake and exhaust manifolds.
24. Install the wheel and lower the vehicle.
25. Check that all pipes and hoses are securely connected and fill the cooling system with coolant and screw in the spark plugs.
26. Connect the battery, start the engine and check for leaks.
Visitor comments