OpelBook.ru
Cars AvtoVAZ Cars Mitsubishi Cars BMW Cars Mercedes Cars Nissan Cars Toyota Cars Chevrolet
English Русский
Български
Беларускі
Український
Српски
Hrvatski
Română
Polski
Slovenský
Magyar
 |  Sitemap  |  Contacts  |    


Main Astra Corsa Insignia Kadett Omega Vectra Zafira Others Articles
Vectra A (1988-1995, petrol) Vectra A (1988-1995) Vectra B (1995-2002, petrol) Vectra B (1995-2002) Vectra C (2002-2008)
  • Main
  • Vectra
  • Vectra B
  • Power unit
  • DOHC petrol engine
  • Camshaft and tappets — removal and installation

Camshaft and tappets — removal and installation (Opel Vectra B)

            0

Contents: Removal ⬇ Examination ⬇ Installation ⬇
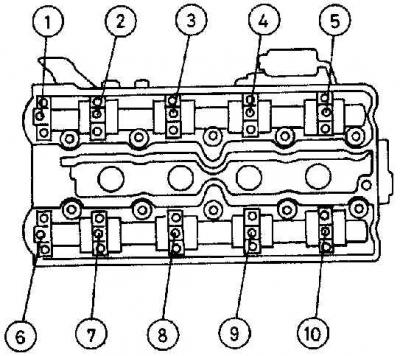
Camshaft Bearing Cap Numbering Sequence

Camshaft Bearing Cap Numbering Sequence


Location of identification marks on camshaft bearing caps and cylinder head
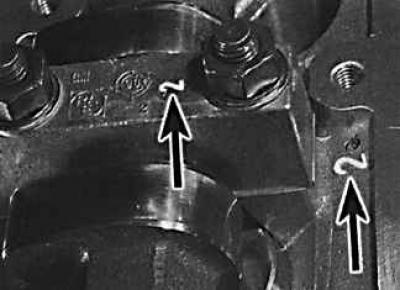
Location of identification marks on camshaft bearing caps and cylinder head


Places where a thin layer of sealant is applied to the cylinder head mating with the right camshaft bearing caps
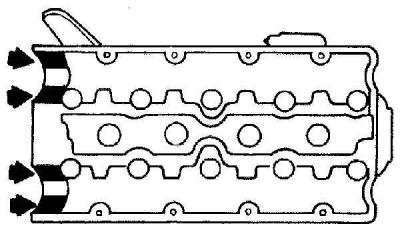
Places where a thin layer of sealant is applied to the cylinder head mating with the right camshaft…


Removal


Removal


[Material copied from this website: Opelbook.ru]

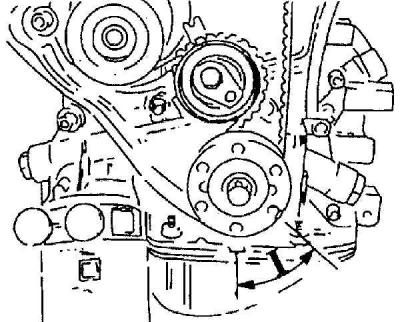
1. Remove the timing belt. Before removing the timing belt, turn the crankshaft back approximately 60° (4 teeth), which will set the camshafts so that the valve spring pressure is uniform along the entire length of the shaft.

2. Remove the pulleys from the camshafts.

3. On the camshaft that controls the intake valves, working in a spiral sequence from the outside in, gradually and evenly loosen the camshaft bearing cap bolts. Once the valve spring pressure has ceased, unscrew the bolts completely. The bearing caps and their installation locations on the cylinder head are numbered. (Intake valve camshaft from 1 to 5. Exhaust valve camshaft from 6 to 10).
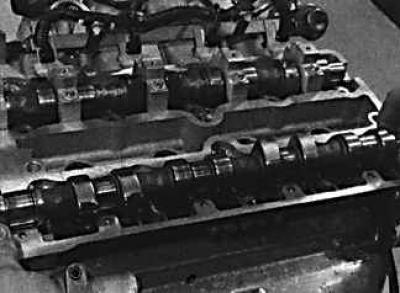
3. On the camshaft that controls the intake valves, working in a spiral sequence from the outside…


4. Remove the camshaft from the cylinder head.


5. Repeat the steps for removing the camshaft that controls the exhaust valves.
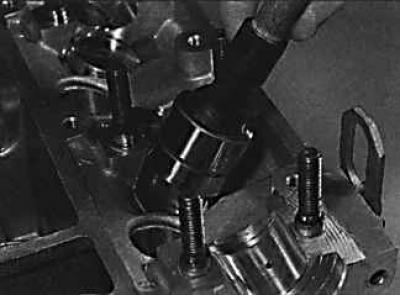
5. Repeat the steps for removing the camshaft that controls the exhaust valves.


6. Using a rubber suction cup, remove the lifters from the top of the cylinder head and store each lifter in a separate bag for later reinstallation of the lifters into their proper locations.

Warning: Do not turn hydraulic lifters upside down as oil may leak out.


Examination


1. Check the camshaft bearing running surfaces and camshaft lobes for wear. If any wear is present, replace the camshaft. If the camshaft bearings are worn, the cylinder head must be replaced.

2. Check the condition of the working surfaces of the hydraulic tappets that come into contact with the camshaft cams.

Installation


1. Lubricate the hydraulic lifters with clean engine oil and insert each lifter into its place in the cylinder head.

2. Lubricate the camshaft journals and lobes with clean engine oil and install the camshaft in the cylinder head. Check that the crankshaft is 60° rearward of the first cylinder top dead center and rotate each camshaft so that the lobes of the first cylinder lobes point upward. Temporarily install the pulleys on the camshafts and rotate them so that the timing mark on the pulley is offset by 4 teeth before TDC.


3. Apply a thin layer of sealant to the mating surfaces of the right camshaft bearing caps (see Fig. Places where a thin layer of sealant is applied to the cylinder head mating with the right camshaft bearing caps).
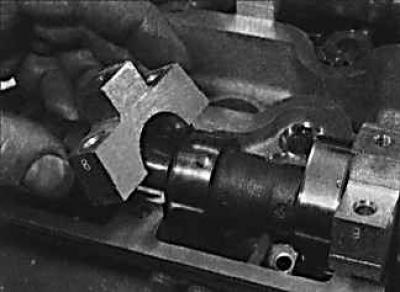
3. Apply a thin layer of sealant to the mating surfaces of the right camshaft bearing caps (see…


4. Install the bearing caps according to the identification marks.
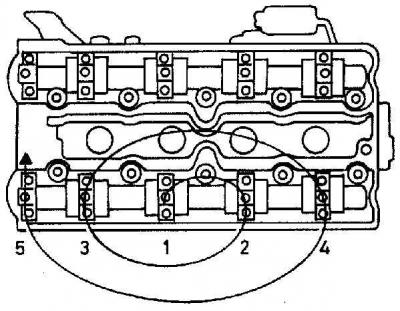
4. Install the bearing caps according to the identification marks.


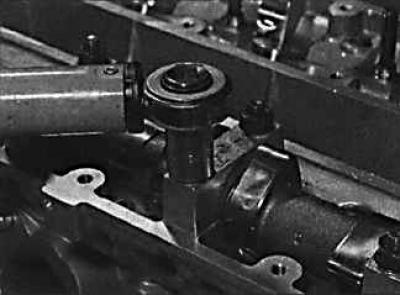
5. On the intake camshaft, tighten the camshaft bearing cap bolts by hand, then tighten the bearing cap bolts in a spiral pattern from the center outward, gradually and in a specific sequence, turning each bolt one-half turn at a time, until each cap contacts the cylinder head. Then tighten the bolts to the specified torque in several stages in the same sequence.
5. On the intake camshaft, tighten the camshaft bearing cap bolts by hand, then tighten the bearing…


6. Similarly, tighten the bolts securing the bearing caps of the camshaft that controls the exhaust valves.


7. Install new camshaft oil seals.

8. Install the camshaft pulleys.

9. Align all pulley timing marks with the pointers and install the timing belt.

10. Install the cylinder head cover and timing belt covers.


This article is available at russian, bulgarian, belarusian, ukrainian, serbian, croatian, romanian, polish, slovak, hungarian
Checking the article: Pavlovsky Nikolay

Share information:

Previous articles
Opel Vectra B: DOHC petrol engine
Next articles

Replacing camshaft oil seal rings
Timing Belt Pulleys, Tensioner and Idler Pulley
Timing belt — removal and installation
Timing Belt Covers — Removal and Installation
Crankshaft pulley — removal and installation
Cylinder head cover — removal and installation
Cylinder head — removal and installation
Oil pan — removal and installation
Oil pump — removal and installation
Flywheel/drive plate
Replacing the crankshaft oil seal rings
Powertrain suspension


See similar ones from other Opel car manuals:
▶ Camshaft and tappets — removal and installation Opel Astra G (1998-2004, petrol)
▶ Replacing the camshaft seal Opel Corsa B (1993-2000)
▶ Replacing the primary drive chain (camshaft drive chain) Opel Insignia A (2008-2017)
▶ Installing the camshaft Opel Kadett E (1984-1995)
▶ Camshaft Cover — Removal and Installation Opel Omega B2 (1999-2003)
Link to this page in different formats

Visitor comments


No comments yet


How much will 16 + 23 =


Vectra C (2002-2008) 
  • General information
  • User manual
  • Vehicle device
  • Maintenance
  • Troubleshooting
  • Power unit
  • Engine repair
  • Cooling system
  • Power and control system
  • Engine electrics
  • Transmission
  • Clutch
  • Car gearbox
  • Drive shafts
  • Chassis
  • Car suspension
  • Steering
  • Brake system
  • Body
  • Exterior
  • Interior
  • Doors, locks and windows
  • Heating and ventilation
  • Electrical equipment
  • Equipment and devices
  • Headlights and lighting
  • Electrical circuits
Vectra B (1995-2002) 
  • General information
  • User manual
  • Weekly checks
  • Maintenance (gasoline)
  • Maintenance (diesel)
  • Troubleshooting
  • Power unit
  • SOHC gasoline engine
  • DOHC petrol engine
  • Diesel engine 1.7 liter
  • Diesel engine 2.0 liters
  • Engine repair
  • Cooling system
  • Fuel system (gasoline)
  • Fuel system (diesel)
  • Charging system
  • Launch system
  • Ignition and preheat
  • Transmission
  • Clutch
  • Mechanical gearbox
  • Automatic gearbox
  • Drive shafts
  • Chassis
  • Brake system
  • Wheel suspension
  • Steering
  • Body
  • Exterior
  • Interior
  • Doors and windows
  • Heating and ventilation
  • Electrical equipment
  • Equipment and devices
  • Electrical circuits
Vectra B (1995-2002, petrol) 
  • General information
  • Maintenance
  • Help with malfunctions
  • Power unit
  • Engine repair
  • Exhaust system
  • Cooling system
  • Fuel system
  • Multec injection system
  • Four point injection
  • Transmission
  • Clutch
  • Gearbox and drive
  • Chassis
  • Wheel suspension
  • Steering
  • Brake system
  • Wheels and tires
  • Body
  • Exterior
  • Interior
  • Electrical equipment
  • Fuses and electronics
  • Power devices
  • Ignition system
  • Lighting and signaling
  • Equipment and devices
  • Heating and ventilation
  • Electrical circuits
Vectra A (1988-1995) 
  • Power unit
  • Engine repair
  • Ignition system
  • Lubrication system
  • Cooling system
  • Injection system
  • Fuel system (carburetor)
  • Fuel system (diesel)
  • Exhaust system
  • Transmission
  • Clutch
  • Car gearbox
  • Chassis
  • Front suspension
  • Rear suspension
  • Steering
  • Brake system
  • Wheels and tires
  • Body
  • Exterior
  • Interior
  • Electrical equipment
  • Electrical circuits
Vectra A (1988-1995, petrol) 
  • General information
  • User manual
  • Maintenance
  • Power unit
  • SOHC engine
  • DOHC engine
  • Cooling and ventilation
  • Fuel system (carburetor)
  • Fuel system (injector)
  • Exhaust converter
  • Transmission
  • Clutch
  • Mechanical gearbox
  • Automatic gearbox
  • Drive shafts
  • Chassis
  • Brake system
  • Car suspension
  • Steering
  • Body
  • Body elements
  • Electrical equipment
  • Power devices
  • Equipment and devices
  • Electrical circuits
OpelBook.ru © 2017–2026 · Mobile version · · Sitemap: EN BG BY UA RS HR RO PL SK HU · Feedback · Site search
Astra F, petrol · Astra G, petrol · Astra G · Astra H · Astra J, petrol · Corsa B · Corsa C, petrol · Corsa C · Insignia A · Kadett D · Kadett E · Omega A · Omega B · Omega B2 · Vectra A, petrol · Vectra A · Vectra B, petrol · Vectra B · Vectra C · Zafira A, petrol · Frontera A, petrol · Frontera B · Ascona C · Vivaro A ·
We want your visit to be comfortable 🤝! We use cookies 🍪 to make that happen.