
Attention! When removing the sensor, the fuel level in the tank should be minimal (otherwise fuel will leak out). To do this, you must either work out the remaining fuel while driving, or pump it out through the filler neck using an additional pump.
Attention! Gasoline vapors are poisonous! Ensure good ventilation of the workplace.
Attention! Keep open flames or sparks away from the work area. There is a risk of fire!
Removing
Disconnect wire "masses" from the battery.
Raise the vehicle and place it on stands.
Loosen the clamps and disconnect the fuel hoses, having previously marked them with adhesive tape.
Vehicles manufactured before August 1991: Disconnect the wires from the sensor.
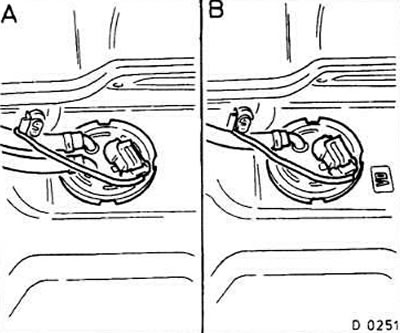
A - in an engine with a carburetor
B - in an engine with a fuel injection system
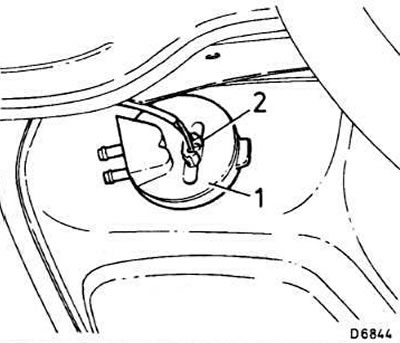
Vehicles manufactured from September 1991: remove protective cover 1 together with connector 2 (see fig.).
Attention! Trace around the sensor circuit in the tank with a waterproof felt-tip pen or write down in which direction the connecting fitting of the fuel hose is directed.
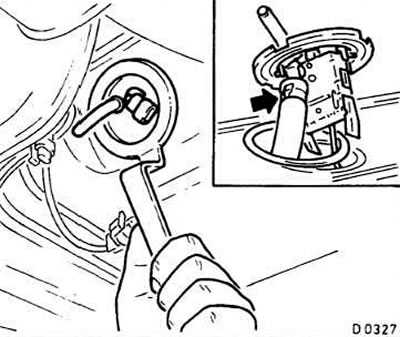
Unscrew the cover with a KM 332-B wrench or appropriate tongs (see fig.).
Take out the sensor. On engines with a fuel injection system, disconnect the drain hose from the sensor.
Installation
Lubricate the sealing rubber ring with grease and put it on the sealing surface of the sensor.
When installing, make sure that the ring does not move.
Install the sensor and tighten it. On engines with a fuel injection system, first connect the drain hose and secure it with a clamp.
Connect fuel hoses and secure with clamps.
Attention! Do not confuse the supply and drain hoses!
Vehicles manufactured before August 1991: connect the connector to the sensor.
Vehicles manufactured from September 1991: fit the protective cover together with the connector.
Remove clamps.
Fill the tank with fuel.
Check fuel system for leaks.
Connect wire "masses" to the battery.
Visitor comments