


Contents: Removal ⬇ Installation ⬇
The engine is removed upwards without the gearbox. The intake and exhaust manifolds, carburetor and generator are not disconnected. A lift is required to lift the engine. Do not lower the engine onto its front part, as this can cause serious damage to it.
The engine mounts must be removed from the body, after the car has been raised using a lift. Before starting work in the engine compartment, the fenders must be protected from damage.
Depending on the model and year of the vehicle, electrical wires, vacuum hoses, and coolant hoses may be routed differently. Without going into detail on the routing diagrams, we recommend that you mark all wires and hoses with adhesive tape before disconnecting.
Removal
Remove the battery.
Remove the hood (see the chapter " Bodywork " ).
Drain the coolant.
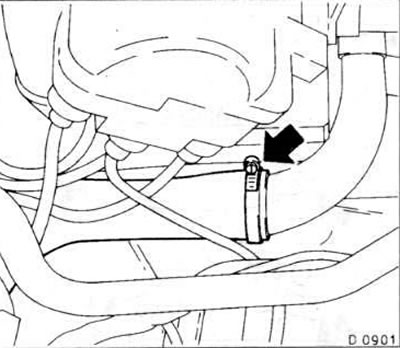
Disconnect the coolant hose at the upper radiator pipe, first completely releasing the clamp and sliding it back.
Remove the air filter. Cover the carburetor with a rag.
If present, remove the suction hose and pre-chamber.
Mark with adhesive tape and disconnect the wires, hoses and cables going to the engine (wires from the generator and starter, coolant temperature sensor, oil pressure sensor, injection system pipe, high-voltage wires).
Remove the accelerator rod.
Remove the alternator drive V-belt. If a poly V-belt is installed, remove the pulley from the coolant pump. Remove the pump from the cylinder block. The figure shows the E16NZ engine.
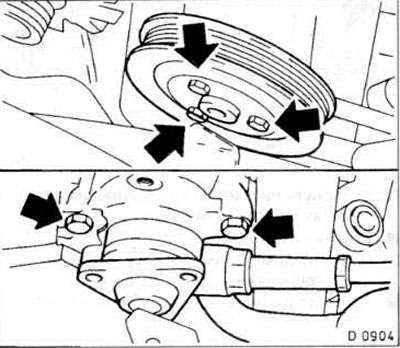
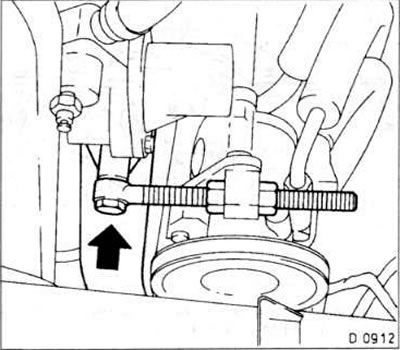
If the vehicle is equipped with power steering and air conditioning, remove the power steering pump and air conditioning compressor from the engine by unscrewing the bolts securing them to the cylinder block.
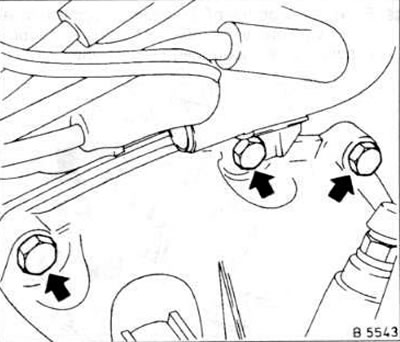
Loosen the upper bolts securing the clutch housing to the cylinder block.

Hang the engine on the KM-263 lifting device (see fig.).
If there is no such device, place a suitable section of pipe over the engine compartment, resting it on the fenders and placing wooden blocks under the contact points. Fasten the cable or hooks to the engine and connect them to the pipe. Tighten the cable.
Raise the vehicle and place it on supports.
Remove the front exhaust pipe.
If the vehicle is equipped with power steering and air conditioning, remove their drive belts.
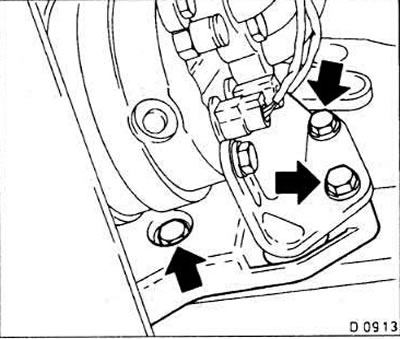
Loosen the lower bolts securing the power steering pump and air conditioning compressor.
Attention! Move the pump and compressor with the hoses attached to them to the side or hang them on a wire. Never disconnect the hoses from the air conditioner! The refrigerant used in the air conditioner can cause frostbite if spilled. If the brake system pipes are disconnected, the air must be removed from the system during assembly.
Loosen the gearbox cover mounting bolts.
For 1.8 and 2.0 L engines: remove the belt pulley from the crankshaft. Drain the oil and remove the oil filter.
Remove the clutch.
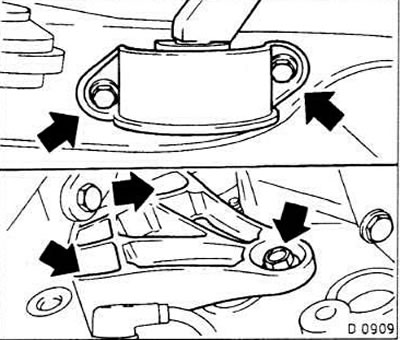
Loosen the bolts securing the right engine support.
Loosen the bolts securing the remaining engine mounts.
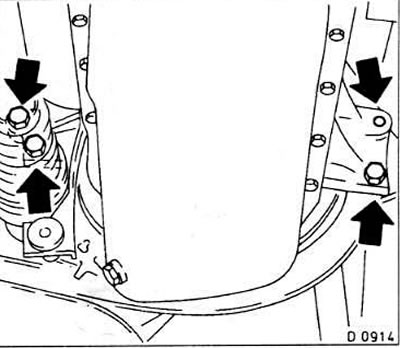
Loosen the lower bolts securing the gearbox to the cylinder block.
Lower the car.
Raise the gearbox with a jack, placing a wooden spacer underneath.
Remove the lifting device KM-263.
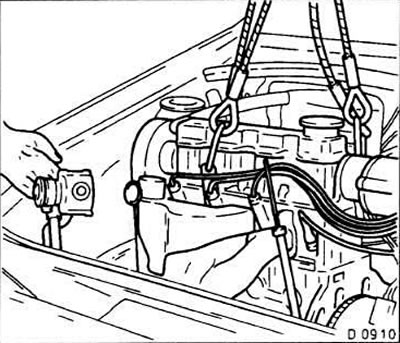
Attach the hoist hooks to the engine.
Separate the engine from the gearbox using a crowbar until the input shaft is completely free.
Check that all hoses and wires leading to the body are disconnected.
Lift the engine out of the engine bay. Remove the power steering pump (for vehicles with a poly V-belt). Figure D0910 shows the E16NZ engine.
Caution! When lifting the engine, be careful not to hit the engine with the body.
Installation
Check engine mounts, cooling system hoses, oil and fuel hoses for cracks and kinks. Replace damaged parts.
Check the thickness of the clutch drive disc and the quality of its surface. If severe wear is detected, the clutch must be replaced completely. If the release bearing makes noise when you press the clutch pedal, it must also be replaced.
Clean and lubricate the clutch release bearing and input shaft splines with M0S2 based grease.
Carefully lower the engine into the engine compartment. When lowering, be careful not to damage the input shaft, clutch, or body.
For vehicles with a poly V-belt: install and secure the power steering pump.
Tighten the clutch housing mounting bolts to 75 Nm.
Install the lifting device KM-263 (remove the jack).
Tighten the lower gearbox-to-engine block mounting bolts to 75 Nm.
Tighten the engine mounts to a torque of 60 Nm.
Secure the right engine mount to the body with a torque of 65 Nm using new bolts.
Raise the car with a jack and place it on supports.
Install the clutch.
If the crankshaft pulley was removed, install and secure it.
Secure the gearbox cover.
For 1.8 and 2.0 L engines: install an oil filter.
Install the front exhaust pipe.
If the power steering pump and air conditioning compressor have been removed, install and secure them with bolts to a torque of 40 Nm. Install and tighten the V-belt.
Article posted on a web portal: opelbook.ru
For vehicles with a poly V-belt: install the power steering pump and secure it to the cylinder block with a torque of 30 Nm, and the belt pulley with a torque of 25 Nm. Install the poly V-belt and tighten it.
Lower the car.
Install and tension the V-belt.
Connect all wires, hoses and cables going to the engine in accordance with the marks on them.
Secure the hoses with clamps and the electrical wires with clips.
Fill the engine with fresh oil.
Check the oil level and top up if necessary.
Check the density of the coolant and top it up if necessary.
Clean the air filter housing and filter element. Replace the element if necessary.
Install the air filter.
Install the hood.
Install the battery and connect the wires to it.
Check the ignition timing setting.
Check the engine idle speed.
Start the engine, warm it up to operating temperature, check the coolant level, check all hose and pipe connections for leaks.
Visitor comments