
Removing
1. Set the parking brake, jack up the front of the car and place it on supports, if equipped, remove the crankcase protection. Remove intake ducts and air cleaner housing (see chapter Power and exhaust systems).
2. Drain gear oil (see chapter Current service).
3. Remove the battery from the mounting tray (see chapter Engine electrical equipment).
4. Disconnect the electrical wiring from the sensor-switch of the reversing lights (see Check of serviceability of functioning, removal and installation of the sensor-switch of reversing lights) and release it from the intermediate clamps on the gearbox housing.
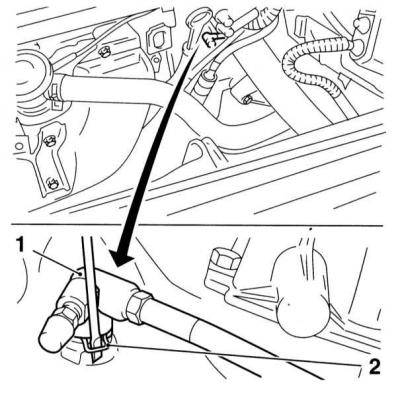
5. In order to minimize the loss of clutch hydraulic fluid, clamp the flexible one connected to the manual transmission with a clamp. Remove the circlip from the union at the top of the clutch dome and disconnect the hose. Gently squeezing the lock, put the retaining ring in place in the connector. The sealing ring must be replaced without fail. Seal the open ends of the tube and hose immediately to minimize hydraulic fluid and prevent dirt from entering the system.
Do not depress the clutch pedal with the hose disconnected!
6. Remove the exhaust pipe, catalytic converter and the middle section of the exhaust system (see chapter Power and exhaust systems).
7. On models equipped with F13, F17 and F18 manual transmissions, disconnect the shift rod assembly from the top of the transmission case (see Removal and installation of the mechanism of a gear change). On models with F23 boxes, disconnect the cable ends from the linkage assembly on top of the crankcase, remove the mounting bolt and move the cable support bracket aside.
8. Remove drive shafts (see chapter Clutch and drive shafts).
9. Hang the power unit on the rod laid in the mudguard troughs and remove the front subframe (see chapter Suspension and steering).
10. Support the transmission with a trolley jack, - in order to distribute the load, lay a wooden block between the head of the jack and the crankcase of the manual transmission.
11. Turn out fixing bolts and separate an arm of a forward support of a suspension bracket of the power unit from a coupling dome.
12. Turn out six fixing bolts and remove an arm of the left support from a manual transmission case and remove an arm. Gradually releasing the hoist, lower the rear of the transmission by approximately 5 cm - make sure that the communication lines laid from below are not pinched (hoses and wiring).

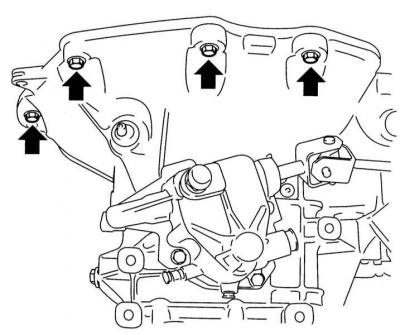
13. On stamped steel sump models, unscrew the clutch cover and remove it from the crankcase base.
14. Turn out the top and bottom bolts of fastening of transmission to the engine, - try to remember an arrangement of bolts and the basic brackets fixed by them. Once again, make sure that all communication lines are disconnected and nothing prevents the removal of the box.
15. Having shifted the jack with the transmission fixed on it, separate the clutch dome from the engine block, - make sure that the dome is completely removed from the guide bushings, if the bushings are loose, remove them and put them in a safe place.
Installation
Installation is in the reverse order. Pay attention to the following points.
1. Before installation, make sure that the guide bushings are seated in their seats.
2. Tighten all fasteners to the correct torque.
3. Before installing the drive shafts, replace their oil seals (see Replacement of oil seals).
4. Install the front subframe as recommended (see chapter Suspension and steering).
5. Do not forget to replace the sealing ring of the union connection of the clutch hydraulic hose, make sure the hose is securely fixed and pump the hydraulic drive (see chapter Clutch and drive shafts).
6. Fill in the manual transmission with the required amount of gear oil of the required type (see chapter Current service).
7. Finally, adjust the shift mechanism (see Adjustment of a drive of a gear change).
Visitor comments