


Warning! The electronic ignition system generates very high voltage! Be careful and take all necessary precautions when servicing any components of the system, including not only the main (ignition coil ignition module), but also related items such as spark plug connectors, tachometer and other equipment!
Attention! All work on replacing the spark plug should be carried out only on a cold engine (engine temperature can be touched by hand) otherwise, when removing the spark plugs on a hot engine, the internal thread of the spark plug installation hole on the cylinder head may be damaged.
1. The correct functioning of spark plugs is largely determined by the efficiency of the engine recoil. It is important that the engine has spark plugs of the exact type specified by the manufacturer). Attempts to "improve" the engine by installing more expensive and at first glance better candles will most likely lead to the opposite result. On a serviceable engine, the need for unscheduled spark plug maintenance is extremely rare, and you should not needlessly unscrew the spark plugs for testing. To avoid accidental damage to the electrodes, do not perform maintenance and cleaning of candles without the use of special equipment.
2. To replace spark plugs, you need a special spark plug head (16 mm) complete with extension, universal joint, torque wrench (see accompanying illustration). Using a torque wrench will help ensure that the correct amount of tightening force is applied to the spark plugs.
Caution! Use a spark plug wrench with an elastic insert to prevent damage to the spark plug insulator!
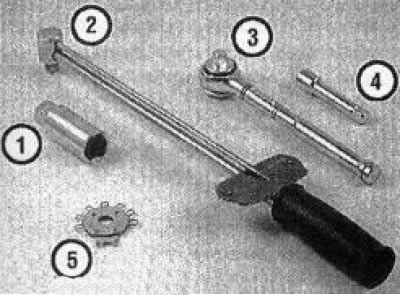
22.2 Tools required when replacing spark plugs:
1. Spark plug head - Equipped with a special elastic insert, eliminating the possibility of accidental damage to the porcelain insulator when unscrewing the spark plug.
2. Torque wrench - Although not a required tool, it provides a reliable guarantee of the correct tightening force of the spark plugs.
3. Ratchet drive - Used in combination with a spark plug head and torque wrench.
4. Extension - Depending on the model and its auxiliary units, access to the spark plugs may be limited to varying degrees, so using extensions of the appropriate shape and design will make the procedure much easier.
5. Tool for measuring and adjusting spark plug gaps. Several types of such tools are available. Make sure that the tool is equipped with a feeler gauge that matches the size of the spark plug gaps in your vehicle.
3. To gain access to the spark plugs, it is necessary to first remove the ignition module/coils (see Chapter 5).
4. On engines with DOHC layout the spark plugs are deeply recessed into the spark plug recesses, so you will need a key extension to unscrew them (see accompanying illustration). After placing the head on the spark plug, connect the drive and, carefully turning the crank counterclockwise, unscrew the spark plug.
5. Compare the removed spark plug with the condition chart shown in the photographic insert, which will allow you to qualitatively assess the overall condition of the engine.
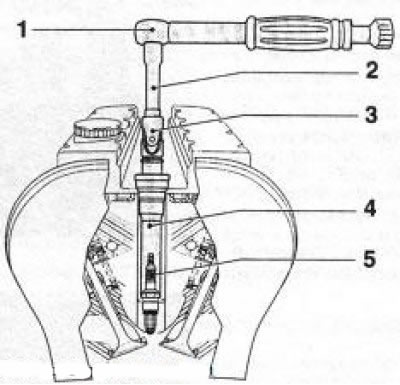
22.4 Removing the spark plug from a deep recess using a special key: 1. Ratchet handle; 2. Extension cord; 3. Cardan joint; 4. Spark plug head (with elastic liner); 5. Spark plug
6. Checking the condition of the spark plugs gives a good idea of the engine condition. If there are no traces of any deposits on the insulator of the central electrode, this indicates that the air-fuel mixture is too lean, or that an excessively "hot" spark plug is used (heat dissipation from the insulator to the housing on "hot" spark plugs occurs much less intensively than on "cold" ones)
7. The presence of black carbon deposits on the electrodes indicates that the mixture is too rich, and if the carbon deposits also have an oily consistency, you should also consider a more detailed assessment of the degree of wear of the internal components of the engine.
8. A golden or grey-brown coating on the insulator confirms the engine is in good condition and the air-fuel mixture is correctly configured.
9. Modern engines use different types of spark plugs. Multi-electrode spark plugs are widely used (see accompanying illustration), which have increased wear resistance and reliability. The installation of interelectrode gaps on such spark plugs is carried out at the manufacturer and, as a rule, does not require any adjustments. If necessary, the installation of interelectrode gaps should be carried out in accordance with the instructions of the spark plug manufacturers.
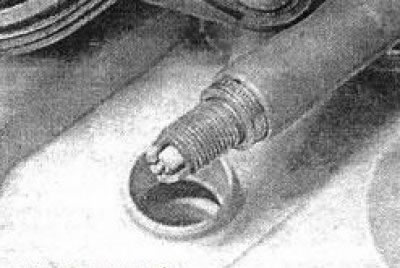
22.9 Most modern models come standard with multi-electrode spark plugs
10. The measurement of the interelectrode gap is performed using a special wire-type probe (see accompanying illustration 22.10a). When adjusting, only the side electrodes should be bent - attempts to deform the central electrode are fraught with irreversible damage to the insulator. If a blade-type feeler gauge is used to measure the spark plug gap, the gap can be considered adjusted correctly when the blade of the feeler gauge passes into it with slight resistance (see accompanying illustration 22.10b)
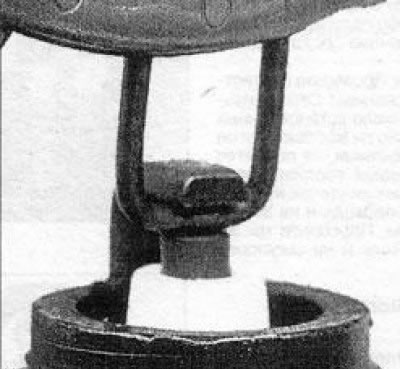
22.10a Checking the interelectrode gap size using a wire type gauge
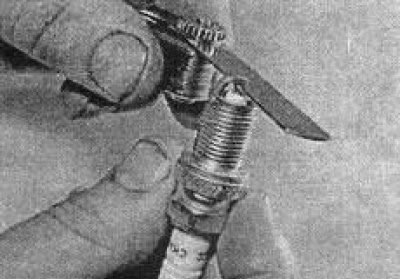
22.10b Checking the interelectrode gap using a blade-type feeler gauge
11. Before installing the spark plug, make sure that the threads on the body and the outer surface of the spark plug are well cleaned.
12. If damage to the threaded connection is found during inspection of the spark plug, the spark plug must be replaced, and if the thread in the cylinder head is damaged, it is necessary, without removing the head, to cut a new thread using a special tool for a special transition sleeve that is screwed onto a standard spark plug. For this purpose, the appropriate tool and various repair kits are available for sale (for example, the company BERU).
13. Manually thread one of the new spark plugs into the appropriate hole in the engine. After making sure that the spark plug is not twisted in the thread, tighten it to the required force. To facilitate the threading procedure, pull a piece of flexible fuel hose over its tail (see accompanying illustration) in order to eliminate the possibility of thread stripping, since the slightest biting will simply cause the hose to start turning. Proceed in a similar manner to install all the remaining spark plugs.
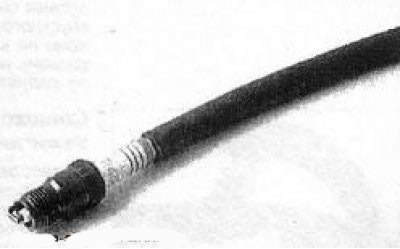
22.13 To avoid damaging the threads in the cylinder head as a result of the spark plugs being tilted, they should be baited using a section of fuel hose placed on the tailpiece
14. Reinstall all removed components.
Spark plug diagnostics
Coal deposits
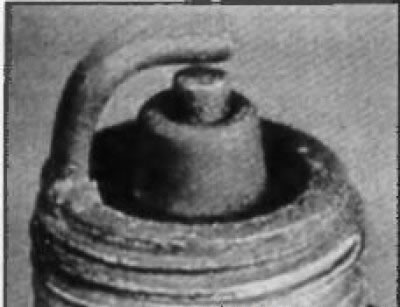
Symptoms: The presence of soot indicates an over-rich fuel-air mixture or weak spark intensity. Causes misfires, difficult starting and leads to unstable engine operation.
Recommendations: Check if the air cleaner is clogged, if the fuel level in the float chamber is too high, if the air damper is stuck and if the contacts are too worn. Try using spark plugs with a longer insulator, which increases resistance to contamination.
Oiling
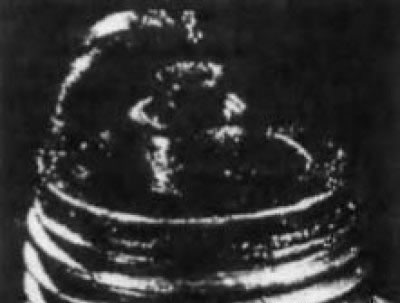
Symptoms: Oiling of the spark plug is caused by worn out oil deflector caps. Oil gets into the combustion chamber through worn valve guides or piston rings. Causes misfires, difficult starting and leads to unstable engine operation.
Recommendations: Perform mechanical repairs and replace spark plugs.
Overheat
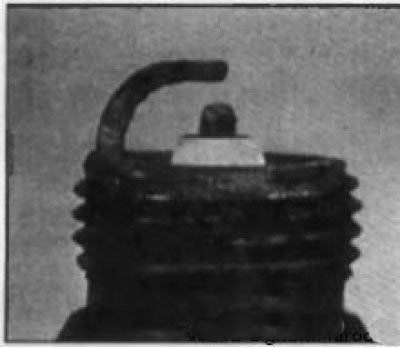
Symptoms: Porous, white insulator, erosion of electrodes and absence of any deposits. Leads to a reduction in spark plug life.
[Article posted on an online resource: OpelBook.ru]
Recommendations: Check that the installed spark plugs are of the correct heat range, that the ignition timing is set correctly, that the fuel/air mixture is not too lean, that there are no vacuum leaks in the intake manifold and that the valves are not stuck. Also check the coolant level and that the radiator is not clogged.
Too early ignition
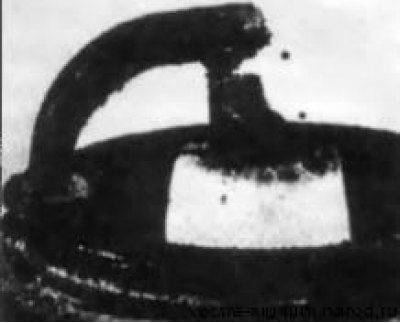
Symptoms: The electrodes are melted. The insulator is white, but may also be contaminated due to misfiring or foreign particles entering the combustion chambers. May cause engine failure.
Recommendations: Check the glow number of the installed spark plugs, the ignition timing, and the quality of the mixture (isn't it too poor?), whether the cooling system is clogged and whether the lubrication system is functioning normally.
Conductive gloss
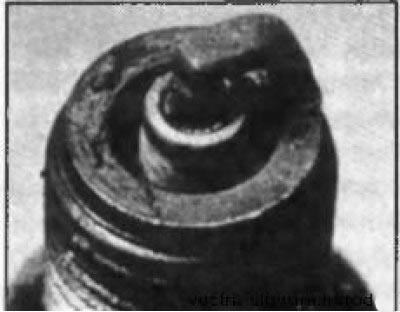
Symptoms: The insulator has a yellowish color and a polished appearance. Indicates a sudden increase in temperature in the combustion chambers during sharp acceleration. Normal deposits melt, acquiring the appearance of a varnish coating. Leads to misfires at high speeds.
Recommendations: Change the spark plugs (cooler, while maintaining the same driving style).
Short circuit of electrodes
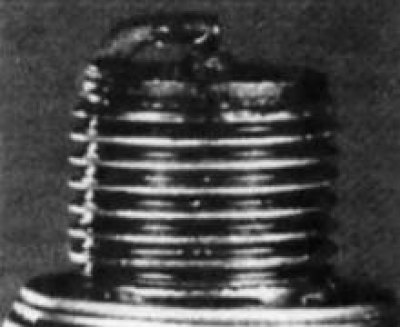
Symptoms: Combustion waste gets into the interelectrode space. Solid deposits accumulate, forming a bridge between the electrodes. Leads to ignition failure in the cylinder.
Recommendations: Remove deposits from the interelectrode space.
Normal condition of the candle
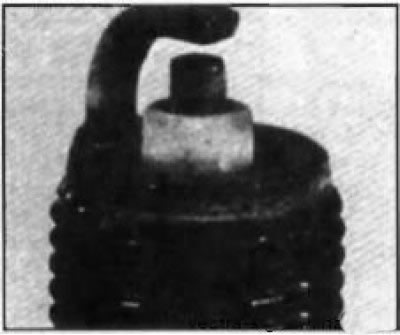
Symptoms: Gray-brown color and slight wear of electrodes. The glow number of the spark plugs corresponds to the type of engine and its general condition.
Recommendations: When replacing spark plugs, install spark plugs of the same type.
Ash formation
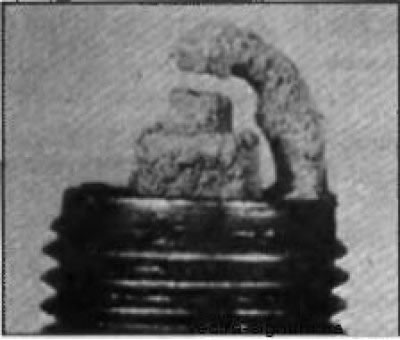
Symptoms: Soft, brownish deposits on one or both spark plug electrodes. Caused by oil and/or fuel additives. Excessive buildup can insulate the electrodes and cause misfires and rough running under acceleration.
Recommendations: If deposits accumulate quickly, replace the oil seals, which will prevent oil from entering the combustion chambers. Try changing the fuel brand.
Wear
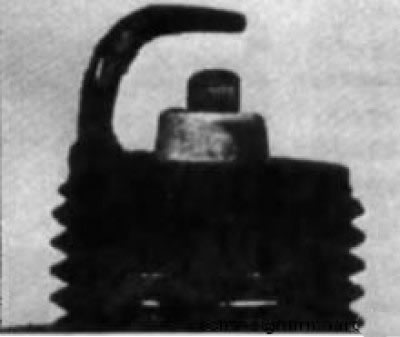
Symptoms: Rounding of the electrodes with a small accumulation of deposits at the working end. Color is normal. Causes difficulty starting the engine in cold, damp weather and increased fuel consumption.
Recommendations: Replace the spark plugs with new ones of the same type.
Detonation
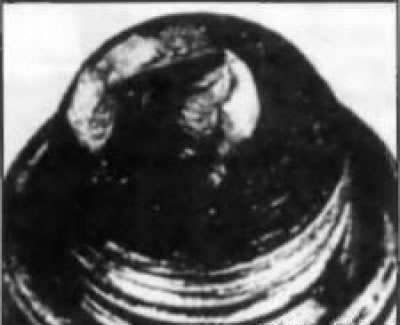
Symptoms: Insulators may be chipped or cracked. Insulator damage may also result from improper spark plug gap adjustment. Piston damage may result.
Splashing
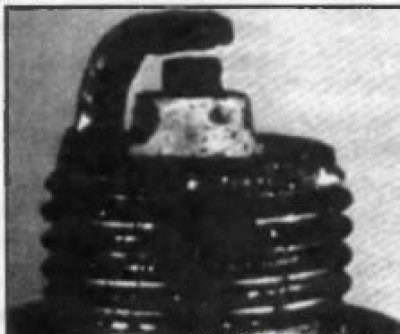
Symptoms: After a long period of misfire, deposits may become loose while the combustion chamber remains at operating temperature. At high speeds, deposits flake off the piston and stick to the hot insulator, causing misfires
Recommendations: Replace the spark plugs or clean and reinstall the old ones.
Mechanical damage
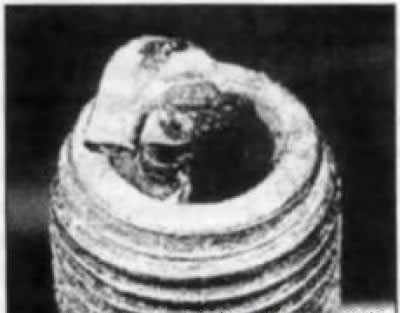
Symptoms: Can be caused by foreign material entering the combustion chamber or by the piston hitting a spark plug that is too long. Leads to cylinder failure and piston damage.
Recommendations: Remove foreign particles from the engine and/or replace the spark plugs.
Visitor comments