


Contents: General information ⬇ Towing hitch ⬇ Basic characteristics of driving…⬇ Tire pressure ⬇ Trailer Stability Assist (TSA) ⬇ Recommendations for driving a car…⬇
General information
Note: Towing a trailer reduces the service life and fuel economy of the vehicle, as the load on the components involved in transmitting torque increases (from the engine to the tires). In this regard, towing a trailer is not allowed at the initial stage of vehicle operation with a mileage of less than 800 km! During the first 800 km of the first towing of a trailer, driving at a speed of more than 80 km/h is not allowed!
Comply with the regulations regarding the maximum permissible weight of the towed trailer (see Specifications). Before towing, make sure that both the trailer and the vehicle are in good technical condition. Use only certified coupling devices, the installation of which should be entrusted to experienced specialists. Similar requirements apply to the connection of the brake system and signal lights of the trailer. When towing, try to select the speed and other driving parameters based on the weight of the trailer. Remember that the trailer increases the actual weight of the vehicle, and do not exceed the maximum permissible weight of the vehicle and the maximum load on its rear axle.
Towing hitch
Caution: When driving without a trailer, the ball joint must be removed!
The installation dimensions of the towing hitch are given in the Specifications.
If equipped accordingly, the vehicle is equipped at the factory with a towing hitch with a removable ball joint. The ball joint is stored in a cover in the luggage compartment under the removable cover of the luggage compartment niche and is secured with a special fastening strap on the spare wheel (see illustration 32.1).
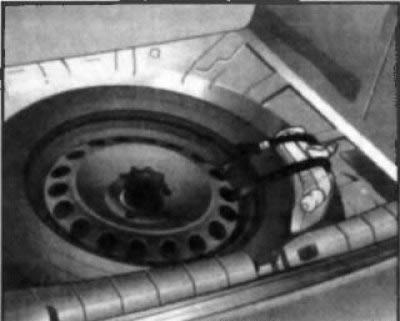
32.1 Storing the removed ball joint of the towing hitch
To install a ball joint you need:
- First, press the 2 clamps and remove the service cover on the rear bumper (see illustration 32.2);
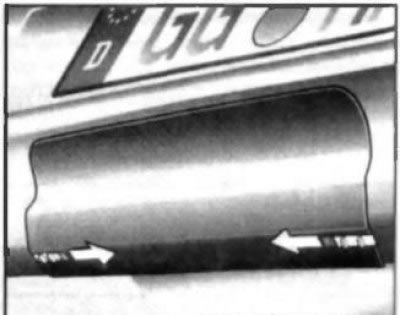
32.2 Removing the service cover on the rear bumper
- Remove the plug (see illustration 32.3) from the ball joint seat and remove it together with the removed service cover into the luggage compartment, remove the ball joint from the luggage compartment, remove the cover;
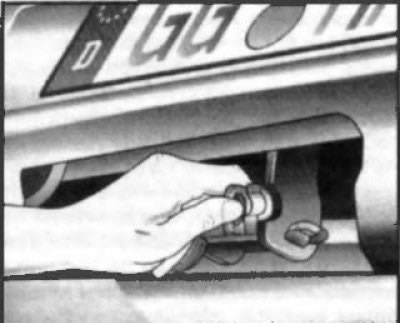
32.3 Removing the ball joint seat plug
- Check the position of the latch levers - lever (1) (see illustration 32.4) should not protrude from the body;
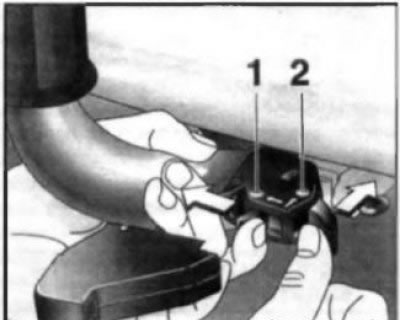
32.4 Preparing the ball joint for installation/removing the ball joint
- If this condition is not met, it is necessary to clamp the ball joint before installing it in the seat, and press the latch levers (see illustration 32.4);
- Insert the ball joint into the mounting socket and push it forward with force until it locks into place (see illustration 32.5), then install the protective cover on the latch levers and fix it until it clicks. If the cover does not snap into place, repeat the installation of the free support;
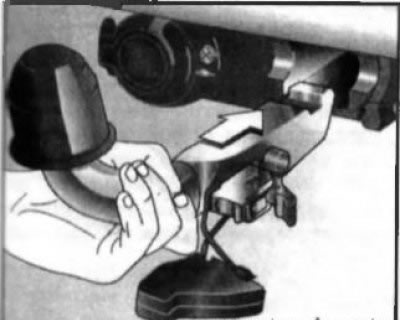
32.5 Installing the ball joint of the towing hitch
- Insert the key into the lock cylinder located on the left side of the ball joint (see illustration 32.6), move it to a position where the longer side of the key handle is pointing downwards, and remove it from the cylinder, replacing the protective cap.
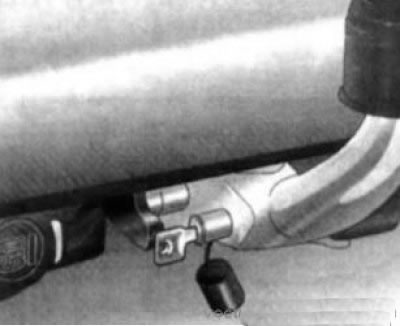
32.6 In the locked position, the longer side of the key handle should point downwards
Check the reliability of the ball joint fixation.
Attention! Driving with a trailer is only allowed with a correctly installed ball joint. In case of difficulties during the installation of the support, consult an Opel service station. If the trailer is equipped with a brake system, secure the safety cable to the eye (see illustration 32.7).
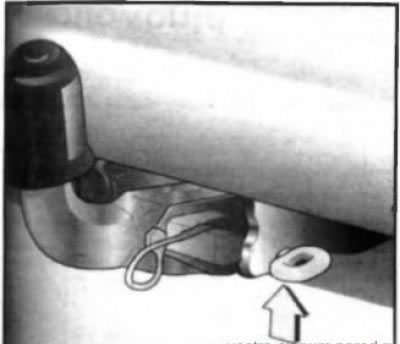
32.7 Eye for attaching trailer safety rope
To dismantle the ball joint, you need to:
- Unlock the ball joint with the key;
- Remove the protective cover of the latch levers;
- Press the latch levers (see illustration 32.4) and pull the ball joint out of the mounting socket, put on the cover and secure the support on the spare wheel;
- Install the support seat plug and the rear bumper service cover.
Attention! Cleaning the ball joint by blowing hot steam or other high-pressure devices is not allowed!
Basic characteristics of driving with a trailer
Trailer load
The actual trailer load is the difference between the actual total weight of the trailer and the support load when the trailer is attached. To check the trailer load, only the trailer wheels should be placed on the scale. Only drivers with sufficient experience in towing large or heavy trailers should operate the vehicle with the full permissible trailer load. Permissible trailer load values depend on the type of vehicle and engine, and they must not be exceeded. The permissible trailer load is recorded in the vehicle documents. In the absence of a special entry, the permissible trailer load value is applicable for inclines no more than 12%.
These permissible values characterize the vehicle's capabilities only for the specified climbs at an altitude of up to 1000 m above sea level (NN normal zero). At high altitudes, due to the rarefied air, engine power is reduced - to calculate the maximum permissible trailer load, it is necessary to reduce its standard value by 10% for every 1000 m above sea level.
Note: When driving on roads with a slight slope (less than 8%), there is no need to reduce the trailer load.
Support load
Support load (vertical load on the towing hitch) - is the force with which the trailer presses on the coupling support of the towing hitch. This force can be adjusted by distributing the weight when loading the trailer. The maximum permissible support load of the towing vehicle is indicated on the type plate of the towing hitch and in the vehicle documentation. It is necessary to try to always maintain this value, especially for heavy trailers.
Attention! The support load must be at least 25 kg!
When measuring the support load, it is necessary to set the drawbar of the loaded trailer to the same height at which it will be after the trailer is attached to the loaded vehicle. This is especially important for two-axle trailers.
Rear axle load
When a trailer is attached and the towing vehicle is fully loaded, including the weight of all passengers, the load on the rear axle must not exceed the permissible load (see Specifications) more than 40 kg. If the permissible load on the rear axle is greater, do not exceed the speed limit 100 km/h.
Note: If the traffic rules establish lower speeds when operating a vehicle with a trailer, follow the rules.
Tire pressure
When operating a vehicle with a trailer, you should constantly ensure that the appropriate air pressure in the tires is maintained depending on the load of the vehicle and trailer (see Specifications), make appropriate adjustments if necessary.
Trailer Stability Assist (TSA)
If equipped accordingly, TSA monitors the driving behaviour of the vehicle with a trailer. If the system detects strong "yawing", the engine power is automatically reduced and the trailer is deliberately braked until the "yawing" stops.
Recommendations for driving a car with a trailer
When operating a vehicle with a trailer, please consider the following recommendations:
- a) Additional trailer load significantly affects the operation of all vehicle systems and changes the operating parameters of the engine, controls, brakes and other systems.
- b) Before starting the trip, check the serviceability of the towing hitch and the functionality of the brake system (with appropriate equipment) and external light signaling of the trailer.
- c) Avoid sudden acceleration and braking, as well as sudden maneuvers when turning or changing lanes.
- d) When towing a trailer, the vehicle is more susceptible to deviation from straight-line movement under the influence of gusts of crosswind, uneven road surfaces, aerodynamic disturbances, passing trucks, etc.
- e) Observe the established traffic rules speed limit, especially on roads with slippery surfaces. The permitted speed for cars with a trailer is always lower than for a regular car. In any case, when driving with a trailer, it is not recommended to exceed 80 km/h.
- f) On diesel models, on inclines of 10% or more, do not exceed 30 km/h in first gear and 50 km/h in second gear.
- g) When driving with a trailer, the braking distance of the vehicle is significantly increased compared to normal driving conditions; keep a safe distance from the vehicle in front. In case of emergency braking, keep the brake pedal fully depressed until the vehicle comes to a complete stop.
- h) If the trailer starts to "swerve" while driving, you should reduce the speed until you come to a complete stop - do not try to compensate for the trailer's swaying by manoeuvring the steering wheel.
- i) On long descents the load on the brakes increases significantly, so engine braking should be used. The choice of gear should be made in accordance with the general rule of driving on descents: "Descend in the same gear in which the car can climb the slope".
- j) After stopping on a steep incline, difficulties may arise when starting the car, especially on models with a manual transmission. In this case, hold the car from rolling using the parking brake. To start moving, depress the clutch pedal and set constant medium engine speed by pressing the gas pedal (gasoline engines - from 2500 to 3000 rpm, for diesel engines - from 2000 to 2200 rpm), then slowly release the parking brake lever and release the clutch pedal, smoothly increasing engine speed. On cars with AT in automatic mode, it is enough to fully depress the gas pedal Before starting off in extreme conditions (high trailer weight, driving in mountainous conditions with steep climbs) you should turn off unnecessary energy consumers, such as rear window heating, air conditioning, and front seat heating.
- k) When parking, it is recommended to place wheel chocks under the wheels of the car and trailer - stopping on steep slopes is not recommended. If equipped, always use the trailer parking brake.
- l) When loading, the heaviest items should be placed above the trailer axle, and all manufacturer's recommendations should be followed.
Visitor comments