


Note: To maintain the vehicle's stability and control characteristics, the rear shock absorbers should be replaced in pairs. Different models require different types of shock absorbers - only shock absorbers with the appropriate characteristics should be used.
1. Support the front wheels with wheel chocks, jack up the rear of the car and place it on supports. Remove the corresponding rear wheel.
2. On models equipped with automatic ride height control, disconnect the electrical wiring from the shock absorber.
3. Support the appropriate hub assembly holder with a trolley jack and lift it slightly. Remove the lower mounting bolt Torx (see accompanying illustration) and remove the shock absorber from the hub assembly holder.
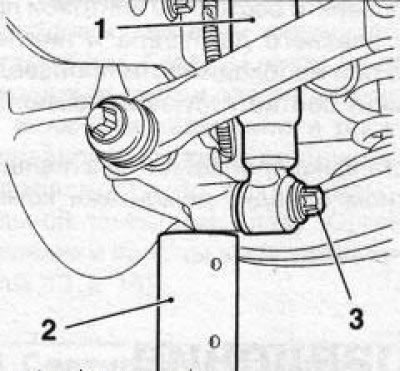
8.3 Raise the rear wheel hub assembly holder with a jack (2) and unscrew the lower bolt (3) securing the shock absorber (1)
4. Remove the top bolt of the Torx (see accompanying illustration) fastening the shock absorber to the bottom, remove the shock absorber and take it out of the rear wheel well.
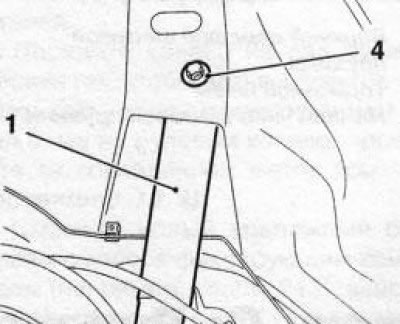
8.4 Upper bolt Torg (4) for fastening the shock absorber (1)
5. Clamp the lower shock absorber support bracket in a vice with soft jaws and rock the piston rod from stop to stop several times (see accompanying illustration). Any disturbances in the smoothness of the rod movement indicate the need to replace both shock absorbers.
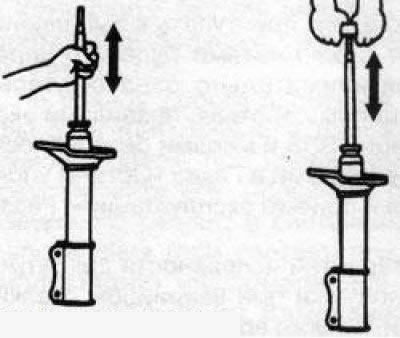
8.5 Checking the proper functioning of the shock absorber (for convenience, clamp the lower support bracket in a vice with soft jaws)
6. Assess the degree of wear of the rubber-metal bushings of the shock absorber; if necessary, replace both shock absorbers.
7. Installation is performed in the reverse order of removal, with the only difference being that the lower shock absorber mounting bolt is fastened first, and then the upper one. Make sure that all fasteners are tightened to the required force.
8. Replace the second shock absorber in the same way.
Visitor comments