


Contents: Removal ⬇ Installation ⬇
Timing drive mechanism
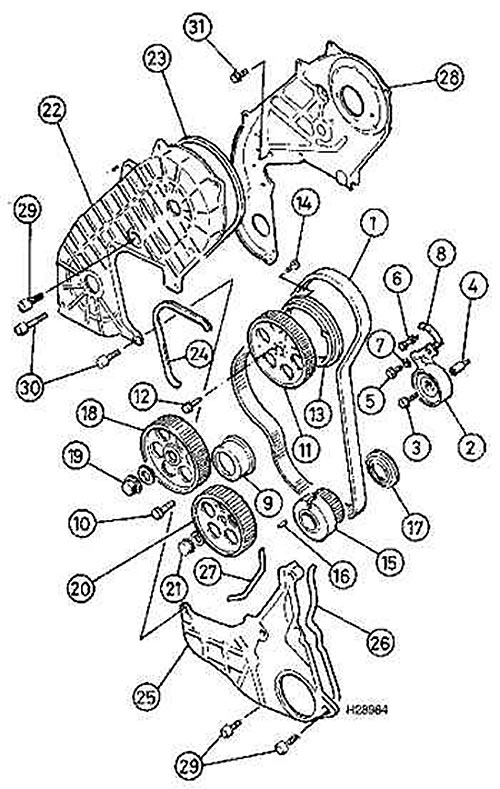
1. Toothed belt
2. Tensioning mechanism
3. Tensioner mounting bolt
4. Tensioning mechanism axis
5. Tensioner lever mounting bolt
6. Finger
7. Washer
8. Spring
9. Idle pulley
10. Idler pulley bolt
11. Camshaft pulley
12. Camshaft pulley mounting bolt
13. Camshaft pulley flange
14. Screw
15. Crankshaft pulley
16. Pin
17. Gasket
18. Fuel pump pulley
19. Nut
20. Oil pump pulley
21. Nut
22. Upper casing
23. Compaction
24. Compaction
25. Lower casing
26. Compaction
27. Compaction
28. Rear casing
29. Bolt
30. Bolt
31. Bolt
Removal
Upper casing
1. Raise the front of the car and secure it on stands. Remove the right front wheel.
Original source on the website [OpelBook.ru]
2. Remove the air filter housing.
3. Remove the accessory drive belts.
4. On models equipped with air conditioning, loosen the compressor drive belt tensioner mounting bolt and remove it.
5. Place a jack under the engine and lift the engine using a wooden block until the entire top of the engine is supported by the jack. Unscrew the nuts and remove the right suspension of the power unit.
6. Unscrew the bolts and remove the upper timing belt cover together with the rubber seal.
Lower casing
7. Remove the upper timing belt cover.
8. Remove the crankshaft pulley.
9. Unscrew the bolts and remove the lower timing belt cover together with the rubber seal.
Inner casing
10. Remove the timing belt.
11. Remove the camshaft pulley, high pressure fuel pump pulley, idler pulley and tensioner mechanism.
12. Unscrew the bolts and remove the inner timing belt cover.
Installation
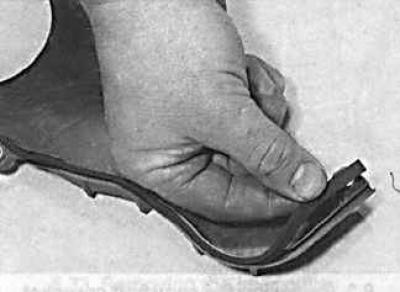
Installation is performed in the reverse order of removal. When doing so, check that the rubber gaskets are positioned correctly.
Visitor comments