
OpelBook.ru
Cars AvtoVAZ Cars Mitsubishi Cars BMW Cars Mercedes Cars Nissan Cars Toyota Cars Chevrolet
English Русский
Български
Беларускі
Український
Српски
Hrvatski
Română
Polski
Slovenský
Magyar
 |  Sitemap  |  Contacts  |    


Main Astra Corsa Insignia Kadett Omega Vectra Zafira Others Articles
Vectra A (1988-1995, petrol) Vectra A (1988-1995) Vectra B (1995-2002, petrol) Vectra B (1995-2002) Vectra C (2002-2008)
  • Main
  • Vectra
  • Vectra A
  • Chassis
  • Front suspension
  • Removal and installation the front pillar

Removal and installation the front pillar (Opel Vectra A)

            0

Contents: Removal ⬇ Installation ⬇

Removal


Engage any gear, apply the parking brake. Remove the cotter pin and unscrew the hub crown nut.

Attention! The car must be on the ground, otherwise it may fall!


Loosen the front wheel mounting bolts.

Raise the front of the car.

Remove the front wheel, having first marked its position relative to the hub.
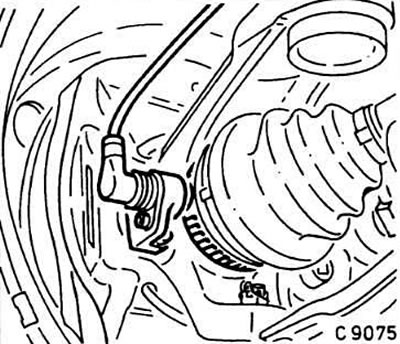
Remove the front wheel, having first marked its position relative to the hub.


Remove the ABS sensor from the bracket (if equipped).
Remove the ABS sensor from the bracket (if equipped).


Remove the brake caliper and hang it on a wire (see chapter "Brake system").

Caution! Do not disconnect the brake hose, otherwise you will need to bleed the brake system later.


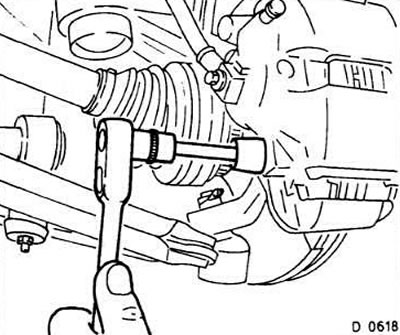
Unscrew the nut on the steering tip. Press out the tip using a puller (for example, Hazet 779) or Opel KM-507-B devices.


Unscrew the nut on the steering tip. Press out the tip using a puller (for example, Hazet 779) or…


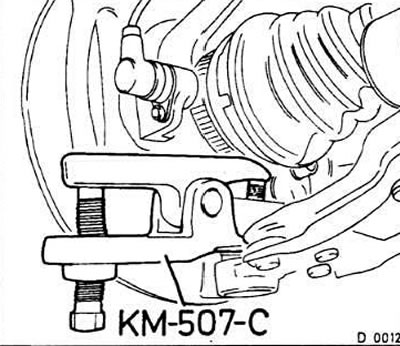
Remove the cotter pin from the hinge support, unscrew the crown nut, press out the hinge with a puller or the Ore! KM-507-C device.

Remove the hinge pin from the hub manually. If this is not possible, press it out with a puller.

Support the front pillar with a jack to prevent it from falling when releasing the top mount.
Support the front pillar with a jack to prevent it from falling when releasing the top mount.


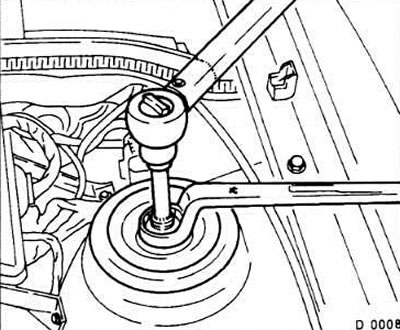
Loosen the strut mounting nut at the top with a 24 mm bent wrench, while holding the rod with a wrench with internal teeth, for example Hazet 990-Lg-12 (some variants will require the Hazet 990Lg-10 key).

Lower the rack down.

Installation


Attention! If the rack has only been removed and not repaired, before installing it, check the tightening torque (70 Nm) of the thrust bearing mount.


Insert the strut from below, put the thrust washer on top first, then the fastening nut and tighten it to a torque of 55 Nm, while holding the shock absorber rod.

For vehicles with ABS: secure the ABS sensor with the bracket with a torque of 8 Nm. Secure the wire holder to the rack.

Lubricate the axle shaft splines with transmission oil.

Insert the axle shaft into the hub.

Caution! Use a new washer and castle nut. Screw on the castle nut without tightening it.


Insert the joint into the steering knuckle and tighten the crown nut to 70 Nm. Insert a new cotter pin into the nut and bend it.

Install the steering joint and tighten the new self-locking nut to 60 Nm.

Tighten the caliper mounting bolts to the strut with a torque of 95 Nm, after cleaning their threads and covering them with Loctite 262 sealant.
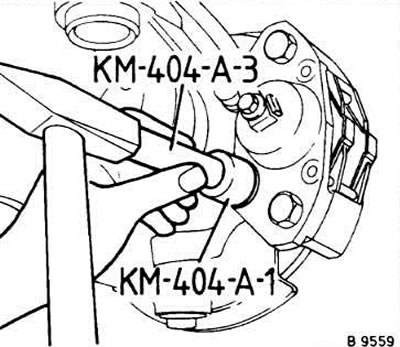
Tighten the caliper mounting bolts to the strut with a torque of 95 Nm, after cleaning their…


On the GMF caliper: fit new protective caps onto the caliper bolts until they stop. The caps should fit evenly against the caliper.

Install the front wheel, observing the previously made markings.

Release the car.

Tighten the wheel bolts crosswise to 90 Nm.

Material taken from an internet portal: opelbook.ru


Tighten the hub nut to 130 Nm. Then loosen the nut and tighten to 20 Nm. In this position, tighten the nut another ¼ turn.

Insert a new cotter pin and bend it; loosen the crown nut (and not to tighten) to the nearest hole.


This article is available at russian, bulgarian, belarusian, ukrainian, serbian, croatian, romanian, polish, slovak, hungarian
Checking the article: Zinoviev Kirill

Share information:

Previous articles
Opel Vectra A: Front suspension
Next articles

Front suspension and axle shafts. Design and general information
Removal and installation the shock absorber and front spring
Checking the shock absorber
Removal and installation axle shafts
Replacement of axle joint and joint boot
Removal and installation front wheel hub bearings
Removal and installation the front suspension beam


See similar ones from other Opel car manuals:
▶ Bottom view of the front — C 16 SE engine Opel Astra F (1991-1998, petrol)
▶ Replacing the front disc brake pads Opel Corsa B (1993-2000)
▶ Front direction indicators Opel Insignia A (2008-2017)
▶ Front wheel drive Opel Kadett E (1984-1995)
▶ Front view from below (model 1.8 GL Saloon) Opel Omega A (1986-1993)
Link to this page in different formats

Visitor comments


No comments yet


How much will 13 + 42 =


Vectra C (2002-2008) 
  • General information
  • User manual
  • Vehicle device
  • Maintenance
  • Troubleshooting
  • Power unit
  • Engine repair
  • Cooling system
  • Power and control system
  • Engine electrics
  • Transmission
  • Clutch
  • Car gearbox
  • Drive shafts
  • Chassis
  • Car suspension
  • Steering
  • Brake system
  • Body
  • Exterior
  • Interior
  • Doors, locks and windows
  • Heating and ventilation
  • Electrical equipment
  • Equipment and devices
  • Headlights and lighting
  • Electrical circuits
Vectra B (1995-2002) 
  • General information
  • User manual
  • Weekly checks
  • Maintenance (gasoline)
  • Maintenance (diesel)
  • Troubleshooting
  • Power unit
  • SOHC gasoline engine
  • DOHC petrol engine
  • Diesel engine 1.7 liter
  • Diesel engine 2.0 liters
  • Engine repair
  • Cooling system
  • Fuel system (gasoline)
  • Fuel system (diesel)
  • Charging system
  • Launch system
  • Ignition and preheat
  • Transmission
  • Clutch
  • Mechanical gearbox
  • Automatic gearbox
  • Drive shafts
  • Chassis
  • Brake system
  • Wheel suspension
  • Steering
  • Body
  • Exterior
  • Interior
  • Doors and windows
  • Heating and ventilation
  • Electrical equipment
  • Equipment and devices
  • Electrical circuits
Vectra B (1995-2002, petrol) 
  • General information
  • Maintenance
  • Help with malfunctions
  • Power unit
  • Engine repair
  • Exhaust system
  • Cooling system
  • Fuel system
  • Multec injection system
  • Four point injection
  • Transmission
  • Clutch
  • Gearbox and drive
  • Chassis
  • Wheel suspension
  • Steering
  • Brake system
  • Wheels and tires
  • Body
  • Exterior
  • Interior
  • Electrical equipment
  • Fuses and electronics
  • Power devices
  • Ignition system
  • Lighting and signaling
  • Equipment and devices
  • Heating and ventilation
  • Electrical circuits
Vectra A (1988-1995) 
  • Power unit
  • Engine repair
  • Ignition system
  • Lubrication system
  • Cooling system
  • Injection system
  • Fuel system (carburetor)
  • Fuel system (diesel)
  • Exhaust system
  • Transmission
  • Clutch
  • Car gearbox
  • Chassis
  • Front suspension
  • Rear suspension
  • Steering
  • Brake system
  • Wheels and tires
  • Body
  • Exterior
  • Interior
  • Electrical equipment
  • Electrical circuits
Vectra A (1988-1995, petrol) 
  • General information
  • User manual
  • Maintenance
  • Power unit
  • SOHC engine
  • DOHC engine
  • Cooling and ventilation
  • Fuel system (carburetor)
  • Fuel system (injector)
  • Exhaust converter
  • Transmission
  • Clutch
  • Mechanical gearbox
  • Automatic gearbox
  • Drive shafts
  • Chassis
  • Brake system
  • Car suspension
  • Steering
  • Body
  • Body elements
  • Electrical equipment
  • Power devices
  • Equipment and devices
  • Electrical circuits
OpelBook.ru © 2017–2026 · Mobile version · · Sitemap: EN BG BY UA RS HR RO PL SK HU · Feedback · Site search
Astra F, petrol · Astra G, petrol · Astra G · Astra H · Astra J, petrol · Corsa B · Corsa C, petrol · Corsa C · Insignia A · Kadett D · Kadett E · Omega A · Omega B · Omega B2 · Vectra A, petrol · Vectra A · Vectra B, petrol · Vectra B · Vectra C · Zafira A, petrol · Frontera A, petrol · Frontera B · Ascona C · Vivaro A ·
We want your visit to be comfortable 🤝! We use cookies 🍪 to make that happen.