


Contents: Display ⬇ Anti-theft protection ⬇ Removable panel (16) ⬇ Removal the panel ⬇ Installing the panel ⬇ Turn on/off ⬇ Automatic shutdown ⬇ Volume ⬇ Stereophonic reception ⬇ Tuning to a radio station ⬇ Enabling RDS ⬇ Turning off RDS ⬇ Road information (TR) ⬇ Turning on TR ⬇ Turning off TR ⬇ Listening to transport messages only ⬇ Disruption of Transport…⬇ RDS-EON ⬇ Transport Messages via RDS-EON ⬇ Memorizing radio stations ⬇ Automatic memorization of radio…⬇ Calling preset stations ⬇ Playing a cassette tape ⬇ Reverse ⬇ Automatic tape type detection ⬇ Dolby B Noise Reduction System ⬇ Tape Pause Search (CPS) ⬇ Turning off pause search on tape ⬇ Fast forward and rewind ⬇ Stop playback (Pause) ⬇ Ejecting the cassette ⬇ Radio display when playing a cassette ⬇ Security code ⬇ Decoding ⬇ Remote control ⬇ Volume control ⬇ Selecting a signal source ⬇ Setting ⬇ Scanning ⬇ Automatic switch ⬇ Automatic volume control ⬇ Transport Announcement (TA) Volume…⬇
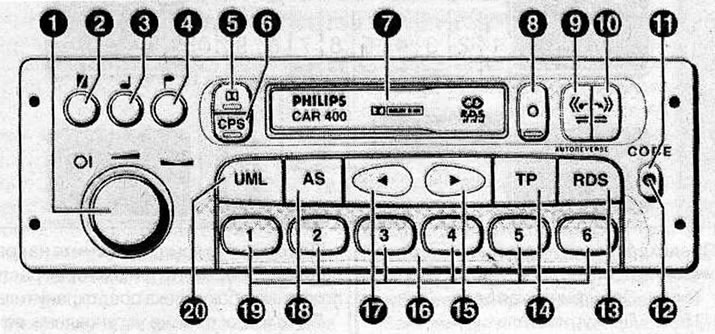
№ Symbol Purpose
1. OI On/off: Press.
 Volume: Turn.
 Sound balance left <> right: Pull out and turn.
2.
 Balance the sound volume between the front and rear speakers: Press and turn.
3.
 Bass level adjustment: Press and rotate.
4.
 Treble level adjustment: Press and rotate.
5.
 Dolby B noise reduction system.
6. CPS Search for a program on a tape.
7. - Eject the cassette.
8. O Switch radio → cassette player.
9. ⏪ Fast rewind.
10. ⏩ Fast forward.
 ⏪ and ⏩ pressed simultaneously half way: cassette reverse.
 ⏪ and ⏩ simultaneously fully pressed: eject the cassette.
11. CODE Panel unlock button.
12. CODE Anti-theft LED.
13. RDS RDS function.
14. TR A program about traffic on the roads.
15. ► Search for the desired radio station towards the upper part of the range.
16. - Removable panel.
17.◄ Search for the desired radio station towards the lower part of the range.
18. AS Automatic memorization of radio stations.
19. 1-6 Buttons for selecting radio stations stored in memory.
20. UML Range selection.
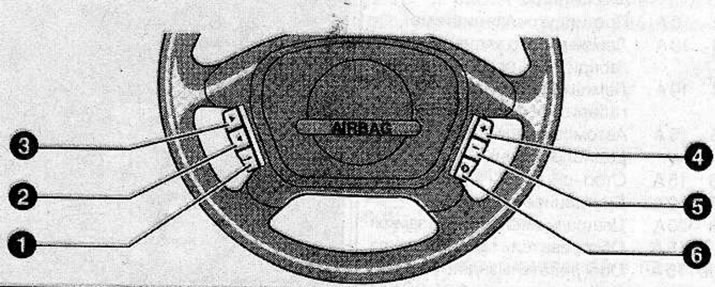
Remote control (only certain car versions)
no. Symbol Purpose
1.
 Increase the set value.
2. ◄ Search for the desired radio station towards the lower part of the range.
3. ► Search for the desired radio station towards the upper part of the range.
4. + Increase volume.
5. - Decrease volume.
6. ABOUT Switch between radio and cassette player.
Display
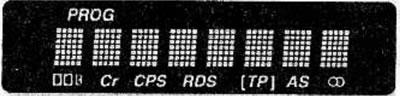
The display in the car is also used to show radio information.
There are two main types of displays used to show information.
Display 8 digits
Display 10 digits
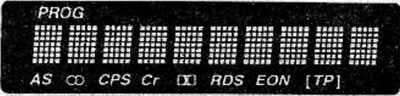
The following is a description of the 10-digit display.
The information displayed on the 8-digit display is the same as the information displayed on the 10-digit display except for the waveband and preset numbers with some radio functions.
Anti-theft protection
The coding applied during the production of the radio receiver provides passive protection against theft. Do not leave the radio registration document with the code number in the car.
When the radio is coded, "CODE" is displayed on the display every time the ignition is turned on. The anti-theft LED (12) "CODE" starts flashing after the radio and ignition are turned off.
Removable panel (16)
For additional protection against theft, the radio has a removable panel. Always take the removable panel with you when leaving the vehicle. The radio only works with the original removable panel. If the removable panel is lost, the entire radio will need to be replaced by an Opel dealer.
Removal the panel
Press the panel release button (11) and remove the panel from the radio.
Installing the panel
Place the panel against the radio and press on both sides until the latches click into place.
If the panel is not installed correctly, "PANEL" will be displayed on the display after turning on the radio. Make sure the panel is securely fastened on both sides.
Turn on/off
OI Press the knob (1) to turn the radio on or off.
The radio will turn on automatically after the ignition is turned on, if the radio was not turned off before the ignition was turned off.
Automatic shutdown
The radio receiver will turn off automatically 1 hour after the ignition is turned off.
Volume
The radio starts working with a preset volume, which cannot be changed.

Volume
The volume is adjusted by turning the knob (1).

Balance between left and right speakers
Pull out and turn the handle (1).

Balance between front and rear speakers
Press and turn the handle (2).

Adjusting the bass level
Press and turn the handle (3).

Adjusting the high frequency level
Press and turn the handle (4).
Selecting the range of received waves
By pressing the UML button (20) one or more times, select the desired range of received waves.
The selected range is shown on the display ("U", "M" or "L").
U = FM
M = MW (medium waves)
L = LW (long waves)
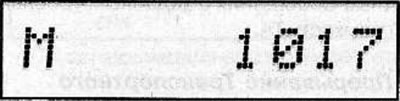
Receiving station on medium wave.
Stereophonic reception
When receiving a stereo FM radio station, the symbol is displayed on the display
 . When the signal is weak, the receiver automatically switches to mono mode.
Tuning to a radio station
You can tune the receiver to a radio station using the following methods:
- Setting in search mode.
- Manual setting.
- Automatic memorization of radio stations (AS).
And also with RDS enabled (fM only):
- Searching for FM stations stored in memory.
- Search for the RDS program.
- Search for TR stations - radio stations are received that broadcast messages about traffic jams or road repairs.
Setting in search mode
(with RDS turned off)
Press and hold the (15) or (17) button for more than 1 second. There is no sound in the radio receiver when searching for a radio station.
◄ to listen to the previous radio station
► to listen to the next radio station
If a radio station operating in the given range is not found during the first search, the radio receiver automatically switches to a search with higher sensitivity.
Manual setting
(with RDS and TP turned off)
Tune the radio receiver to a radio station operating on a known frequency.
Rough setting:
Press and hold the ◄ or ► button until the desired frequency is reached.
Fine tuning:
Press the ◄ or ► button briefly and repeatedly until the desired frequency is displayed on the screen.
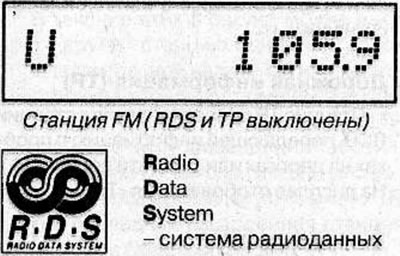
The radio can receive RDS signals. RDS makes it easier to find the desired radio station in the FM range and ensures reliable reception.
RDS stations transmit digital data with additional information in addition to the main program.
When receiving an RDS station, the display shows the station name instead of the frequency.
Each RDS station is transmitted on multiple frequencies. While driving, RDS automatically compares the signal quality of the acceptable frequencies, and the radio always switches to the strongest transmitted signal. The station name shown on the display remains unchanged.
Therefore, it is recommended to enable RDS.
Enabling RDS
Press the UML button (20) to select the FM range, then use the button (13) to turn on RDS, and the display will show "RDS". When the TP mode is turned on, (programs about movement), RDS will be activated automatically.
When tuning in search mode, only RDS radio stations will be received. The radio will select the best frequency for reception for the tuned station. However, short-term interruptions in station reception may occur.
Search for RDS program:
Press button (15) or (17).
◄ search for a program down the range, ► search for a program up the range.
Displaying the RDS station frequency:
To display the actual frequency of the RDS radio station being received, press the UML button for more than 1 second. After about 5 seconds, the display returns to the radio station name.
Turning off RDS
Press the RDS button, and "RDS" will disappear from the display. The display will show the frequency of the received radio station, not its name, and the receiver will no longer tune to a radio station with a stronger signal.
Road information (TR)
The TR station is equivalent to an RDS station that transmits information about traffic jams or road repairs (TA). The display shows "TR".
Turning on TR
Only TR stations are received. When searching, the radio receiver receives only TR stations.
Use the UML button (20) to select the FM band, then press the TP button (14), and the display will show "[TP]".
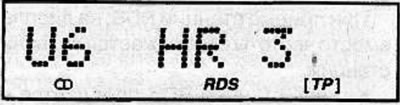
TP station, TP is on.
If the TR station cannot be received, or during searching, "[]" will be displayed.
The radio receiver automatically tunes to the signal of the strongest TR station if:
- You turned on TR while listening to a non-TR station;
- You have selected a non-TR station by pressing one of the buttons (19);
- the volume is adjusted to the minimum level and the selected TP station becomes too weak;
- the radio was tuned to a non-TR station when playing the tape;
- the tuned TR station becomes too weak during tape playback.
During playback of the tape, playback will be interrupted at the moment of TA transmission (Transport Communications).
You can also turn on TR while listening to a cassette. In this case, the station name of the last selected program will be displayed on the display for 5 seconds.
You can program the volume of the Transport Announcements sound independently of the standard volume.
Turning off TR
Press the TP button, but the display will not show "[]".
To turn off the TR while receiving Transport Messages, briefly press the TR button twice.
"TP ON" or "TP OFF" will be stored in the specified buttons.
Listening to transport messages only
(Material copied from this resource: www.opelbook.ru)
If you only want to listen to Transport Announcements, turn on the TP and turn the knob (1) to reduce the radio volume to minimum. You will listen to Transport Announcements at the set TA volume level.
Disruption of Transport Communications
If you do not wish to listen to the Transport Announcements while playing the tape, press the TP button once briefly during the Transport Announcement, while the TP remains on.
RDS-EON
(EON - receiving information about the traffic situation from other stations)
RDS system has EON function (Enhanced Other Networks), which allows you to listen to traffic news even if the station the receiver is tuned to does not offer such a service, but is networked with other stations.
Transport Messages via RDS-EON
Press the TP button, and the display will show "[TP]".
If the traffic information function is activated, stations that support the EON function will be treated as traffic information stations, i.e. the search will also stop at these stations.
When a new traffic information message is received, the radio switches to a traffic information station connected to EON. After receiving the message, the radio returns to the previous program.
Memorizing radio stations
The radio receiver's memory can store 30 stations:
- 6xU(FM),
- 6xM(MW),
- 6xL(LW),
- 6xUAS (Automatically saved FM stations),
- 6xMAS (Automatically saved MW stations).
Select the desired wave range and station. Press one of the buttons (19) and hold it down until you hear a working radio station.
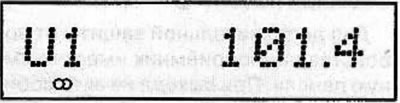
FM station stored in the 1 speed select button.
The previously recorded frequency on this button will be replaced with the last recorded frequency. The selected station numbers 1-6 will be displayed on the display. "RDS-ON" or "RDS-OFF" will be saved (in addition to frequency) on the specified buttons.
Automatic memorization of radio stations
Select the desired wave range (U or M). Press the (18) AS button and hold it until you hear a confirmation sound. Press search, the display will show "AS".
RDS is automatically turned on during searching and remains on after searching is complete.
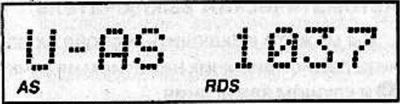
Setting up in AS mode.
After the search process is completed, the six strongest stations in this reception area will be stored in the memory of the specified buttons.
During automatic memorization of radio stations, preference is given to RDS stations that are stored on the first buttons.
If you turn on the TR before or during the automatic memorization process, the radio receiver reminds you of the set TR station after the automatic memorization process is completed.
If no TR station is found during automatic memorization of radio stations, the search will continue until at least one TR station is found.
Calling preset stations
Select the desired wave range (U, M or L). Press the desired button to select the radio stations stored in memory.
To select one of the stations recorded in the automatic memorization mode, select the wave range (U or M), then briefly press the AS button. Select the station by pressing the desired button for selecting the radio stations recorded in the memory.
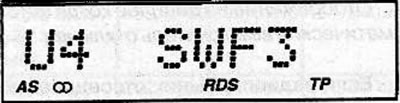
TR station recorded in the automatic memorization mode of radio stations. TR is off.
Playing a cassette tape
Insert the cassette into the cassette slot (7), the display will show "CAS 1".
If you insert a cassette into a radio that is turned off, the radio will automatically turn on unless you remove the cassette while the radio is turned off. Playback of the cassette starts from the top side of the cassette.
Reverse
 To change the playback direction of the cassette, press buttons (9) and (10) halfway.
When playing the top side of the tape, the display will show "CAS 1 >", and when playing the bottom side of the tape, the display will show "CAS 2 > "
After one side of the tape has finished playing, the tape will automatically reverse and the other side of the tape will start playing.
Automatic tape type detection
The radio provides automatic detection of the Metal/Chrome tape type. When a Metal/Chrome tape is inserted, the display will show "Cr".
Dolby B Noise Reduction System
Note: Dolby:Dolby® noise reduction - Noise reduction system: Reduces tape noise and hiss.
The Dolby® system is manufactured under license from Dolby Laboratories Licensing Corporation. Dolby® and the double-D symbol are registered trademarks of Dolby® Laboratories Licensing Corporation.
 When playing a tape recorded with Dolby B noise reduction, briefly press
  (5), and the display will show
  B или
B или  .
.
To turn off the Dolby noise reduction system, press the button again
 .
.
Tape Pause Search (CPS)
To activate the pause search on the tape, press the CPS button (6), the display will show "CPS".
Press one of the buttons (9) or (10) all the way:
⏩ Search for the next track.
⏪ Find the beginning of the track currently playing.
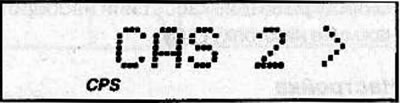
Search for a pause on the bottom of the tape.
Turning off pause search on tape
Press the other button halfway " or ", which was not pressed before, or remove the cassette or press pause.
Fast forward and rewind
(CPS is off)
Press one of the buttons all the way down " or ":
⏩ Fast forward.
⏪ Fast rewind.
As you fast-forward the tape, you hear the last tuned radio station.
To turn off fast forward, press the other button halfway.
Stop playback (Pause)
ABOUT Briefly press the button (8), the cassette will remain in the cassette receiver. The radio will switch from playing the cassette to listening to the radio.
To switch the radio to listening to the cassette, briefly press the button (8).
Ejecting the cassette
 Press the buttons at full speed at the same time " and ". The radio will switch from playing the cassette to listening to the radio and the cassette will be ejected from the cassette receiver.
You can also eject the cassette from the cassette player with the radio turned off.
Radio display when playing a cassette
When playing a tape, you can display the station name on the display (rDS stations) or station frequencies.
Press the UML button (20) and hold it for 1 second, the frequency or name of the last tuned station will be displayed on the display for 5 seconds, for example, "U1 101.2".
During these 5 seconds, you can select another station using one of the preset buttons or start tuning to a station using the buttons.
If TP is turned on or you turn on TP while playing a tape, the radio automatically tunes to the strongest TP station when the last tuned station becomes too weak.
Security code
The radio is protected against theft by a security code. A coded radio receiver is of no interest to thieves.
If the coded radio is disconnected from the power supply, such as by theft or by disconnecting the wires from the battery terminals, the radio will be blocked.
Only you can restore the radio's functionality by entering the correct code. The code number is given in the vehicle registration document or the radio registration document. Keep the radio passport in a safe place (for example, with car documents), but never in a car.
When selling the radio you must also provide the correct code number.
To prevent the selection of the correct code by "trial and error", there is a waiting period after each unsuccessful attempt to enter the code.
During the standby time, the radio should remain on and "SAFE" should be displayed.
After the first two attempts, the waiting time is approximately 10 seconds. After that, the waiting time increases to 10 minutes. With each subsequent unsuccessful attempt, the waiting time doubles, reaching 640 minutes on the ninth attempt.
After 10 unsuccessful attempts the radio will be locked.
It is recommended that after the sixth unsuccessful attempt you take the radio to an Opel dealer for unlocking.
The number of attempts to enter the code is displayed on the display.
Decoding
(deactivating the anti-theft function)
Decoding the radio receiver is only possible when the ignition is on.
1. Turn on the ignition.
2. Turn off the radio.
3. Press and hold the AS button (18).
4. Turn on the radio. Keep pressing the AS button until you hear a confirmation beep. The display will show "CODE" and then after 3 seconds "10 ----". This shows the number of attempts to enter the code.
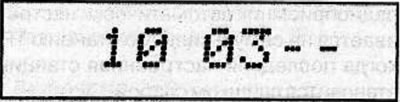
Display in the process of decoding, 10 attempts have passed.
5. Use buttons 1, 2, 3 and 4 to enter the code number.
If you entered an incorrect code, please enter the full correct code.
Example: code number - 0 3 6 5
Buttons (19) Display
1 x button 1 0---
4 x button 2 03-
7 x button 3 036-
6 x button 4 0365
6. Confirm the code number by pressing the AS button: keep the button pressed until you hear a confirmation beep.
7. If an incorrect code number was entered and confirmed: the display shows "SAFE" and after a waiting time "9 ---", i.e. 9 attempts remain.
Now enter the correct code number.
Remote control
(only certain versions of cars)
To increase driving safety and simplify radio control, some functions can be controlled remotely using buttons located on the steering wheel.
The following functions are available:
№ Symbol Purpose
1.
 Increase the set value.
2. ◄ Search for the desired radio station towards the lower part of the range.
3. ► Search for the desired radio station towards the upper part of the range.
4. + Increase volume.
5. - Decrease the volume.
6. ABOUT Switch radio <> cassette player.
Volume control
To adjust the volume step by step, press or drag the + or - buttons ((4) or (5)) one or more times.
If you press and hold the button longer, the volume adjustment is continuous.
Selecting a signal source
To switch the radio to the cassette player or vice versa, press the button ABOUT (6).
Setting
The ◄ and ► buttons (2) and (3) have the same functions as when tuning the radio receiver (see corresponding description).
Scanning
With the button
 (1) You can select preset radio station 1-6.
Every time you press the button
 , You can select the next radio station stored in memory.
Pressing and holding the button cycles through radio stations.
Automatic switch
You can turn the radio off and on again by pressing the knob (1) and the ignition key.
You can disable the connection between the radio and the ignition key (the circuit breaker is on).
Turning off the circuit breaker
- Turn on the ignition and turn off the radio
- Press and hold buttons 1 and 3 (19)
- Turn on the radio and hold down buttons 1 and 3 until you hear a confirmation beep.
Before the sound signal, the current status of the circuit breaker is confirmed on the display.
a) "IGNI ON" - the circuit breaker is on.
b) "IGNI OFF" - the circuit breaker is off.
Approximately 3 seconds after the confirmation beep, the current state changes. With "IGNI OFF" you can switch the radio on and off only with the knob (1).
Activating the circuit breaker
Turn off the circuit breaker as described earlier.
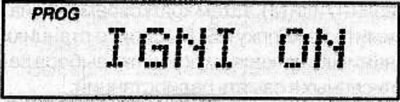
Displays on the screen when the circuit breaker is off.
If the radio is disconnected from the battery and reconnected, the circuit breaker is activated.
The circuit breaker will turn off the radio 1 hour after the ignition is turned off, regardless of the circuit breaker mode.
Automatic volume control
(only certain versions of cars)
Automatic volume control adjusts the volume depending on the vehicle speed.
The higher the speed of the car, the louder the volume, which compensates for the noise created by the car when moving.
Automatic volume control
- Press the UML button (20) and hold it for at least 3 seconds until you hear a confirmation beep. The display will show the volume level, for example "SD-VOL+2".
- Press and hold buttons (15) or (17) for 10 seconds to select the desired volume level between "SD-VOL 0" and "SD-VOL +5".
- To save the selected volume level, press the UML button (20) again and hold it for at least 3 seconds until you hear a confirmation beep.
If you do not save the selected volume level within 10 seconds after pressing the last button, the new volume level setting will not be saved.
In "SD-VOL 0" automatic volume control is disabled.
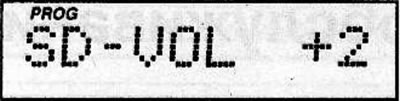
Automatic volume control
Transport Announcement (TA) Volume Level
In addition to the standard volume level, you can adjust the volume level of Transport Announcements (TA).
- Press the TP button (14) and hold it for at least 3 seconds until you hear a confirmation sound. The display will show the volume level, for example "TP-VOL-1".
- Use buttons (15) or (17) to select the volume level between -3 and +3.
- To save the selected volume level, press the TP button again for at least 3 seconds until you hear a confirmation beep.
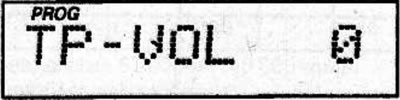
Display during the process of adjusting the volume level of the TA.
If you do not save the selected volume level within 10 seconds after pressing the last button, the new volume level setting will not be saved.
Visitor comments