


General information
Defrosting of the rear window is carried out by a heater, which is a series of parallel conductors sprayed onto the glass. When an electric current is passed through, the conductors heat up and defrost and clean the rear window from moisture. Current is supplied from a relay located in the body electrical equipment unit.
To avoid damaging the heater, the following precautions must be taken:
- Clean the inside surface of the rear window only with a damp cloth or chamois, and move along the heating elements;
- Do not scratch the heater elements;
- Do not apply adhesive labels to the heater.
If the heater element is torn, it can be repaired without removing it from the vehicle using conductive silver paint.
On vehicles with electrically operated rear view mirrors, turning on the rear window defroster turns on the heated mirrors.
Minor wire breaks can be repaired without removing the rear window from the vehicle.
Checking the heating element
To test the rear window defroster, wrap the voltmeter probe in aluminum or tin foil to prevent damage to the defroster conductive strip.
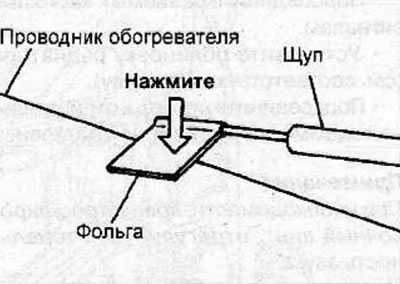
Start the engine and let it run at 2000 rpm.
Turn on the rear window defroster. Connect the negative probe of the voltmeter to the vehicle ground. Connect the voltmeter probe to the center of each rear window defroster strip in turn. The voltmeter should show a voltage of about 6 V.
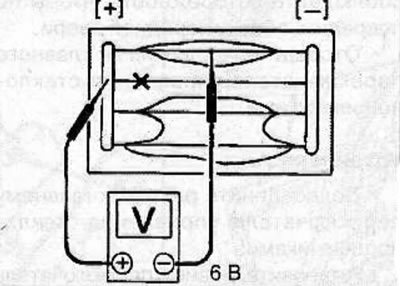
If the voltmeter shows 12 V, then the heater's conductive strip has a break on the side between the voltmeter connection point and the side of the heater connected to ground.
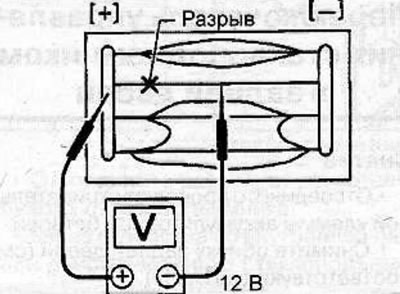
If the voltmeter shows a voltage below 0 V, the heater's conductive strip has an open circuit on the side between the voltmeter connection point and the side of the heater connected to the positive terminal of the battery.
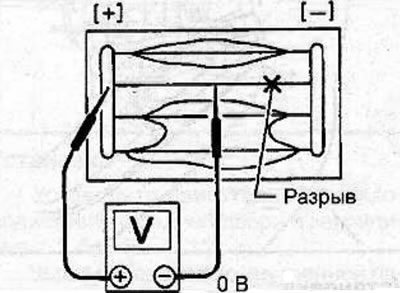
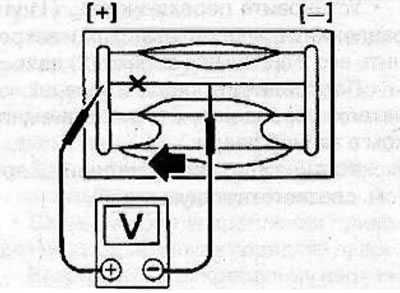
To determine the break point, move the probe along the conductive strip of the heater in the appropriate direction. The point where the voltage shown by the voltmeter changes abruptly is the break point.
Repair
To repair the glass heater conductor you will need:
- Adhesive conductive composition;
- Ruler 30 cm long;
- Drawing pen;
- Hair dryer;
- Alcohol;
- Textile.
Use a cloth soaked in alcohol to clean the broken area of the glass heater conductor and the surrounding area.
Use a drawing pen to take a small amount of conductive adhesive. Shake the container with the conductive adhesive composition before use.
Place a ruler on the glass near the break and along the glass heater conductor. Using a marking pen, apply the conductive compound to the break and to the undamaged areas of each conductor at a distance of 5 mm.
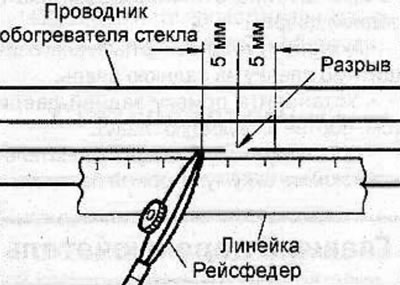
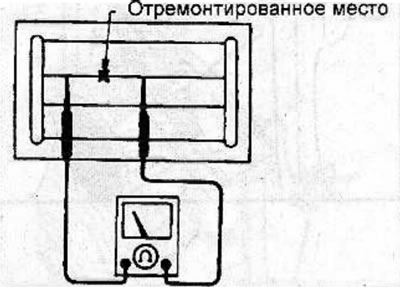
After completing the repair of the glass heater conductor, check the conductivity of the heater conductor after 10 minutes. When checking, do not touch the repair area of the glass heater conductor.
Use a hair dryer to dry the repair area of the glass heater conductor for 20 minutes. If you don't have a hair dryer, let the conductive adhesive dry for 24 hours.
Visitor comments