
OpelBook.ru
Cars AvtoVAZ Cars Mitsubishi Cars BMW Cars Mercedes Cars Nissan Cars Toyota Cars Chevrolet
English Русский
Български
Беларускі
Український
Српски
Hrvatski
Română
Polski
Slovenský
Magyar
 |  Sitemap  |  Contacts  |    


Main Astra Corsa Insignia Kadett Omega Vectra Zafira Others Articles
Frontera A (1991-1998, petrol) Frontera B (1998-2004) Ascona C (1981-1988) Vivaro A (2001-2014)
  • Main
  • Opel
  • Frontera B
  • Body
  • Heating and air conditioning
  • Heating and ventilation control unit

Heating and ventilation control unit (Opel Frontera B)

            0

Contents: Removal ⬇ Installation ⬇
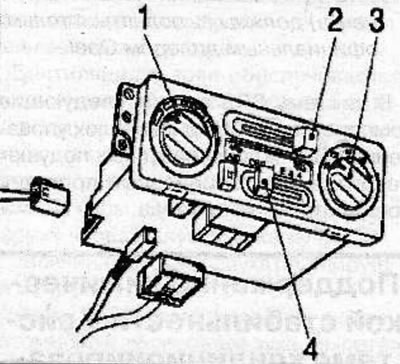
Heating and ventilation control unit: 1 - air temperature control handle; 2 - ventilation control…

Heating and ventilation control unit: 1 - air temperature control handle; 2 - ventilation control handle; 3 - air distribution mode selection handle; 4 - fan speed control knob.


Removal


Disconnect the cable from the negative battery terminal.

Remove the center console (1) (see the relevant chapter).
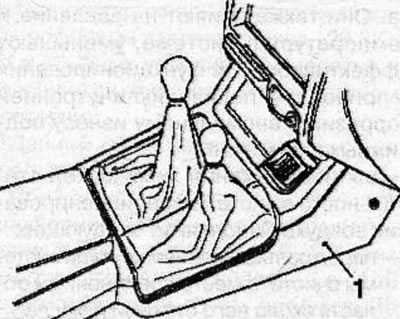
Remove the center console (1) (see the relevant chapter).


Remove 2 screws and remove the hood release handle from the lower cover (1) of the instrument panel.

Loosen the screws and remove the bottom cover (1) from the instrument panel, then disconnect the connectors.

Disconnect the connector from the turn signal and hazard warning flasher (2) located on the support bracket.
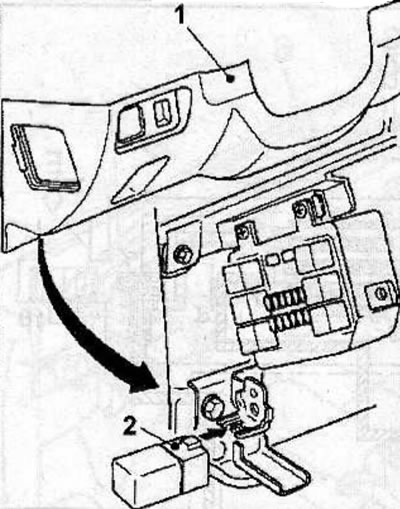
Disconnect the connector from the turn signal and hazard warning flasher (2) located on the support…


Remove the driver's knee bolster from the instrument panel.
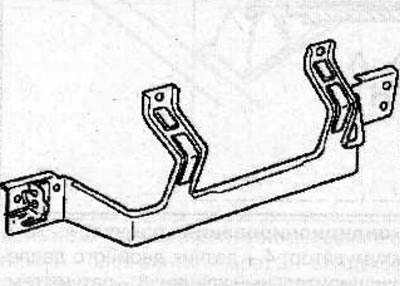


Remove the driver's knee bolster from the instrument panel.


Remove 2 screws, disconnect connectors and remove instrument cluster trim (1) from instrument panel.

[Text copied from an internet website: www.OPELBOOK.ru]
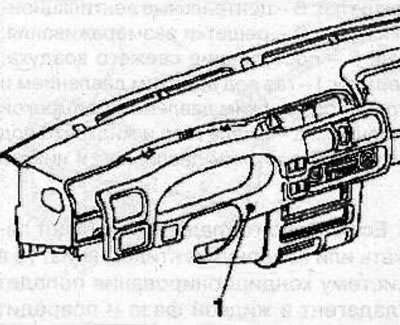
Remove 2 screws, disconnect connectors and remove instrument cluster trim (1) from instrument panel.


Open the glove box cover, remove the screws and remove the glove box from the instrument panel.
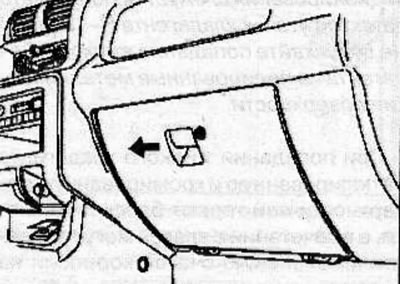
Open the glove box cover, remove the screws and remove the glove box from the instrument panel.


Disconnect the 3 control cables from the heater unit.


Remove the insulating plate (1) from the bottom of the heating and ventilation control unit.
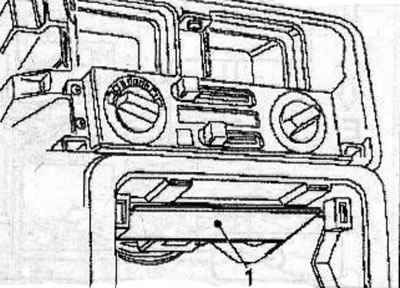
Remove the insulating plate (1) from the bottom of the heating and ventilation control unit.


Remove the screws, pull the heating and ventilation control unit out of the instrument panel and disconnect the connectors and 3 control cables from it.
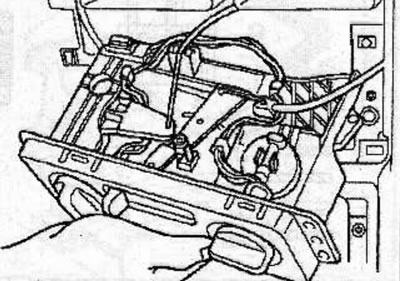
Remove the screws, pull the heating and ventilation control unit out of the instrument panel and…


Installation


Connect the connectors and 3 control cables to the heating and ventilation control unit, insert the unit into the instrument panel and secure with screws.
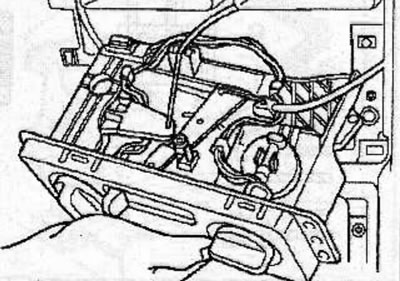
Connect the connectors and 3 control cables to the heating and ventilation control unit, insert the…


Install the insulating plate (1) on the bottom of the heating and ventilation control unit.
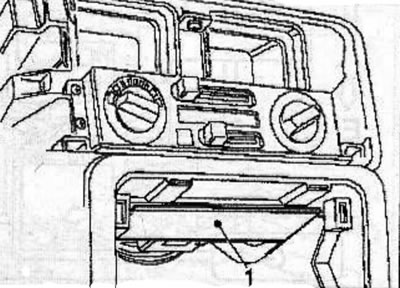


Install the insulating plate (1) on the bottom of the heating and ventilation control unit.


Connect the 3 control cables to the heater unit.

Place the glove box on the dashboard and secure it with screws.
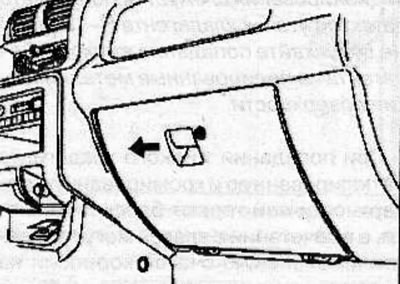
Place the glove box on the dashboard and secure it with screws.


Install the bottom cover (1) on the instrument panel, connect the connector, and secure with one screw.
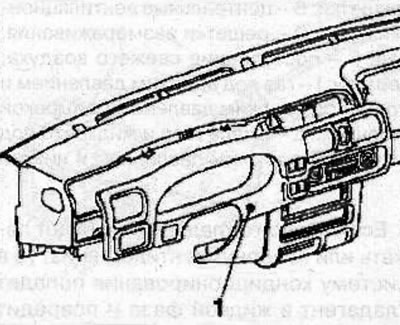
Install the bottom cover (1) on the instrument panel, connect the connector, and secure with one…


Install the driver's knee bolster onto the instrument panel.
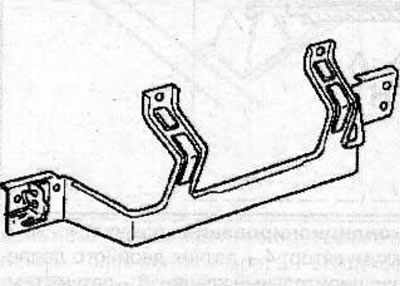
Install the driver's knee bolster onto the instrument panel.


Connect the connector to the turn signal and hazard warning flasher (2) located on the support bracket.
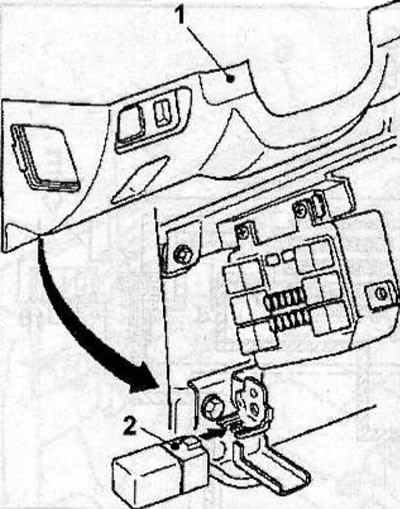


Connect the connector to the turn signal and hazard warning flasher (2) located on the support…


Connect the connector to the bottom cover (1), install the bottom cover on the instrument panel and secure it with the screw.

Install the hood release handle onto the lower cover (1) of the instrument panel and secure it with 2 screws.

Install the center console (1) (see the relevant chapter).
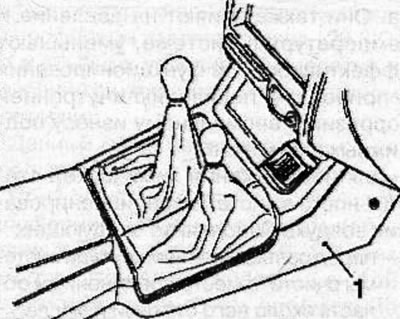
Install the center console (1) (see the relevant chapter).


Connect the cable to the negative terminal of the battery.


This article is available at russian, bulgarian, belarusian, ukrainian, serbian, croatian, romanian, polish, slovak, hungarian
Checking the article: Chernov Alexander

Share information:

Previous articles
Opel Frontera B: Heating and air conditioning
Next articles

Maintaining chemical stability in the air conditioning system
General information
Technical data
Checking and adjusting heating and ventilation control cables
Heater unit
Heater radiator
Compressor replacement
Condenser — removal and installation
Receiver/dryer — replacement


See similar ones from other Opel car manuals:
▶ Removal and installation the heating and ventilation system… Opel Astra J (2009-2015, petrol)
▶ Replacing the backlight lamp of the heating control unit… Opel Corsa B (1993-2000)
▶ Replacing the pre-heating control unit Opel Insignia A (2008-2017)
▶ Heating and ventilation control Opel Omega A (1986-1993)
▶ Ventilation and heating Opel Kadett E (1984-1995)
Link to this page in different formats

Visitor comments


No comments yet


How much will 34 + 46 =


Vivaro A (2001-2014) 
  • General information
  • User manual
  • Power unit
  • Petrol engine F4R
  • Diesel engine F9Q
  • Diesel engine G9U
  • Transmission
  • Clutch and drive shafts
  • Manual gearbox
  • Chassis
  • Front suspension
  • Rear suspension
  • Brake system
  • Body
  • Exterior
  • Interior
  • Electrical equipment
  • Heating and ventilation
  • Air conditioner
  • Equipment and devices
  • Electrical diagrams
Ascona C (1981-1988) 
  • General information
  • Maintenance
  • Power unit
  • Gasoline engines
  • Diesel engines
  • Cooling system
  • Fuel and exhaust system
  • Contact ignition system
  • Contactless ignition system
  • Transmission
  • Clutch
  • Mechanical gearbox
  • Automatic gearbox
  • Drive shafts
  • Chassis
  • Steering
  • Brake system
  • Car suspension
  • Body
  • Exterior
  • Interior
  • Doors and windows
  • Electrical equipment
  • Equipment and devices
  • Power devices
  • Electrical circuits
Frontera B (1998-2004) 
  • General information
  • User manual
  • Maintenance
  • Power unit
  • Petrol engines 2.2 l
  • Petrol engines 3.2 l
  • Diesel engines 2.2 l
  • Cooling system
  • Fuel system (petrol)
  • Fuel system (diesel)
  • Ignition system
  • Transmission
  • Clutch
  • Manual gearbox MUA5C
  • Automatic gearbox 4L30E
  • Chassis
  • Suspension and axles
  • Steering
  • Brake system
  • Body
  • Exterior
  • Interior
  • Doors, locks and windows
  • Heating and air conditioning
  • Electrical equipment
  • Power devices
  • Equipment and devices
  • Lighting and signaling
  • Electrical diagrams
Frontera A (1991-1998, petrol) 
  • General information
  • Introduction to guide
  • User manual
  • Maintenance
  • Power unit
  • Engine repair
  • Lubrication system
  • Cooling system
  • Power and exhaust system
  • Engine electrics
  • Transmission
  • Clutch
  • Mechanical gearbox
  • Cardan shafts
  • Chassis
  • Brake system
  • Front suspension
  • Rear suspension
  • Steering
  • Body
  • Repair and care
  • Electrical equipment
  • Equipment and devices
  • Electrical circuits
OpelBook.ru © 2017–2026 · Mobile version · · Sitemap: EN BG BY UA RS HR RO PL SK HU · Feedback · Site search
Astra F, petrol · Astra G, petrol · Astra G · Astra H · Astra J, petrol · Corsa B · Corsa C, petrol · Corsa C · Insignia A · Kadett D · Kadett E · Omega A · Omega B · Omega B2 · Vectra A, petrol · Vectra A · Vectra B, petrol · Vectra B · Vectra C · Zafira A, petrol · Frontera A, petrol · Frontera B · Ascona C · Vivaro A ·
We want your visit to be comfortable 🤝! We use cookies 🍪 to make that happen.