OpelBook.ru
Cars AvtoVAZ Cars Mitsubishi Cars BMW Cars Mercedes Cars Nissan Cars Toyota Cars Chevrolet
English Русский
Български
Беларускі
Український
Српски
Hrvatski
Română
Polski
Slovenský
Magyar
 |  Sitemap  |  Contacts  |    


Main Astra Corsa Insignia Kadett Omega Vectra Zafira Others Articles
Omega A (1986-1993) Omega B (1993-1999) Omega B2 (1999-2003)
  • Main
  • Omega
  • Omega A
  • General information
  • User manual
  • Heating and ventilation control

Heating and ventilation control (Opel Omega A)

            0

Contents: Heating system switch group ⬇ Central air ducts ⬇ Side blowers ⬇ Ventilation of the cabin in summer ⬇ Heating ⬇ Heating of the lower part of the…⬇ Blowing warm air, defrosting and…⬇ Electrically heated rear window,…⬇ Electric heated seats ⬇
Heating and ventilation control


The heating and ventilation system is based on the principle of air mixing: by mixing cold and warm flows in the car's interior, the required temperature is set and maintained at any speed. The intensity of air supply depends on the speed and the fan mode. At low speed, the fan should be on.

Heating system switch group


Heating system switch group


Heating system switch group


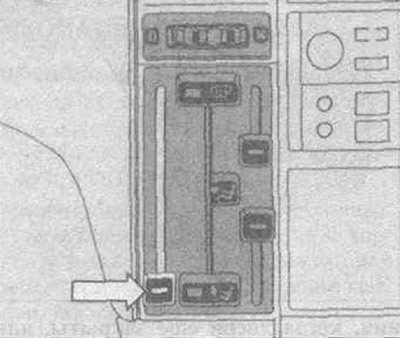
Air must be able to flow freely. Therefore, make sure that the air intakes located on the left and right in front of the windshield are not blocked by leaves or snow.


Air must be able to flow freely. Therefore, make sure that the air intakes located on the left and…


The air supply from outside should be constant, blocking the heat if necessary for a short time, for example to prevent smoke from entering the cabin. To do this, set the air supply regulator to the symbol №№№ and close all the air blowers.
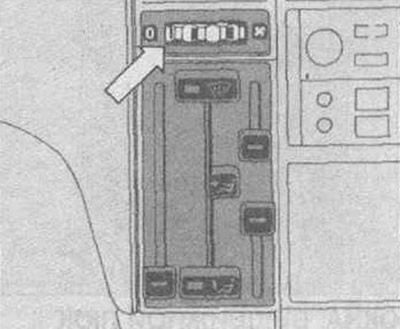
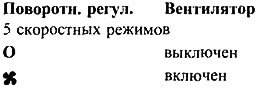
The air supply from outside should be constant, blocking the heat if necessary for a short time,…


The air supply from outside should be constant, blocking the heat if necessary for a short time,…


Besides these, there are four more intermediate positions.

With the help of a compressor, the intensity of air injection can be increased, especially at low vehicle speeds and the need to more quickly establish a comfortable temperature in the cabin or to quickly defrost icy windows.
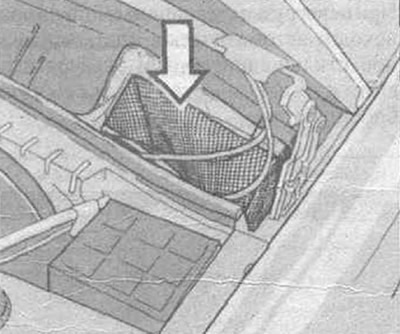


With the help of a compressor, the intensity of air injection can be increased, especially at low…


Air must be able to flow freely. Therefore, make sure that the air intakes located on the left and right in front of the windshield are not blocked by leaves or snow.

Central air ducts
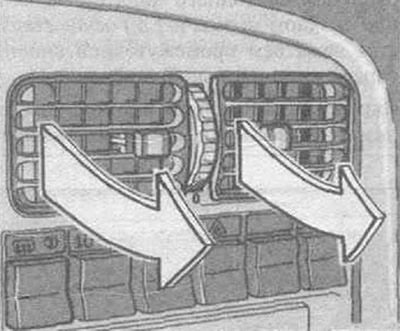


Central air ducts


Provide comfortable ventilation of fresh or heated air - depending on the weather and the position of the temperature switch.

To do this, open both nozzles by turning the built-in knurled rings. In the "0" position, they are completely closed. If you need to close only one air duct, set the lever of the movable guide plates to the central position.

Adjust the air flow intensity using the fan.

Direct the air flow at your own discretion by turning the built-in guide plates.

Side blowers


Provides air supply to the cabin. Four nozzles temperature depending on the position of the regulator.


Material taken from an internet portal [www.OpelBook.ru]
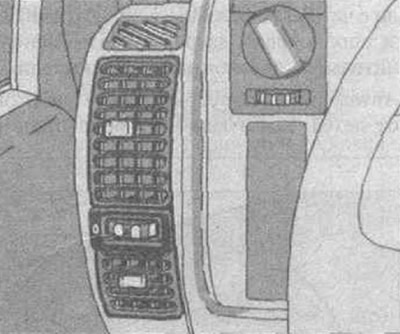
Provides air supply to the cabin. Four nozzles temperature depending on the position of the…


Opened by turning the knurled adjustment rings. In the "0" position - closed.

The lower nozzles are closed by built-in movable plates towards the doors.

Adjust the vertical and horizontal directions of air flow at your own discretion.

During the cold season, the best option is when air flows are directed along the doors.

Ventilation of the cabin in summer


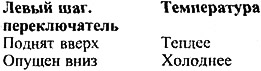
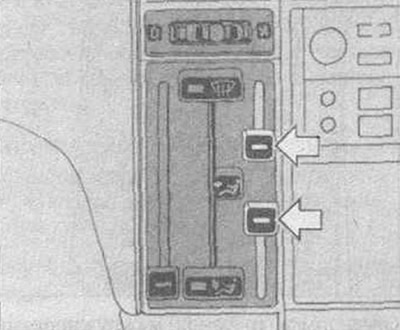
Set the temperature regulator to the lower position.

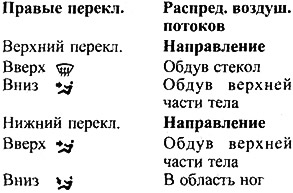
Turn on the fan, for maximum ventilation of air at the top - set both air distribution switches to the symbol all air blowers open.

For air ventilation below - switches on the symbol
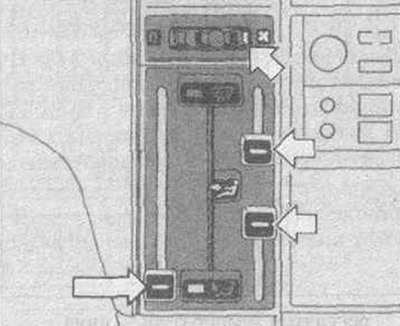
For air ventilation below - switches on the symbol


The convenience, comfort and well-being of passengers largely depend on the correct adjustment of the ventilation and heating system of the passenger compartment, especially in the cold season!


By directing heated air to the feet and installing central air blowers at the passengers' request, a temperature layer of air is created in the cabin with a pleasant "cold head and warm feet" effect.


Air flow to the rear seats: Bring the center air vents together and point them slightly upward.

Heating


The efficiency of the heating system depends on the temperature of the coolant, and will be maximum only with a well-warmed engine.

To quickly heat the interior, set the fan control to position 3.
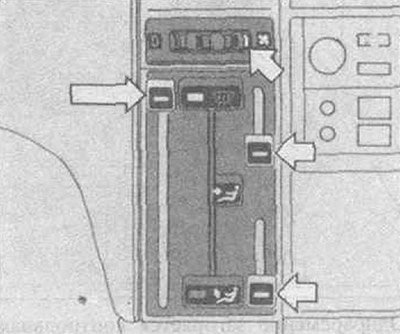
To quickly heat the interior, set the fan control to position 3.


Heating of the lower part of the passenger compartment in the foot area


The heated air is also supplied to the feet of the rear seat passengers. Set the temperature switch up.

Turn on the fan, lower both air flow distribution controls down, close the central air blowers.

Blowing warm air, defrosting and drying windows


Lift all the switches of the heating system group panel up. Turn on the fan, close the central air blowers, turn on the rear window heating.

Side air blowers: when defrosting windows, direct the upper nozzles towards the side windows to increase the flow of warm air.
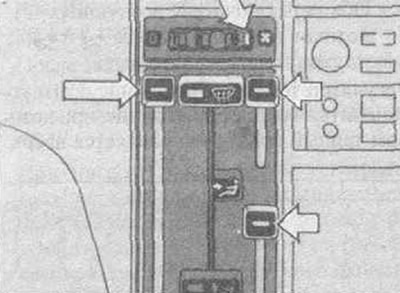
Side air blowers: when defrosting windows, direct the upper nozzles towards the side windows to…


Electrically heated rear window, exterior rear view mirrors


Works only when the ignition is on.

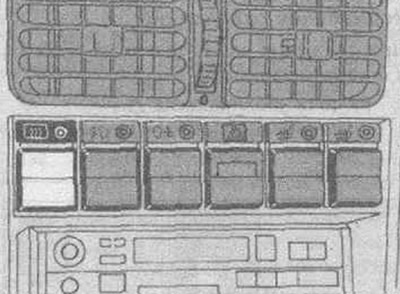
The switch is located on the group panel on the left.

Turns on by pressing down. After approximately 15 minutes of operation, it automatically turns off so as not to waste unnecessary electricity and not to overload the power supply system.

When cleaning the window, be careful not to damage the heating filaments.
When cleaning the window, be careful not to damage the heating filaments.


Electric heated seats


Regulated by thermostat.

Front seats: Two switches are located on the cluster panel.

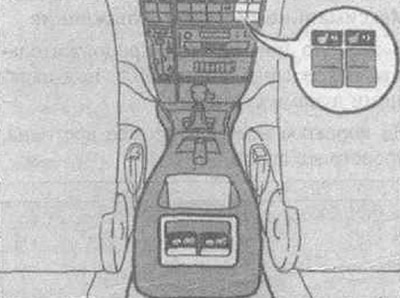
Rear seats: Two control buttons are located on the rear side of the center console.
Rear seats: Two control buttons are located on the rear side of the center console.


This article is available at russian, bulgarian, belarusian, ukrainian, serbian, croatian, romanian, polish, slovak, hungarian
Checking the article: Zinoviev Kirill

Share information:

Previous articles
Opel Omega A: User manual
Next articles

Windows, retractable sunroof
Lighting fixtures
Structural safety of the body
Interior Elements Management
Trunk lid, tailgate
Door control
Air Conditioning Control
Automatic transmission
Electronically controlled chassis damping
Adjusting the vehicle's landing level
Manual speed control device
Brake system


See similar ones from other Opel car manuals:
▶ Heating/Ventilation Control Tree — Removal and Installation Opel Astra F (1991-1998, petrol)
▶ Control of air flow for heating and ventilation of the… Opel Frontera A (1991-1998, petrol)
▶ Heating, ventilation and air conditioning systems Opel Corsa B (1993-2000)
▶ Replacing the pre-heating control unit Opel Insignia A (2008-2017)
▶ Ventilation and heating Opel Kadett E (1984-1995)
Link to this page in different formats

Visitor comments


No comments yet


How much will 44 + 18 =


Omega B2 (1999-2003) 
  • General information
  • User manual
  • Maintenance
  • Troubleshooting
  • Power unit
  • Petrol 4-cylinder
  • Petrol 6-cylinder
  • Engine overhaul
  • Diesel engines 2.0 l
  • Diesel engines 2.5 l
  • Cooling and heating
  • Injection system (gasoline)
  • Fuel system (diesel)
  • Fuel system
  • Exhaust system
  • Ignition system
  • Transmission
  • Clutch
  • Mechanical gearbox
  • Automatic gearbox
  • Main gear and shafts
  • Chassis
  • Brake system
  • Car suspension
  • Steering
  • Body
  • Body elements
  • Electrical equipment
  • Equipment and devices
  • Electrical circuits
Omega B (1993-1999) 
  • General information
  • User manual
  • Tips for the car owner
  • Maintenance (gasoline)
  • Maintenance (diesel)
  • Power unit
  • Petrol engine SOHC 2.0 l
  • Petrol engine DOHC 2.0 l
  • Petrol engines 2.5 and 3.0 l
  • Repair of gasoline engines
  • Diesel engine 2.0 l
  • Diesel engine repair 2.0 l
  • Diesel engine 2.5 l
  • Cooling and heating
  • Power system (petrol)
  • Emission reduction
  • Fuel system (diesel 2.0 l)
  • Fuel system (diesel 2.5 l)
  • Launch system
  • Ignition system
  • Transmission
  • Clutch
  • Mechanical gearbox
  • Automatic gearbox
  • Drive shafts
  • Chassis
  • Brake system
  • Wheel suspension
  • Steering
  • Body
  • Exterior
  • Interior
  • Doors and windows
  • Electrical equipment
  • Equipment and devices
  • Wiring diagrams (early)
  • Wiring diagrams (late)
Omega A (1986-1993) 
  • General information
  • User manual
  • Maintenance
  • Changes and additions
  • Troubleshooting
  • Power unit
  • Gasoline engines
  • Diesel engines
  • Cooling system
  • Fuel system (gasoline)
  • Fuel system (diesel)
  • Ignition system
  • Transmission
  • Clutch
  • Mechanical gearbox
  • Automatic gearbox
  • Cardan shaft
  • Drive shafts
  • Chassis
  • Brake system
  • Car suspension
  • Steering
  • Body
  • Exterior
  • Interior
  • Electrical equipment
  • Power devices
  • Lighting and appliances
  • Electrical circuits
OpelBook.ru © 2017–2026 · Mobile version · · Sitemap: EN BG BY UA RS HR RO PL SK HU · Feedback · Site search
Astra F, petrol · Astra G, petrol · Astra G · Astra H · Astra J, petrol · Corsa B · Corsa C, petrol · Corsa C · Insignia A · Kadett D · Kadett E · Omega A · Omega B · Omega B2 · Vectra A, petrol · Vectra A · Vectra B, petrol · Vectra B · Vectra C · Zafira A, petrol · Frontera A, petrol · Frontera B · Ascona C · Vivaro A ·
We want your visit to be comfortable 🤝! We use cookies 🍪 to make that happen.