
Solid cardan shaft
Removing the one-piece propeller shaft is carried out in the same way as removing the front propeller shaft, described in section Axle bearing replacement. The difference lies in the fact that in this case, on one side, the shaft is removed from the spline connection of the driven shaft of the gearbox. The oil escaping in this case must be properly collected by substituting a container.
Composite cardan shaft and intermediate support
Here, as on a solid shaft, the fastening bolts are self-locking and are not installed a second time.
1. Mark with paint the mutual position of the flanges of the cardan shaft and the final drive gear on the rear axle.
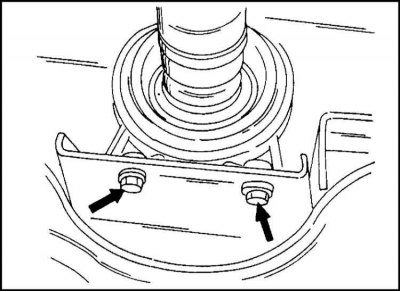
2. Loosen and knock out the bolts.
3. Remove the bolts securing the intermediate support from the chassis cross member.
4. Remove the support.
5. Remove the cardan shaft from the splined connection of the driven shaft of the gearbox.
6. Place a container to collect the leaking oil.
7. When installing the cardan shaft, screw it with new bolts to the flange of the drive gear of the final drive without tightening the bolts.
8. To prevent incorrect assembly, tighten the intermediate support mounting bolts with the vehicle lowered to the ground.
9. Tighten the bolts to 33 Nm.
10. Now tighten the flange connection bolts evenly around the circumference to 75 Nm.
11. Finally, check the oil level in the gearbox as described in the appropriate section.
Replacing the intermediate support
1. Loosen the bolt and remove the rear fork from the front driveshaft.
2. Remove the yoke from the shaft spline

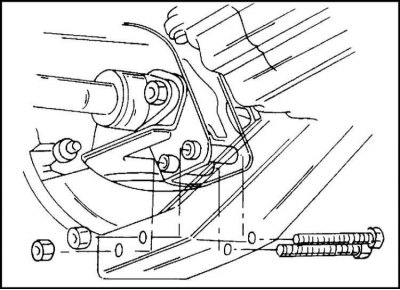
3. Press the intermediate support. The location of the intermediate support is shown in the illustration.
4. When installing the intermediate support (2) press onto the shaft (1).
5. Put on the rear fork (3) on the shaft. It should be borne in mind that the shaft has a spline connection that allows you to combine parts in only one position.
6. Now the driveshaft can be installed on the car.

Cardan shaft assembly with intermediate support:1 - cardan shaft; 2 - intermediate support; 3 - rear fork
The location of the contact patch in the gearing of the final drive gears (left column is forward side, right column is reverse side):
- a and b - incorrect contact, it is necessary to move the drive gear away from the driven gear, reducing the thickness of the shim,
- c and d - incorrect contact, it is necessary to move the drive gear to the driven gear, increasing the thickness of the shim,
- e - the correct location of the contact patch.
Visitor comments