
OpelBook.ru
Cars AvtoVAZ Cars Mitsubishi Cars BMW Cars Mercedes Cars Nissan Cars Toyota Cars Chevrolet
English Русский
Български
Беларускі
Український
Српски
Hrvatski
Română
Polski
Slovenský
Magyar
 |  Sitemap  |  Contacts  |    


Main Astra Corsa Insignia Kadett Omega Vectra Zafira Others Articles
Kadett D (1979-1984) Kadett E (1984-1995)
  • Main
  • Kadett
  • Kadett D
  • Power unit
  • Gasoline engines
  • Adjusting valve clearances

Adjusting valve clearances (Opel Kadett D)

            0

Contents: OHV engine ⬇ Engine ONS ⬇

OHV engine


As part of maintenance, it is necessary to check the valve clearances every 15,000 km and adjust them if necessary. The valve clearance must be checked on a warm engine after repairing the cylinder head.

Valve adjustment only has the desired result if the valves seal perfectly, do not have unacceptable play in the guides and the ends of the rods are not broken.

If the clearance is too small, the valve timing changes, compression deteriorates, engine power decreases, and the engine runs unstably. In extreme cases, the valves may become deformed or the valves or valve seats may burn.

With a large gap, strong mechanical knocks occur, the valve timing changes, due to the lean working mixture the engine develops less power, the engine operation is unstable.

Remove the air filter, see paragraph 4.44.

Remove the cylinder head cover.
Remove the cylinder head cover.


Check the valve clearance at operating temperature (approximately 80°C for coolant and 60°C for oil) and with the engine running using the appropriate feeler gauge:
  • Exhaust valves 0.25 mm.
  • Inlet valves 0.15 mm.

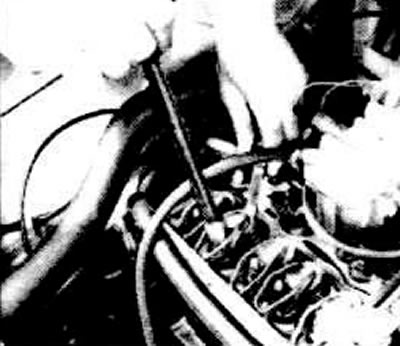
The feeler gauge should move with difficulty between the rocker arm and the end of the valve stem.


The feeler gauge should move with difficulty between the rocker arm and the end of the valve stem.


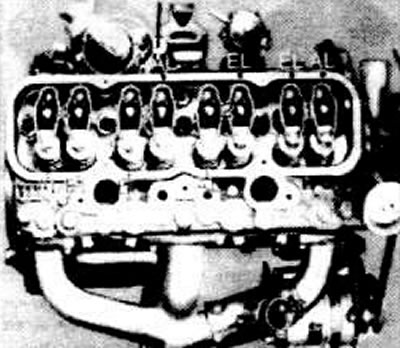
From the front of the engine, the valves are arranged in the following order: 1st cylinder - exhaust, intake, 2nd cylinder - intake, exhaust, 3rd cylinder - exhaust, intake, 4th cylinder - intake, exhaust.

If the clearance is incorrect, it can be adjusted by turning the rocker arm nut.

Note: Oil splashes from the rocker arm can be removed with a piece of cardboard (approximately 40x320 mm), which is installed between the sealing surface of the cylinder head cover and the push rods.


Screw on the timing cover with a new gasket.

Install the air filter with the heating hose, see paragraph 4.44.

Engine ONS


Thanks to the installation of hydraulic compensators, there is no need to adjust the valve clearance.

Caution: Hydraulic valve clearance compensators may cause valve train noise when the oil level is high. In this case, first check the engine oil level and adjust if necessary.


Valve stem clearance:
  • Intake valves: 0.015 to 0.047 mm
  • Exhaust valves: 0.030 to 0.062 mm

Permissible valve stem runout:
  • Inlet valves: 0.04 mm
  • Exhaust valves: 0.05 mm


This article is available at russian, bulgarian, belarusian, ukrainian, serbian, croatian, romanian, polish, slovak, hungarian
Checking the article: Kornev Georgy

Share information:

Previous articles
Opel Kadett D: Gasoline engines
Next articles

Replacing the valve stem seals
Grinding valves to seats
Checking the valve guides
Checking the valve timing (OHV engine)
Removal and installation the chain tensioner (OHV engine)
Removal and installation of the timing case (OHV)
Checking the flatness of the mating surface of the cylinder head
Checking the cylinder block surface for flatness
Checking the compression in the cylinders
Starting the engine from an auxiliary source
Engine malfunctions


See similar ones from other Opel car manuals:
▶ Checking and adjusting valve clearances (1.7L DOHC engines) Opel Astra G (1998-2004)
▶ Checking and adjusting valve clearances on a diesel engine Opel Corsa B (1993-2000)
▶ Checking and adjusting valve clearances Opel Vectra A (1988-1995)
▶ Checking and adjusting valve clearances Opel Frontera B (1998-2004)
▶ Valve clearances — checking and adjustment Opel Omega A (1986-1993)
Link to this page in different formats

Visitor comments


No comments yet


How much will 45 + 26 =


Kadett E (1984-1995) 
  • General information
  • Vehicle description
  • Operation and maintenance
  • OHV power unit
  • Engine design
  • Check and repair
  • Engine work
  • OHC power unit
  • Engine design
  • Engine repair
  • Ignition system
  • Cooling and lubrication
  • Supply system
  • Fuel injection «LE-Jetronic»
  • Fuel injection «LE3-Jetronic»
  • Motronic ML4.1 system
  • Motronic M1.5 system
  • Motronic M2.5 system
  • Transmission
  • Clutch
  • Gearbox F10 and F13
  • Gearbox F16 and F20
  • Automatic gearbox
  • Drive shafts
  • Chassis
  • Front suspension
  • Rear suspension
  • Steering
  • Brake system
  • Electrical equipment
  • Equipment and devices
  • Electrical circuits
Kadett D (1979-1984) 
  • General information
  • Car care
  • Maintenance
  • Power unit
  • Gasoline engines
  • Lubrication system
  • Cooling system
  • Power system (gasoline)
  • Carburetor Solex 35 PDSI
  • Carburetor Varajet II
  • Carburetor 1B1
  • Fuel injection (gasoline)
  • Diesel engines
  • Fuel system (diesel)
  • Transmission
  • Clutch
  • Manual gearbox
  • Chassis
  • Front suspension
  • Rear suspension
  • Steering
  • Brake system
  • Wheels and tires
  • Body
  • Body elements
  • Doors and windows
  • Electrical equipment
  • Equipment and devices
  • Lighting system
  • Power devices
  • Ignition system
  • Electrical circuits
OpelBook.ru © 2017–2026 · Mobile version · · Sitemap: EN BG BY UA RS HR RO PL SK HU · Feedback · Site search
Astra F, petrol · Astra G, petrol · Astra G · Astra H · Astra J, petrol · Corsa B · Corsa C, petrol · Corsa C · Insignia A · Kadett D · Kadett E · Omega A · Omega B · Omega B2 · Vectra A, petrol · Vectra A · Vectra B, petrol · Vectra B · Vectra C · Zafira A, petrol · Frontera A, petrol · Frontera B · Ascona C · Vivaro A ·
We want your visit to be comfortable 🤝! We use cookies 🍪 to make that happen.