
OpelBook.ru
Cars AvtoVAZ Cars Mitsubishi Cars BMW Cars Mercedes Cars Nissan Cars Toyota Cars Chevrolet
English Русский
Български
Беларускі
Український
Српски
Hrvatski
Română
Polski
Slovenský
Magyar
 |  Sitemap  |  Contacts  |    


Main Astra Corsa Insignia Kadett Omega Vectra Zafira Others Articles
Astra F (1991-1998, petrol) Astra G (1998-2004, petrol) Astra G (1998-2004) Astra H (2004-2009) Astra J (2009-2015, petrol)
  • Main
  • Astra
  • Astra G
  • Power unit
  • Fuel and exhaust systems
  • Single-injector system sensors and devices — removal and installation

Single-injector system sensors and devices — removal and installation (Opel Astra G)

            0

Contents: Nozzle ⬇ Fuel pressure regulator ⬇ Electric idle speed control ⬇ Throttle Position Sensor ⬇ Intake Manifold Pressure Sensor (MAP…⬇ Crankshaft angle sensor ⬇ Knock sensor ⬇ Engine Processor Unit ⬇ Fuel pump relay ⬇
Attention! Maintenance of the injection system is performed in a car service. It is allowed to change sensors and devices of the injection system independently.


Nozzle


1. Decompress the fuel system and disconnect the battery from ground.

2. Remove the air duct from the upper section of the throttle body, disconnect the hoses from the upper section, unscrew the screws and remove the upper section.

3. Remove the nozzle as shown in the photo.
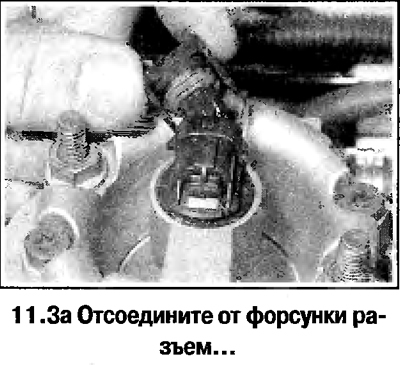
3. Remove the nozzle as shown in the photo.
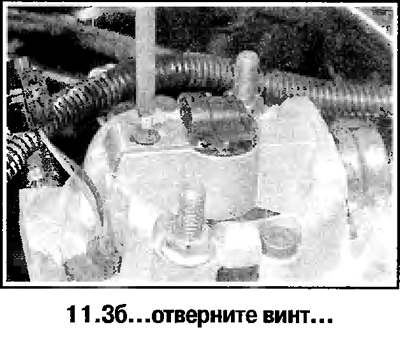

3. Remove the nozzle as shown in the photo.
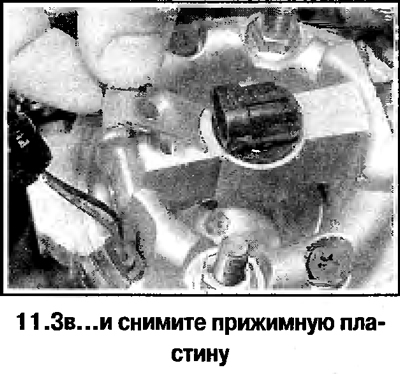

3. Remove the nozzle as shown in the photo.
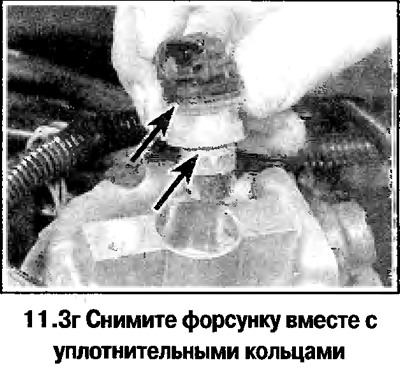

3. Remove the nozzle as shown in the photo.


4. Installation is carried out in reverse order. Replace the injector sealing rings.


Fuel pressure regulator


Attention!
  • The fuel pressure regulator is changed together with the upper section of the throttle body.
  • It is permissible to disassemble the regulator for cleaning, however, the pressure regulator should only be disassembled if absolutely necessary.

Material copied from the portal [OpelBook]


5. Decompress the fuel system and disconnect the battery from ground.

6. Remove the upper section of the throttle body by disconnecting the hoses and unscrewing the screws.

7. Mark the position of the regulator cover relative to the throttle pipe, unscrew the screws (see photo) and remove the cover. Remove the spring and membrane (see photo).
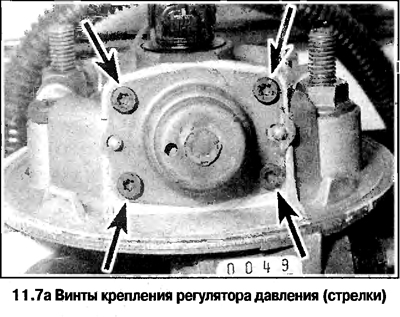
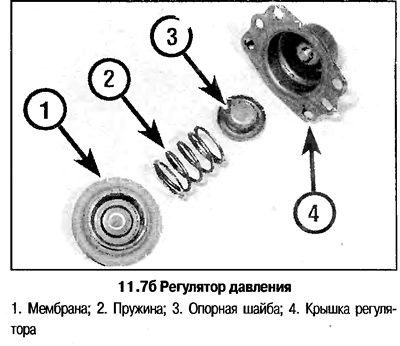
7. Mark the position of the regulator cover relative to the throttle pipe, unscrew the screws (see…


7. Mark the position of the regulator cover relative to the throttle pipe, unscrew the screws (see…


8. Wash the parts and check their condition.

9. Assembly is carried out in reverse order


Electric idle speed control


10. Disconnect the battery from ground, remove the upper section from the throttle body.

11. Remove the electric drive by disconnecting the connector and unscrewing the screws (see photo).
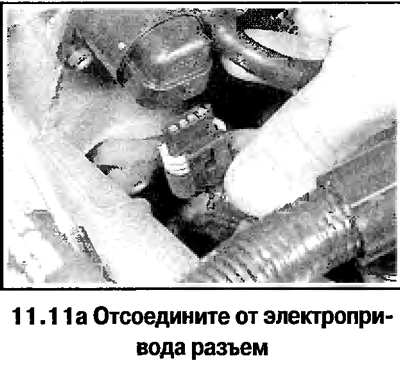
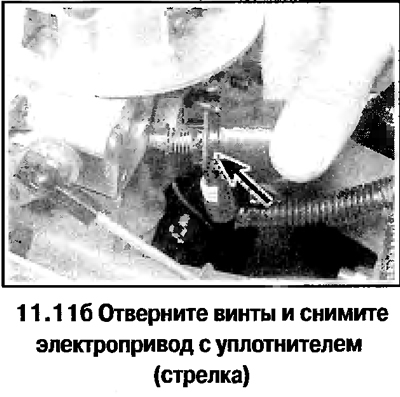
11. Remove the electric drive by disconnecting the connector and unscrewing the screws (see photo).


11. Remove the electric drive by disconnecting the connector and unscrewing the screws (see photo).


12. Installation is carried out in the reverse order. When installing, make sure that the dimension A does not exceed 28 mm to avoid breakage of the plunger of the electric drive motor (see photo). If necessary, carefully push the plunger into the actuator housing.
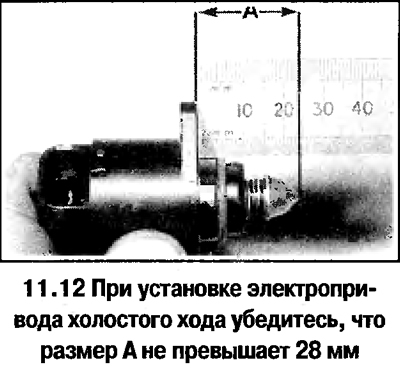
12. Installation is carried out in the reverse order. When installing, make sure that the dimension…


Throttle Position Sensor


13. Disconnect the connector from the sensor, which is located on the left side of the throttle pipe, unscrew the screws and remove the sensor (see photo). The sensor screws are tightened with a fixing compound.
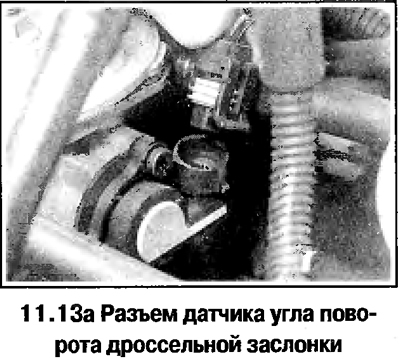
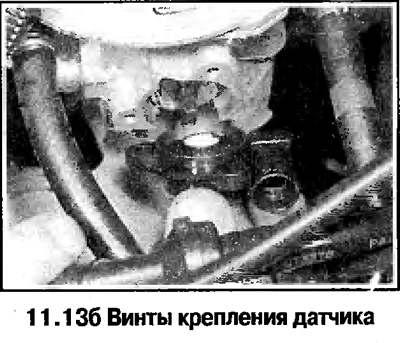
13. Disconnect the connector from the sensor, which is located on the left side of the throttle…


13. Disconnect the connector from the sensor, which is located on the left side of the throttle…


Intake Manifold Pressure Sensor (MAP sensor)


14. The sensor is attached with a bracket to the bulkhead of the engine compartment, to the left of the throttle body (see photo).
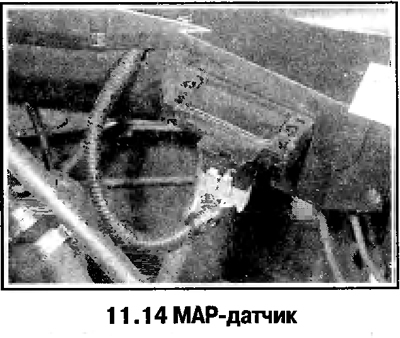
14. The sensor is attached with a bracket to the bulkhead of the engine compartment, to the left of…


Crankshaft angle sensor


15. The sensor is mounted in the front part of the cylinder block, on the side of the engine compartment bulkhead. Access to the sensor is provided from below

16. Disconnect the sensor connector from the harness, remove the sensor wire from the brackets.

17. Loosen the bolt and remove the sensor (see photo).
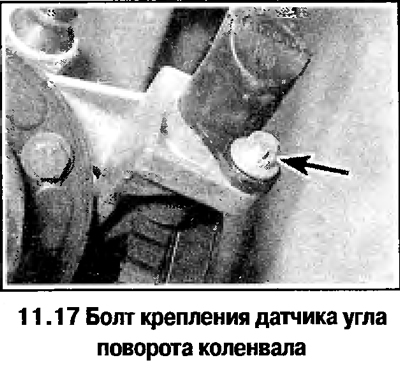
17. Loosen the bolt and remove the sensor (see photo).


18. When assembling, check the gap between the end of the sensor and the tooth on the crankshaft pulley, which should be 1.0±0.7 mm. If the gap is not within the norm, replace the sensor bracket.

Knock sensor


19. The sensor is mounted at the rear of the cylinder block. Access to the sensor is provided from below.

20. Disconnect the sensor connector from the harness, remove the sensor wire from the brackets.

21. Loosen the bolt and remove the sensor.

Engine Processor Unit


22. The block is mounted next to the battery.

23. Disconnect the battery from ground. Remove the cover from the unit. Remove the unit from the bracket and disconnect the connector.

Attention! The engine processor unit is changed in a car service center, as it needs to be recoded.


Fuel pump relay


24. The relay is located in the mounting block, which is mounted in the engine compartment.

25. Remove the cover and take out the relay (purple relay housing).


This article is available at russian, bulgarian, belarusian, ukrainian, serbian, croatian, romanian, polish, slovak, hungarian
Checking the article: Kornev Georgy

Share information:

Previous articles
Opel Astra G: Fuel and exhaust systems
Next articles

Throttle body — removal and installation
Fuel tank — removal and installation
Fuel level sensor — removal and installation
Fuel pump — removal and installation
Decompression of the fuel system
Injection systems — general information
Sensors and devices of multi-nozzle injection systems — removal and installation
Intake manifold — removal and installation
Exhaust manifold — removal and installation
Exhaust system parts — removal and installation
Catalyst


See similar ones from other Opel car manuals:
▶ Electronic suspension control system: sensors and actuators… Opel Insignia A (2008-2017)
▶ Fuel injector (Multec system) — removal and installation Opel Vectra A (1988-1995, petrol)
▶ Injector system parts — removal and installation Opel Ascona C (1981-1988)
▶ Additional electronic devices Opel Corsa B (1993-2000)
▶ Lubrication system of a carburetor engine Opel Kadett E (1984-1995)
Link to this page in different formats

Visitor comments


No comments yet


How much will 37 + 46 =


Astra J (2009-2015, petrol) 
  • General information
  • Vehicle device
  • User manual
  • Faults en route
  • Maintenance
  • Power unit
  • Engine repair
  • Cooling and lubrication system
  • Engine power system
  • Exhaust system
  • Transmission
  • Clutch
  • Car gearbox
  • Drive shafts
  • Chassis
  • Front suspension
  • Rear suspension
  • Steering
  • Brake system
  • Wheels and tires
  • Body
  • Exterior
  • Interior
  • Doors and windows
  • Body Care
  • Heating and air conditioning
  • Security systems
  • Electrical equipment
  • Equipment and devices
  • Lighting and signaling
  • Power devices
  • Electrical circuits
Astra H (2004-2009) 
  • General information
  • Introduction to the guide
  • Troubleshooting
  • User manual
  • Maintenance
  • Power unit
  • Engine repair
  • Cooling and heating
  • Power and exhaust system
  • Ignition system
  • Launch and charge system
  • Transmission
  • Mechanical gearbox
  • Automatic gearbox
  • Drive shafts
  • Chassis
  • Brake system
  • Car suspension
  • Steering
  • Body
  • Interior
  • Exterior
  • Electrical equipment
  • Equipment and devices
  • Electrical circuits
Astra G (1998-2004) 
  • General information
  • Introduction to manual
  • User manual
  • Maintenance
  • Power unit
  • SOHC gasoline engines
  • DOHC gasoline engines
  • Diesel engines 1.7 and 2.0
  • Engine repair
  • Cooling system
  • Supply system
  • Injection system (gasoline)
  • Injection system (diesel)
  • Exhaust system
  • Charge and launch system
  • Ignition system (gasoline)
  • Preheat system (diesel)
  • Transmission
  • Manual gearbox
  • Automatic gearbox
  • Clutch
  • Drive shafts
  • Chassis
  • Brake system
  • Wheel suspension
  • Steering
  • Body
  • Exterior
  • Interior
  • Doors and windows
  • Ventilation and heating
  • Electrical equipment
  • Equipment and devices
  • Electrical circuits
Astra G (1998-2004, petrol) 
  • General information
  • User manual
  • Car care
  • Maintenance
  • Power unit
  • Single shaft engines
  • Twin shaft engines
  • Engine repair
  • Cooling and heating
  • Fuel and exhaust systems
  • Starting and charging system
  • Ignition system
  • Transmission
  • Clutch
  • Mechanical gearbox
  • Automatic gearbox
  • Drive shafts
  • Chassis
  • Brake system
  • Car suspension
  • Steering
  • Body
  • Interior
  • Exterior
  • Electrical equipment
  • Equipment and devices
  • Wiring diagrams Opel Astra
  • Wiring diagrams Opel Zafira
Astra F (1991-1998, petrol) 
  • General information
  • Maintenance
  • Power unit
  • Engine in car
  • Engine removed
  • Cooling system
  • Heating and ventilation
  • Fuel supply (carburetor)
  • Fuel supply (injector)
  • Emission control
  • Ignition system
  • Transmission
  • Clutch
  • Mechanical gearbox
  • Automatic gearbox
  • Drive shafts
  • Chassis
  • Brake system
  • Car suspension
  • Steering
  • Body
  • Exterior
  • Interior
  • Electrical equipment
  • Equipment and devices
  • Electrical circuits
OpelBook.ru © 2017–2026 · Mobile version · · Sitemap: EN BG BY UA RS HR RO PL SK HU · Feedback · Site search
Astra F, petrol · Astra G, petrol · Astra G · Astra H · Astra J, petrol · Corsa B · Corsa C, petrol · Corsa C · Insignia A · Kadett D · Kadett E · Omega A · Omega B · Omega B2 · Vectra A, petrol · Vectra A · Vectra B, petrol · Vectra B · Vectra C · Zafira A, petrol · Frontera A, petrol · Frontera B · Ascona C · Vivaro A ·
We want your visit to be comfortable 🤝! We use cookies 🍪 to make that happen.