
OpelBook.ru
Cars AvtoVAZ Cars Mitsubishi Cars BMW Cars Mercedes Cars Nissan Cars Toyota Cars Chevrolet
English Русский
Български
Беларускі
Український
Српски
Hrvatski
Română
Polski
Slovenský
Magyar
 |  Sitemap  |  Contacts  |    


Main Astra Corsa Insignia Kadett Omega Vectra Zafira Others Articles
Astra F (1991-1998, petrol) Astra G (1998-2004, petrol) Astra G (1998-2004) Astra H (2004-2009) Astra J (2009-2015, petrol)
  • Main
  • Astra
  • Astra G
  • Power unit
  • Engine repair
  • Crankshaft — check

Crankshaft — check (Opel Astra G)

            0

Contents: Checking axial play ⬇ Checking the status ⬇

Checking axial play


1. The axial clearance of the crankshaft is checked before removal from the engine, when the crankshaft can rotate freely in the main bearings.

2. Axial clearance is checked using a dial indicator. Move the crankshaft to the stop to the side and set the dial indicator scale to zero. Move the crankshaft to the opposite side and read the dial indicator reading (see photo). Compare the result with the standard. If the clearance exceeds the standard, then the thrust half rings will need to be replaced.
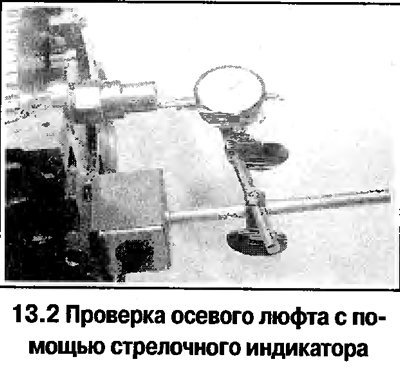
2. Axial clearance is checked using a dial indicator. Move the crankshaft to the stop to the side…


3. If there is no indicator, the axial play can be checked with a feeler gauge. Move the crankshaft as far as it will go toward the flywheel, then measure the play by inserting feeler gauges into the gap between the crankshaft cheek and the thrust half ring next to the 3rd main bearing
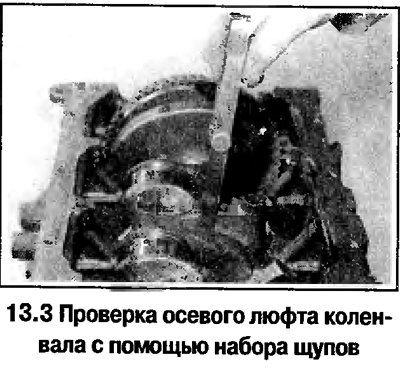
3. If there is no indicator, the axial play can be checked with a feeler gauge. Move the crankshaft…


Checking the status


4. Wash the crankshaft with solvent and dry. Thoroughly clean the oil passages inside the crankshaft.

5. Check the connecting rod necks for signs of uneven wear, cracks, scuff marks and pitting (pits).

6. Wear of the connecting rod journal is accompanied by a distinct metallic knock when the engine is running (it is especially noticeable when you press the throttle pedal while driving at low speeds) and a noticeable drop in oil pressure.

Wear of the main bearings is accompanied by strong engine vibration and a dull rumbling sound that increases with increasing engine speed, as well as a noticeable drop in oil pressure.

7. Check the roughness of the crankshaft journals by running your finger over them. Any roughness (which appears simultaneously with obvious signs of wear of the main and connecting rod bearings) indicates the need for regrinding of the crankshaft journals or its replacement

8. Check the crankshaft runout in the central part by installing the crankshaft in prismatic supports. If the runout exceeds the norm, the crankshaft must be replaced.

9. If the crankshaft journals have been reground, remove burrs around the lubrication holes.

10. Measure the diameter of the main and connecting rod journals (see photo). Determine the ovality of the necks by measuring the diameter at several points around the neck. Check the taper by measuring the diameter near the opposite cheeks of the necks. Compare the results with the standard ones.
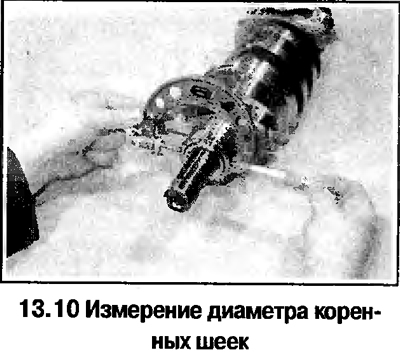
10. Measure the diameter of the main and connecting rod journals (see photo). Determine the ovality…


11. Check the condition of the crankshaft sealing journals. If a deep groove has formed on these journals in place of the working edges of the seal, consult a specialist, as either repair or replacement of the crankshaft will be required.

12. Main and connecting rod bearings of two repair sizes are supplied as spare parts (with a diameter reduction of 0.25 and 0.5 mm). If the crankshaft has not been repaired, the journals should be reground and the liners should be replaced with repair ones.


This article is available at russian, bulgarian, belarusian, ukrainian, serbian, croatian, romanian, polish, slovak, hungarian
Checking the article: Kornev Georgy

Share information:

Previous articles
Opel Astra G: Engine repair
Next articles

Connecting rod and piston group — check
Cylinder Block — Cleaning and Checking
Crankshaft — removal
Pistons and connecting rods — removal
Cylinder head — assembly
Cylinder head and valves — cleaning and checking
Main and connecting rod bearings — inspection
Engine Overhaul — Assembly Procedure
Piston rings — installation
Crankshaft — installation and checking clearances in main bearings
Connecting rod and piston group — installation and checking of clearances in connecting rod bearings
Engine — Starting after major repairs


See similar ones from other Opel car manuals:
▶ Crankshaft — check Opel Vectra B (1995-2002)
▶ Removal and installation the crankshaft pulley Opel Corsa B (1993-2000)
▶ Vehicle check Opel Insignia A (2008-2017)
▶ Installing the crankshaft Opel Kadett E (1984-1995)
▶ Check coolant level — every 400 km Opel Omega A (1986-1993)
Link to this page in different formats

Visitor comments


No comments yet


How much will 26 + 25 =


Astra J (2009-2015, petrol) 
  • General information
  • Vehicle device
  • User manual
  • Faults en route
  • Maintenance
  • Power unit
  • Engine repair
  • Cooling and lubrication system
  • Engine power system
  • Exhaust system
  • Transmission
  • Clutch
  • Car gearbox
  • Drive shafts
  • Chassis
  • Front suspension
  • Rear suspension
  • Steering
  • Brake system
  • Wheels and tires
  • Body
  • Exterior
  • Interior
  • Doors and windows
  • Body Care
  • Heating and air conditioning
  • Security systems
  • Electrical equipment
  • Equipment and devices
  • Lighting and signaling
  • Power devices
  • Electrical circuits
Astra H (2004-2009) 
  • General information
  • Introduction to the guide
  • Troubleshooting
  • User manual
  • Maintenance
  • Power unit
  • Engine repair
  • Cooling and heating
  • Power and exhaust system
  • Ignition system
  • Launch and charge system
  • Transmission
  • Mechanical gearbox
  • Automatic gearbox
  • Drive shafts
  • Chassis
  • Brake system
  • Car suspension
  • Steering
  • Body
  • Interior
  • Exterior
  • Electrical equipment
  • Equipment and devices
  • Electrical circuits
Astra G (1998-2004) 
  • General information
  • Introduction to manual
  • User manual
  • Maintenance
  • Power unit
  • SOHC gasoline engines
  • DOHC gasoline engines
  • Diesel engines 1.7 and 2.0
  • Engine repair
  • Cooling system
  • Supply system
  • Injection system (gasoline)
  • Injection system (diesel)
  • Exhaust system
  • Charge and launch system
  • Ignition system (gasoline)
  • Preheat system (diesel)
  • Transmission
  • Manual gearbox
  • Automatic gearbox
  • Clutch
  • Drive shafts
  • Chassis
  • Brake system
  • Wheel suspension
  • Steering
  • Body
  • Exterior
  • Interior
  • Doors and windows
  • Ventilation and heating
  • Electrical equipment
  • Equipment and devices
  • Electrical circuits
Astra G (1998-2004, petrol) 
  • General information
  • User manual
  • Car care
  • Maintenance
  • Power unit
  • Single shaft engines
  • Twin shaft engines
  • Engine repair
  • Cooling and heating
  • Fuel and exhaust systems
  • Starting and charging system
  • Ignition system
  • Transmission
  • Clutch
  • Mechanical gearbox
  • Automatic gearbox
  • Drive shafts
  • Chassis
  • Brake system
  • Car suspension
  • Steering
  • Body
  • Interior
  • Exterior
  • Electrical equipment
  • Equipment and devices
  • Wiring diagrams Opel Astra
  • Wiring diagrams Opel Zafira
Astra F (1991-1998, petrol) 
  • General information
  • Maintenance
  • Power unit
  • Engine in car
  • Engine removed
  • Cooling system
  • Heating and ventilation
  • Fuel supply (carburetor)
  • Fuel supply (injector)
  • Emission control
  • Ignition system
  • Transmission
  • Clutch
  • Mechanical gearbox
  • Automatic gearbox
  • Drive shafts
  • Chassis
  • Brake system
  • Car suspension
  • Steering
  • Body
  • Exterior
  • Interior
  • Electrical equipment
  • Equipment and devices
  • Electrical circuits
OpelBook.ru © 2017–2026 · Mobile version · · Sitemap: EN BG BY UA RS HR RO PL SK HU · Feedback · Site search
Astra F, petrol · Astra G, petrol · Astra G · Astra H · Astra J, petrol · Corsa B · Corsa C, petrol · Corsa C · Insignia A · Kadett D · Kadett E · Omega A · Omega B · Omega B2 · Vectra A, petrol · Vectra A · Vectra B, petrol · Vectra B · Vectra C · Zafira A, petrol · Frontera A, petrol · Frontera B · Ascona C · Vivaro A ·
We want your visit to be comfortable 🤝! We use cookies 🍪 to make that happen.