


Contents: Drive belts - checking and replacing ⬇ Exhaust gas toxicity test ⬇ Checking electrical equipment ⬇ Checking and adjusting headlights ⬇ Checking the condition of the body ⬇ Checking the front brakes ⬇ Checking the rear disc brakes ⬇ Checking the parking brake ⬇ Checking for leaks and condition of…⬇ Checking the tightness of wheel bolts ⬇ Checking the pneumatic system for…⬇ Replacing the heater dust collector ⬇
Drive belts - checking and replacing
Examination
1. Turn the crankshaft by the pulley bolt so that the belts can be inspected (or belt) along the entire length. Check the belts for cracks, signs of burning or mechanical damage. Also check the belt for glossy areas and delamination. If damage or signs of wear are found, replace the belt.
2. Check the position of the belt tensioner lever, which should be located between the stops on the plate (see photo), the lever should move between the limiters. If the lever rests against the limiter, then the belt tensioner should be replaced.
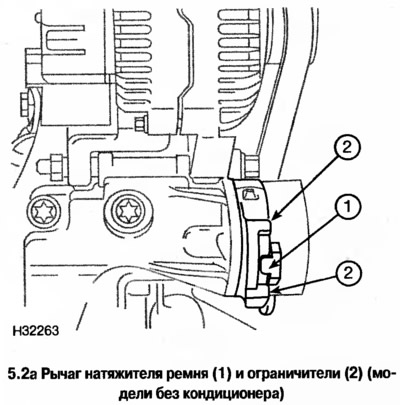
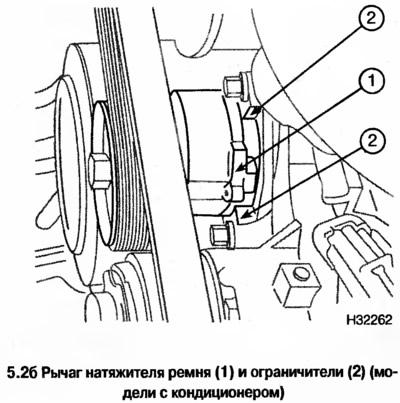
Removal
3. Remove the air filter.
4. Remember (or draw) belt route. Mark the direction of its movement with an arrow (if the belt is not changed).
5. Use a wrench to move the tensioner behind the central bolt of the roller and remove the belt.
6. Put a new belt on the pulleys and lay it along the track. Move the tensioner away, bring it to the belt and release it - the belt will tighten automatically.
Exhaust gas toxicity test
The check is performed at a car service center. However, if there are no serious deviations from the norm in the engine operation, and the engine system health indicator lamp on the instrument panel does not light up, then this check is not necessary.
Checking electrical equipment
1. Check the operation of all control and measuring instruments and electrical equipment.
2. Make sure the instrument readings are correct, check the operation of all consumers, turning them on one by one. Check the condition of the wiring and connectors.
Checking and adjusting headlights
The check is performed at a car service center.
Checking the condition of the body
Check the condition of the body and paint (for cars under warranty, the check is performed at a car service center).
Checking the front brakes
1. Remove the wheel and check the remaining thickness of the pads with a ruler through the opening in the front of the caliper.
2. For a more detailed check, the pads should be removed (Chapter 9).
3. Check the condition of the disk (Chapter 9).
Checking the rear disc brakes
1. Remove the rear wheels and use a ruler to measure the remaining thickness of the pads through the opening in the rear of the caliper.
2. For a more detailed check, the pads should be removed (Chapter 9).
3. Check the condition of the disk (Chapter 9).
Checking the parking brake
The verification procedure is discussed in Chapter 9.
Checking for leaks and condition of hoses
1. Inspect all engine connectors, check for signs of oil or coolant leakage from gaskets and seals. Pay particular attention to areas around the cylinder head gaskets, cylinder head cover, oil pump and oil pan. Keep in mind that very slight leaks from gaskets that develop over a long period of time are permissible, and that only traces of significant leaks are detectable. If leaks are detected, replace the corresponding gasket or seal, following the relevant chapters and sections of the description.
2. Also check the reliability and condition of the fastening of all engine pipes and hoses. Make sure that the wiring is securely fastened, that all clamps, brackets and brackets are present. Breakage or loss of mounting parts leads to chafing of wires and hoses and serious breakdowns.
Material published on the website: www.OpelBook.ru
3. Carefully check the radiator and heater hoses along their entire length. If you find any swelling, cracks or mechanical damage, replace the hoses. Cracks in the hose are more visible when it is bent. Pay special attention to the clamps that secure the hoses to the cooling system components. If the hose is compressed by the clamp, the hose may rupture and coolant leakage may develop. Replace all band clamps or clamps with cotter pin tightening with worm-and-screw clamps.
4. Check for signs of leakage on all parts of the cooling system (including hoses, connectors and AP).
5. If such traces are found on the cooling system parts, replace the part or gasket (Chapter 3).
6. Raise the car and check the condition of the fuel tank and filler neck, the presence of dents, cracks and other damage. Check especially carefully the pipe connecting the neck to the fuel tank. Sometimes a leak from the neck or pipe develops due to loose clamps or deterioration of the rubber.
7. Carefully inspect all rubber hoses and metal tubes connected to the fuel tank. Check for loose connections, damaged tubes, pinched hoses, and other damage. Pay special attention to the ventilation tubes and hoses, which often wrap around the neck and become pinched or clogged. Check the condition of the hoses along their entire length, to the front of the car. Replace damaged sections of the pipelines. Check the condition of all tubes and hoses of the brake hydraulic drive.
8. On vehicles with automatic transmission, check the condition of the transmission fluid cooler hoses.
Checking the tightness of wheel bolts
Remove the hubcaps and check the tightness of the wheel bolts.
Checking the pneumatic system for adjusting the lift of the rear suspension (station wagon)
The simplest check of the pneumatic system is discussed in Chapter 10. In case of system malfunction, contact a car service for repair.
Replacing the heater dust collector
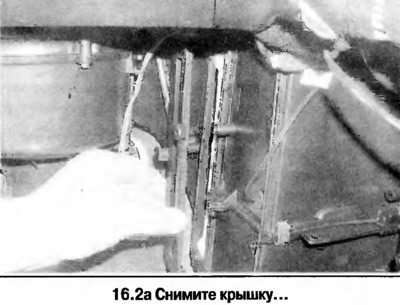
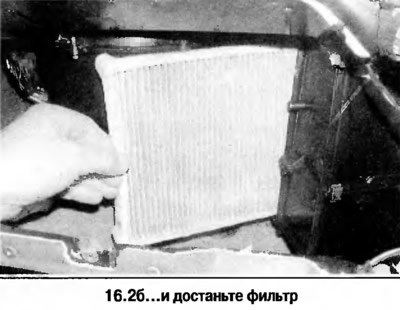
1. On the passenger side, remove the glove box and footwell air duct.
2. Replace the dust container (see photo).
Visitor comments