
Rarely do you need to change both mufflers at once. But still, the idea that the muffler, which is still very good at the moment, will also give up its spirit in the near future, is close to the truth. In order not to have to do the same work repeatedly at short intervals, it can be recommended to replace the intermediate and additional mufflers at the same time. The catalytic converter is housed in stainless steel, so this assembly is subject to wear, at least not due to corrosion.
The front exhaust pipe of cars with a 16V engine is additionally attached to the engine with a bracket.
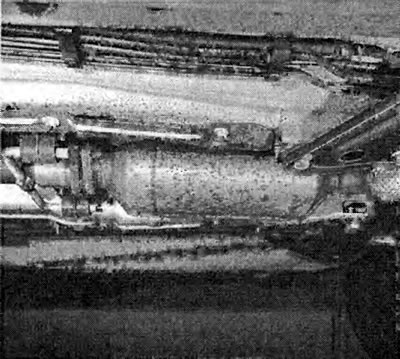
The photo shows the catalytic converter doing its job right in front of the intermediate muffler. What is worth knowing about the catalytic converter, you will find in the chapter «Reducing the toxicity of exhaust gases».
In order to be able to determine the degree of damage to the exhaust system, both mufflers must be carefully checked before installation - even at first glance they are strong.
- Thoroughly tap the dismantled but still functional muffler on all sides with a hammer, including the end sides. Tap without hesitation.
- If the sound is sonorous with each blow, then the metal is still strong.
- If in some places the sound becomes more dull, then the outer shell has already weakened and will soon break through; especially during the cold period of time with the use of salt.
- When buying spare parts, you need to consider that the gasket must also be replaced with new ones (And), bolts and nuts.
Dismantling the exhaust system
- When carrying out any work on the exhaust system, the car must stand on supports absolutely securely, so that it cannot tip over even if the pipes are strongly rotated or pulled out.
- If, when dismantling with an 8-valve engine, any screw connection of the exhaust system elements cannot be separated, then you must break it off by twisting it. Always use new bolts, nuts, gaskets and conical coil springs during assembly.
- Also replace the rubber brackets.
- Remove the individual components of the exhaust system, starting at the rear. To do this, only loosen adjacent fasteners.
- To remove the rubber brackets where needed, use pliers to pry off the metal hanger tabs or remove the mounting bracket safety clips.
- In vehicles with an 8-valve engine, the plug-in connections of the pipes are best disconnected when they are hot. The workshop uses a welding torch for this purpose. A hot air dryer may also work.
- When cold, this can also be done by using a rust remover.
- Plug-in pipe connections are disconnected by vigorous rotational movements or hammer blows. If this does not help, then the connection of the defective muffler is sawn off.
- Saw the remaining piece of pipe with a metal saw in the longitudinal direction and wring it out with a powerful screwdriver.
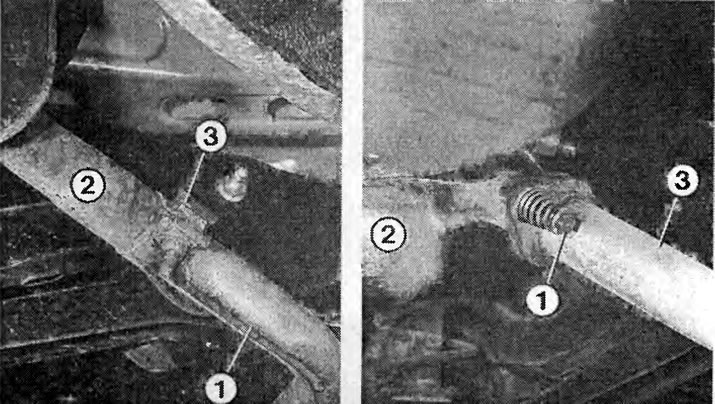
Left:The photo shows the mounting bracket (3) in 8-valve engines, which attaches an additional silencer (2) to intermediate (1).
On right: In vehicles with a 16-valve engine, an additional muffler (2) flanged to intermediate silencer (3) bolts (1), loaded with spring force.
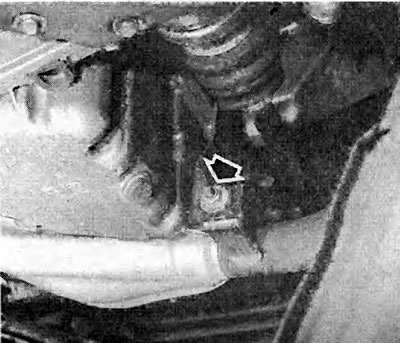
Under the bottom of the vehicle, the catalytic converter is attached to the intermediate muffler with a flange connection (arrow) at the top on rubber suspensions.
Assembly of the exhaust system
- The exhaust system screw connections will be easier to unscrew next time if you lubricate them with copper-containing grease when reassembling.
- In pipe joints, you can also use this heat-resistant grease to make them easier to separate in the future.
- When installing, pay attention to the free, tension-free installation of the exhaust system.
- Temporarily connect the parts, but put the clamps on the pipes immediately and align. Do not tighten flange connections yet.
- Suspend system of an exhaust in - rubber arms to the bottom of the car.
- The rubber rings must be subjected to the same tension.
- The exhaust system must also be at a sufficient distance from the body. By rotating or sliding pipes and mufflers in the longitudinal direction, install the system at an equal distance from the body.
- Tighten screw connections, see table. If necessary, fold back the metal tabs on the rear rubber suspension.
- If during a subsequent test drive it turns out that the exhaust system still knocks on the body in some place, then loosen the clamping clamps again (be careful with hot pipes!) and re-align the system.
Tips: A tension-mounted exhaust system draws attention with grunts and rumbling sounds. In addition, internal stresses can cause cracking.
Minor leaks in the connectors of the new exhaust system can be repaired with a special sealant for the exhaust system.
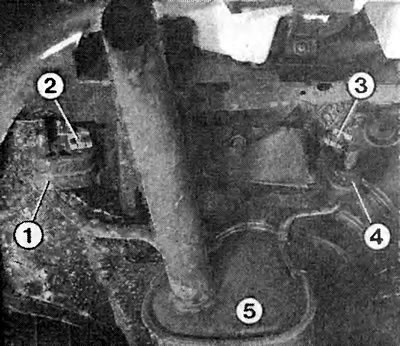
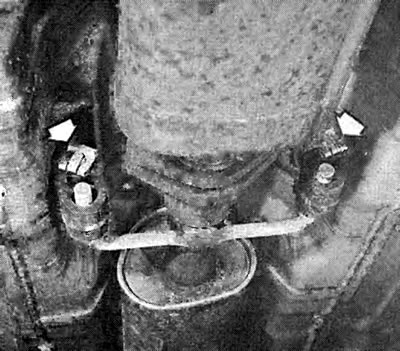
After loosening the attachment of the additional muffler (5) in front, wring out both fastening collars from behind with a screwdriver (2 and 3) and unhook the rubber hangers (1 and 4). Disconnect the additional silencer in the 8-valve Vectra model from the tubular part of the intermediate silencer by rotating it in different directions.
Visitor comments