
Dashboard lighting
This section talks about the illumination of the indicator Instruments. A description of the control lights, which are also located on the dashboard, can be found in the chapter «Tools and devices».
Dismantle the dashboard see instrument chapter.
At the back of the dashboard, turn left and remove the two white bulb sockets.
Remove the inserted light bulbs with glass bases from the socket (2 W).
Insert a new light bulb, insert the cartridge into the dashboard and turn to the right until it stops.
Light switches lighting
Remove the light switch, see chapter «Tools and devices».
On the reverse side of the light switch, unscrew the lamp socket with a screwdriver.
Bulb (0.5W) firmly soldered to the cartridge and sold as spare parts only assembled.
Screw in the new bulb and mount the light switch.
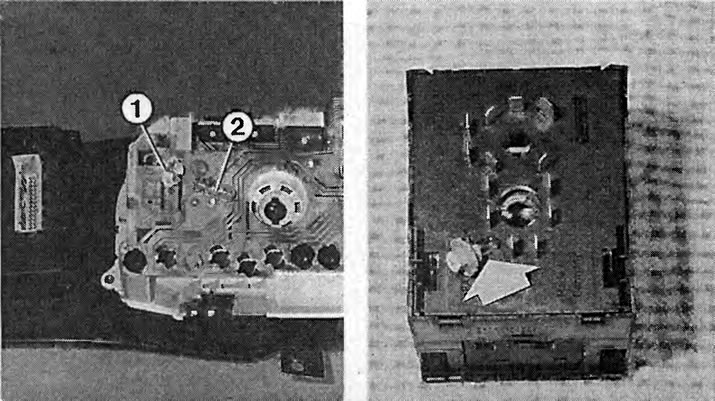
Left:the dashboard is illuminated by three bulbs. When dismantling, turn the white cartridge ¼ turn to the left and remove. 1 - lamp holder; 2 - a lamp with a glass base.
On right:There is a 0.5 W light bulb on the back of the light switch to illuminate it.
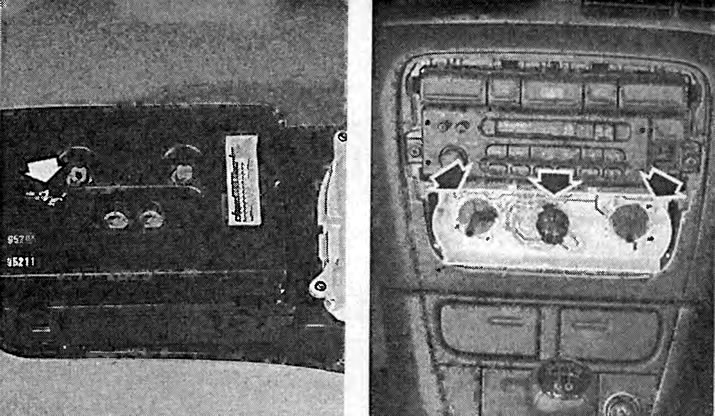
Left:display illumination in vehicles with a triple information display. The arrow indicates a 2 W backlight.
On right: after dismantling the panel, three light bulbs with a glass base are opened (arrows) heating adjustment lighting.
Heating adjustment lighting
Carefully pry the heating/ventilation control panel out of the latches with a screwdriver.
Remove the rotary control from the control module. If necessary, use a gas wrench wrapped in a rag.
Remove the appropriate 1.2W glass base bulb from the socket and insert a new bulb.
Display lighting
Remove the dashboard, see chapter «Tools and devices».
At the back of the display housing, turn to the left and remove the corresponding lamp socket.
Remove the 3W glass base bulb from the socket and insert a new bulb.
In cars with a triple display, the bulbs and sockets are firmly connected to each other and cannot be disconnected. The backlight bulbs have a power of 2 W, and the control bulbs have a power of 1.2 W.
Lighting switches
The hazard warning, air circulation, air conditioning, heated rear window, heated seats, and power windows switches have built-in lighting. Bulb replacement is not possible. Either you need to get by with an unlit switch, or you need to change it as an assembly.
Glove box lighting
When the glove box is opened, the contact switch turns on the glove box light. The lamp receives current only when the ignition is on.
To change a light bulb, open the glove box.
Use a small screwdriver to pry the cover out of the cutout.
Remove the soffit lamp from the socket (10 W, length 41 mm, DIN form K).
Insert a new light bulb and press the cover into the cutout again.
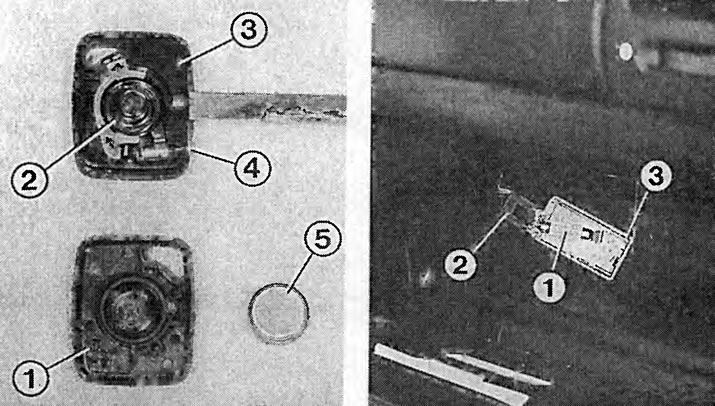
Left: a narrow screwdriver separates both halves of the body (1 and 3) key lighting. How to clean the contact spring (2) or a battery (5), or replace a light bulb (4).
On right:to get to the glove box light bulb, you need to press the lamp housing out of the cutout. The numbers indicate:
1 - soffit lamp;
2 - connector;
3 - ceiling.
Visitor comments