
Removing
1.7L engines
1. Remove the ground wire from the battery. To improve access, disconnect the crankcase breather hose from the back of the head cover.
2. Unscrew the nuts securing the voltage supply bar to the glow plugs and remove the bar from the glow plugs.
3. Unscrew the glow plugs.
2.0L engines
1. Remove the ground wire from the battery. To improve access, remove the pipe connecting the turbocharger and manifold.
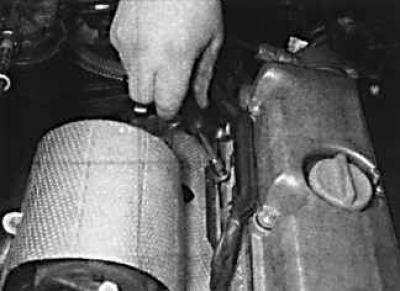

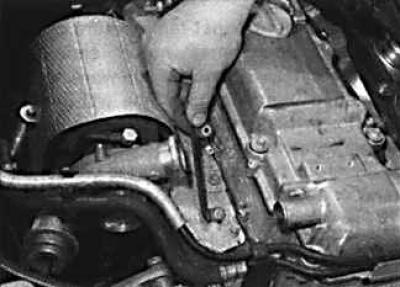
2. On early models, remove the nuts securing the voltage supply rail to each glow plug (photo on the left), and remove the voltage supply rail (photo on the right).
3. On later models, disconnect the electrical connectors from the glow plugs.
4. Unscrew the glow plugs from the cylinder head.
Examination
Check each glow plug for mechanical damage. Burnt or shattered glow plug tips can be from poor injector atomization. If there is such damage, the fuel injectors must be checked and, if necessary, replaced.
If the glow plugs are not mechanically damaged, check their electrical resistance, which should be less than 1 ohm.
Glow plugs can be tested by applying 12 volts to them. At the same time, they must be heated evenly and for the required time interval. In doing so, the following precautions must be observed:
Hold the glow plug with a special clamp or pliers.
The electrical supply circuit of the glow plug must have a fuse.
After checking, the glow plug should cool down for a few minutes.
A glow plug in good condition heats up to a reddish burner within 5 seconds. With a longer heating or heating in the middle part, and not at the end of the candle, the candle is faulty and must be replaced.
Installation
Installation is made in sequence, return to removal.
Visitor comments