


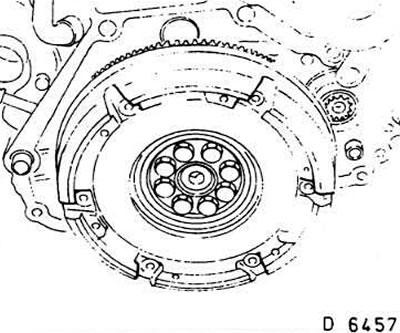
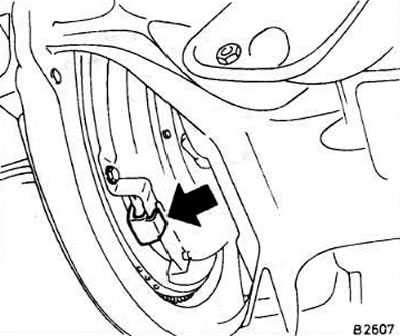
You can check what shape of flywheel is installed on your car by removing the clutch housing cover. If the car has a flywheel shown in Fig. D6457 (cup-shaped), the gearbox must be removed, and if the one shown in Fig. B2607 (see next page) - no need to remove.
Removal
Caution! After removing the clutch disc, check the condition of the sealing ring in the thrust bearing. If it is contaminated, it should be replaced.
Cars with a cup-shaped flywheel
Remove the gearbox.
Flat flywheel vehicles
Loosen the left front wheel mounting bolts.
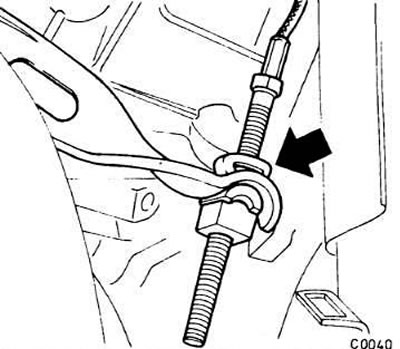
Remove the lock washers from the threaded end of the clutch cable using a screwdriver (see arrow in fig.).
Turn the clutch release lever and remove the cable.
Raise the vehicle and place it on supports.
Loosen the bolts and remove the left front wheel.
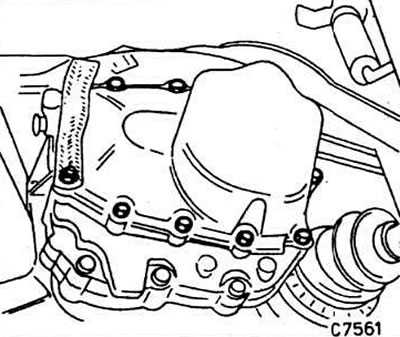
Loosen the gearbox cover mounting bolts.
Caution! Place a container underneath to collect any leaking oil.
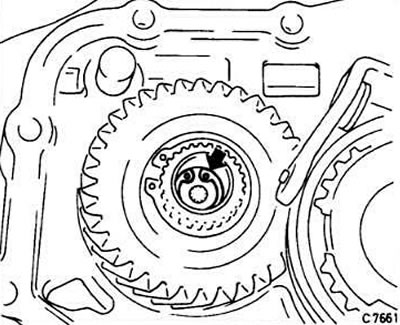
Remove the retaining ring (see arrow in fig.) from the axis.
Unscrew the threaded axle.
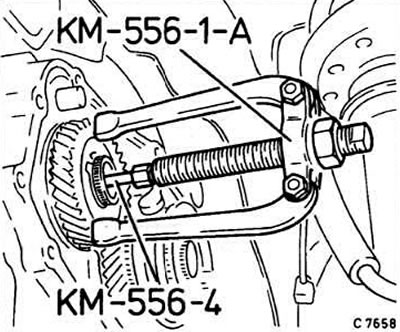
Pull out the primary shaft of the gearbox as far as it will go, using the Opel KM-556-1-A puller and the Opel 556-4 threaded insert. If the specified puller is not available, you can use a regular puller with an M7 threaded insert.
Loosen the clutch housing cover mounting bolts.
Fix the clutch with three KM-526 clamps, while pulling the driven disk back with the mounting lever.
Attention! Distribute the clamps evenly around the circumference (every 60°).
Loosen the bolts securing the clutch pressure plate to the flywheel and remove the pressure plate assembly with the driven disk.
Attention! When removing the disks, do not subject them to impacts. Otherwise, during subsequent operation, this may cause jerking and other problems in the clutch operation. Wipe the flywheel with a rag soaked in gasoline.
Examination
Check the clutch pressure plate for burns and cracks.
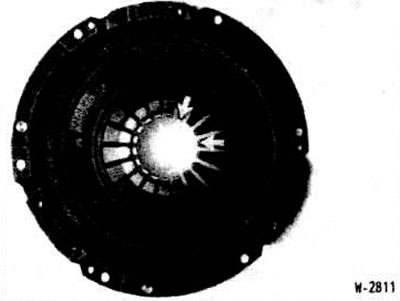
Check the pressure spring for damage (see arrows in fig.).
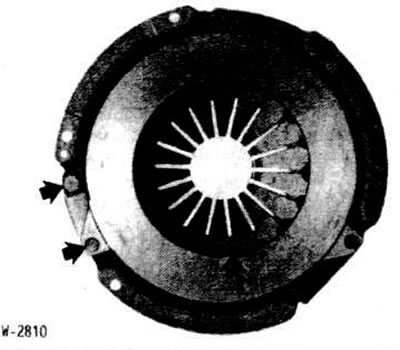
Check the reliability of the spring fastening between the pressure plate and the cover, check the riveted connections for strength. If there are defects in the connections, replace the clutch (see Fig.).
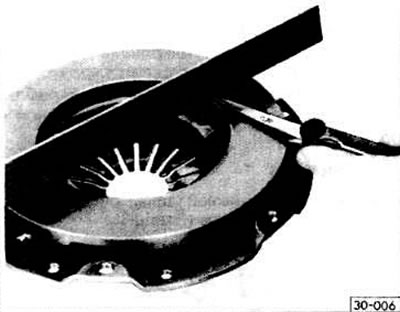
Check the working surface of the pressure plate for damage and wear. Disks with a flatness of up to 0.3 mm are still considered suitable. The check is carried out using a ruler and feeler gauge (see Fig.).
Check the flywheel for defects and replace if necessary.
Clean the clutch pressure plate and flywheel with fine-grained sandpaper.
Replace oily or damaged clutch discs.
Remove and inspect the clutch release bearing.
Installation
Check the thrust bearing sealing gasket and replace if contamination is detected.
Install the clutch release bearing.
Lubricate the hub splines with a thin layer of universal grease, for example, Opel 1948524 (90001825).
Cars with a cup-shaped flywheel
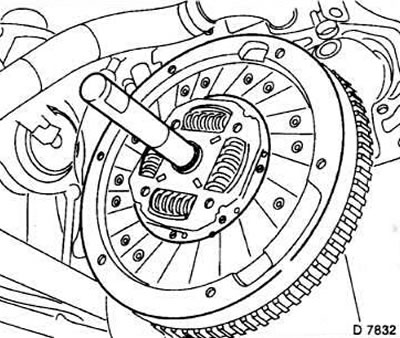
Install the clutch disc and center it using a drift, for example, Hazet 2173-1 (see fig.).
Install the pressure plate and evenly tighten its mounting bolts to a torque of 15 Nm.
Install the gearbox.
Flat flywheel vehicles
Install the clutch assembly onto the flywheel and screw in the bolts without tightening them.
(Source is on the website www.opelbook.ru)
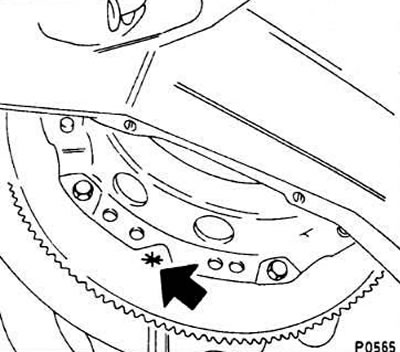
Attention! Check the alignment of marks on the clutch housing and flywheel (see arrow in Fig.P0565). The extended part of the clutch disc hub must face the gearbox.
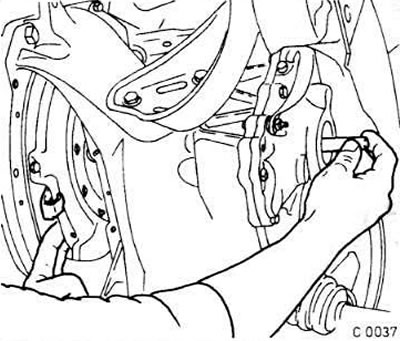
Raise the clutch disc slightly and center it with the gearbox input shaft. Carefully manually engage the gearbox input shaft with the clutch disc and gear block so that the shaft splines engage the disc splines.
Tighten the clutch mounting bolts to 15 Nm.
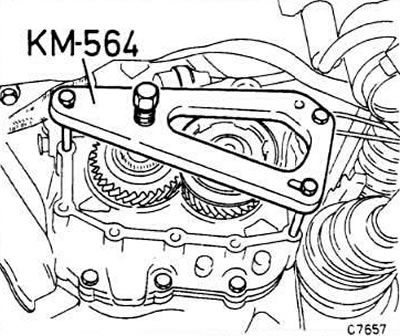
Press the primary shaft to the stop with a special device Opel KM-564. At the same time, screw the threaded axle into the primary shaft. Do not hammer the shaft with a hammer or a mandrel, so as not to damage the splines.
Install a new retaining ring on the shaft.
Apply a thin layer of grease to the mating surface of the gearbox and install the gearbox cover gasket.
Install the gearbox cover and tighten its mounting bolts evenly: M7x1.0 bolts - to 15 Nm, M6x1.25 bolts - to 20 Nm.
Compress the clutch with a crowbar, remove the three clamps.
Tighten the clutch housing cover mounting bolts to 7 Nm.
Install the left front wheel and screw in the mounting bolts without tightening them.
Lower the car.
Tighten the wheel mounting bolts crosswise to a torque of 90 Nm.
Secure the clutch cable to the clutch release lever. Install lock washers on the adjusting screw.
Check the oil level in the gearbox, top up with transmission oil if necessary.
Check the clutch adjustment.
Visitor comments