
Intake manifold (1.3 and 1.6)
2. Before removing the intake manifold, it is necessary to drain the coolant and disconnect the cooling hoses from the manifold.
3. On 1.3 engines, disconnect the wire from the coolant temperature sensor switch.
4. Disconnect the vacuum hose of the brake servo cylinder.
5. Now you can remove the intake manifold with or without the carburetor.
b. If you want to remove the carburetor first, refer to section 12 or 17.
7. To remove the manifold along with the carburetor, follow the instructions in the section that describes carburetor removal, but leave the nuts securing the carburetor to the manifold in place.
8. Unscrew the nuts securing the manifold and remove the manifold with carburetor from the cylinder head (see photo).
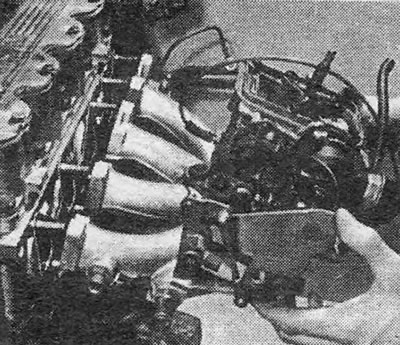
Photo 29.8. Removing the intake manifold (together with carburetor).
9. Remove and discard the carburetor flange gasket.
10. Install the manifold in the reverse order, replacing the carburetor flange gasket. Fill the system with coolant and bleed it.
Intake manifold (1.8)
11. Removal and installation of the throttle body, which on injection models plays the role of a carburetor, is described in section 25.
An exhaust manifold
12. Remove the bolts and remove the heat shield from the manifold (warm air collector).
13. Disconnect the manifold from the lower exhaust pipes by unscrewing the nuts on the connecting flange (see photo).
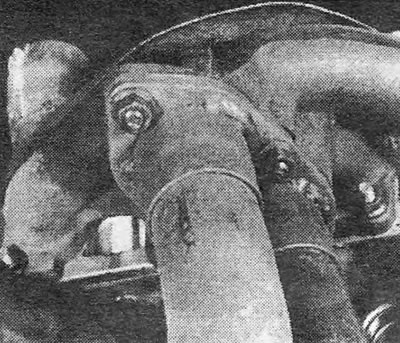
Photo 29.13. The flanges of the fall pipes at their connection to the manifold.
14. Unscrew the exhaust manifold nuts and remove it from the cylinder head (see photo).
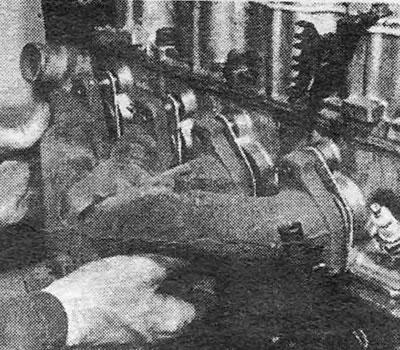
Photo 29.14. Removing the exhaust manifold.
15. Remove the manifold flange gaskets.
16. Install the exhaust manifold in the reverse order. Replace the gaskets with new ones. If the flange connection of the downpipe with the manifold is leaking gases, you can try to correct the situation by installing 2 gaskets.
Visitor comments