
This thermostat defect can be determined by the fact that the engine does not warm up to operating temperature or by the fact that the needle of the coolant temperature gauge deviates more slowly than usual. If such a thermostat defect occurs in winter, then the intensity of interior heating decreases.
Cars with 4-cylinder engine
Removing
1. Disconnect the wire terminal «masses» (-) from the battery.
2. Drain the coolant (see relevant chapter)
Attention! It is not necessary to drain the liquid completely. It is enough that its level is below the thermostat.
3. Disconnect the hose from the thermostat housing, after completely loosening the clamp and shifting it onto the hose. The thermostat is located in the pipe on the cylinder head. The upper radiator hose is connected to this branch pipe.
4. Unscrew the mounting bolts and remove the thermostat housing 1 (see illustration).
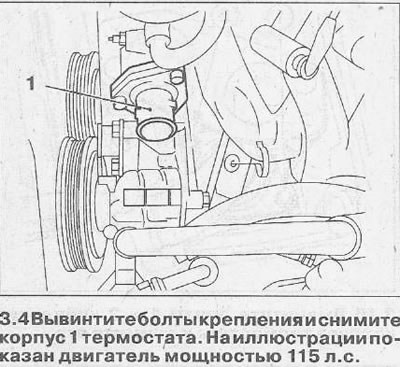
5. Check the thermostat, and if necessary, replace the housing together with the thermostat. The thermostat is only supplied with a housing. Installation
6. Install the thermostat housing, replacing its old sealing gasket with a new one, and fasten with bolts with a torque of 10 Nm. For vehicles with a 16-valve petrol engine, the thermostat housing bolts are tightened to 15 Nm.
7. Connect the hose to the thermostat housing and secure it with a clamp.
8. Check and, if necessary, correct the concentration of the coolant and remove air from the cooling system.
9. Connect wire terminal «masses» (-) to the battery.
10. Set the clock and enter the code into the radio.
Vehicles with V6 engine
Removing
11. Drain the coolant (see relevant chapter).
Attention! It is not necessary to drain the liquid completely. It is enough that its level is below the thermostat.
12. Remove the intake manifold and intake jumper (see relevant chapter).
13. Disconnect the upper hose of the cooling system from the pipeline by loosening the clamp.
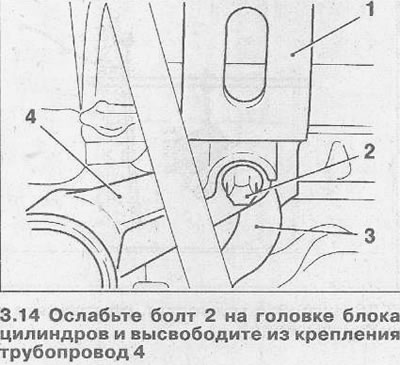
14. Loosen the bolt 2 on the cylinder head and release the coolant pipeline 4 from the mounting on the side of the thermostat housing (see illustration). Remove the lug 1 for lifting the engine and the dipstick guide tube 3 (see illustration 3.14).
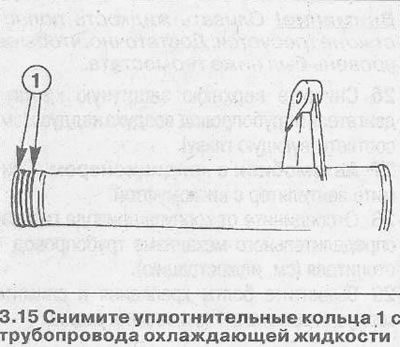
15. Remove sealing rings 1 from the coolant pipeline (see illustration).
16. Unscrew bolts 1 and 2 fastening the thermostat housing and remove it (see illustration).

Installation
17. Clean sealing surfaces.
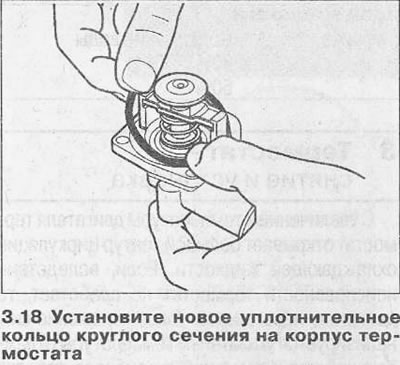
18. Install a new O-ring on the thermostat housing (see illustration).
19. Replace and secure the thermostat housing with bolts with a tightening torque of 20 Nm.
20. Connect the cooling pipe to the thermostat housing, installing new sealing rings on it. Soak rings in coolant.
21. Attach the cooling pipe and the engine lifting lug and guide tube of the engine oil dipstick to the cylinder head. Bolt tightening torque 25 Nm.
22. Put a hose on the pipeline and secure it with a clamp.
23. Install the intake jumper and intake manifold.
24. Check and, if necessary, correct the concentration of the coolant and remove air from the cooling system.
Vehicles with a 2.5L diesel engine
Removing
25. Drain the coolant.
Attention! It is not necessary to drain the liquid completely. It is enough that its level is below the thermostat.
26. Remove the top protective cover of the engine and the charge air pipeline (see relevant chapter).
27. Cars with air conditioning. Remove the viscous fan.
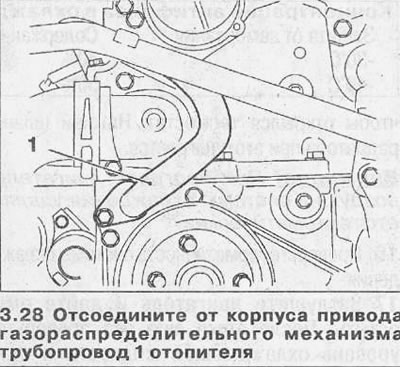
28. Disconnect the pipeline 1 of the heater from the gas distribution mechanism drive housing (see illustration).
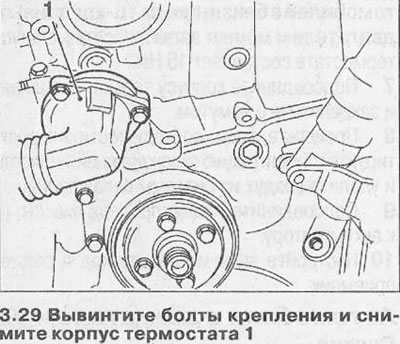
29. Unscrew the mounting bolts and remove the thermostat housing 1 (see illustration).
30. Remove the seal from the thermostat housing.
Installation
31. Clean sealing surfaces.
32. Install a new seal in the thermostat housing and install the thermostat. In this case, the air outlet valve 2 must fall into the guide 1 (see illustration).

Attention! When replacing the thermostat, it is replaced with the housing.
33. Fasten the thermostat housing with a torque of 10 Nm.
34. Connect the heater pipeline to the timing gear housing.
35. Cars with air conditioning. Install a viscous fan.
36. Connect the charge air line and install the top engine cover.
37. Check and, if necessary, correct the concentration of the coolant and remove air from the cooling system.
Thermostat check
Attention! Using the method below, you can check only the beginning of the opening of the thermostat. The full stroke of the thermostat and its final opening occurs at a temperature above the boiling point of water.
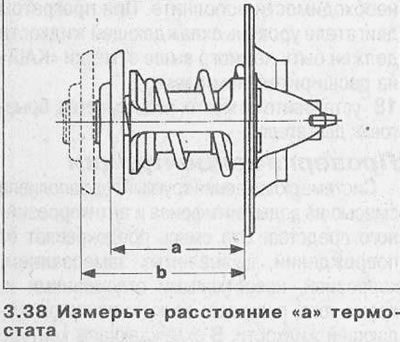
38. Measure the distance «A» thermostat (see illustration).
39. Heat the thermostat by lowering it into a container of water. In this case, the thermostat should not touch the walls of the container and should be completely immersed in water. Check the water temperature with a suitable thermometer (see illustration).
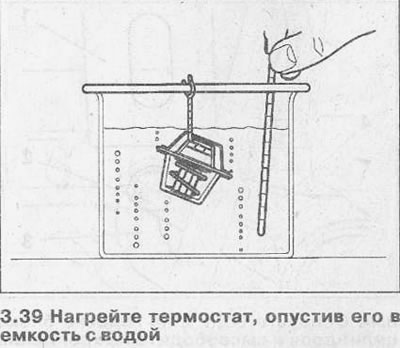
Beginning of the thermostat opening at a water temperature of about +92°C. For cars with a diesel engine of 2.5 liters - + 80°C, and the termination of opening when the water is heated to about + 102°C.
When heating water to a boil, remove the thermostat and distance «b». Compare the resulting value with the value obtained by measuring the distance «A». The opening stroke of the thermostat must be at least 8 mm.
Finally, make sure that the thermostat closes completely when the water cools down. Otherwise, replace the thermostat with a new one.
Cooling system - leak test
The tightness of the cooling system, as well as the performance of the exhaust valve on the radiator filler cap, can be checked using a special device available for sale.
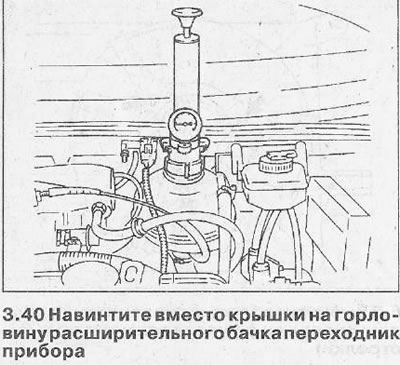
40. Screw the device adapter onto the neck of the expansion tank instead of the cap and use the pump to raise the pressure to about 1.0 (see illustration). If the pressure immediately drops, then you should determine the place of the leak and eliminate it. As a rule, the place of leakage can be seen from the drips of coolant.
If the pressure drop in the system is not accompanied by the release of coolant, then it may leak inside the engine, for example, through the cylinder head gasket or through an internal crack in the cylinder block.
41. Check the outlet valve located in the expansion tank cap by screwing the removed expansion tank cap onto the instrument and increase the pressure with a pump. The valve should open at a pressure of approx. 1.3 bar±0.1 bar (vehicles with 2.5 l diesel engine - 1.5 bar±0.1 bar).
Visitor comments