
Removing
1. Disconnect the negative battery cable and set the N1 piston to TDC.
2. Remove the crankshaft pulley.
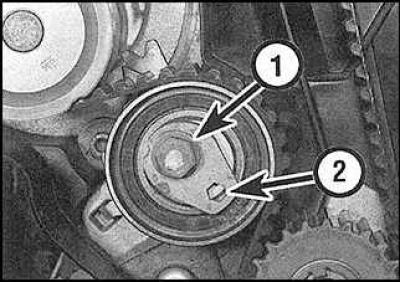
3. Loosen the bolt (1) timing belt tensioner, turn the lever (2) tensioner clockwise to the stop and tighten the bolt.
4. Remove the timing belt and note its direction of rotation.
5. Carefully inspect the belt for wear and damage and replace if necessary.
Installation
Matching sync marks
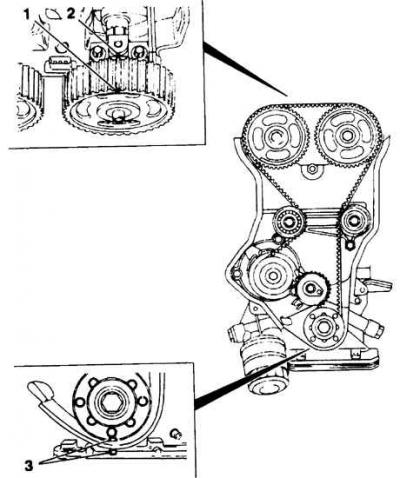
1. Camshaft sprocket marks
2. Marks on bearing caps
3. Alignment of the crankshaft sprocket mark with the slot in the oil pump casing
The location of the tensioner pointer relative to the slot in the rear plate
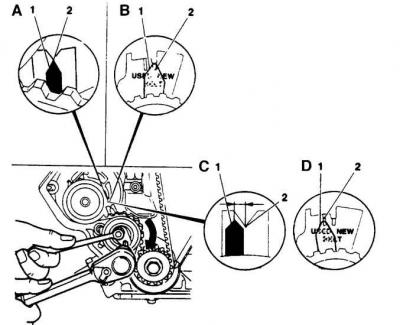
1. Tensioner pointer
2. Slot in back plate
A. New belt, tensioner without marks
B. New belt, tensioner with marks
C. Old belt, tensioner without marks
D. Old belt, tensioner with marks
1. Thoroughly clean the crankshaft and camshaft sprockets. Check the alignment of the camshaft sprocket marks with the marks on the bearing caps, the alignment of the crankshaft sprocket mark with the slot in the oil pump housing (see fig. Matching sync marks).
2. Put the belt on the sprockets.
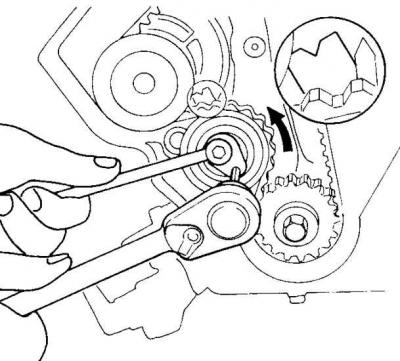
3. Loosen the tensioner bolt and turn the tensioner arm counterclockwise until it stops. Tighten the tensioner bolt.
4. Check if the timing marks are aligned.
5. Rotate the crankshaft two full turns.
6. Check the marks and loosen the tensioner bolt again.
7. If you have installed a new timing belt, adjust the tensioner so that its pointer points to the slot or mark "NEW" (see fig. The location of the tensioner pointer relative to the slot in the rear plate) and tighten the bolt.
8. If you installed an old belt, the tensioner pointer should point 4 mm to the left of the slot or point to the mark "USED" (see fig. The location of the tensioner pointer relative to the slot in the rear plate).
9. Install the remaining parts.
Visitor comments