
Removing
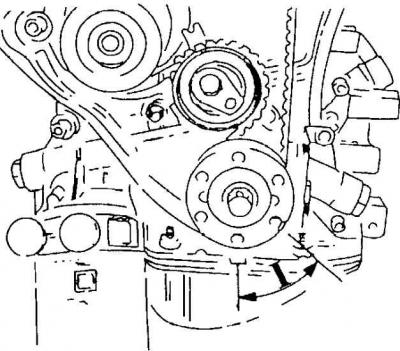
1. Remove the timing belt. Rotate the crankshaft about 60°backwards before removing the belt. This reduces the likelihood of contact between valves and pistons.
2. Remove the camshaft sprockets.

3. Loosen and remove the intake camshaft bearing cap bolts. Loosen the bolts one by one, half a turn at a time. Get bolts and remove covers. All caps are numbered for correct installation during assembly.
4. Remove the intake camshaft.
5. Remove the exhaust camshaft in the same way.
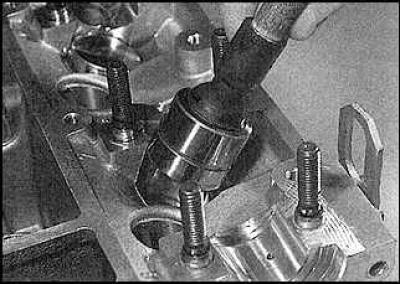
6. Remove the pushers and put them in separate numbered boxes.
Examination
1. Inspect the shaft cams and bearing journals for wear and damage and replace the shaft if necessary. Inspect the shaft bearings in the cylinder head, if they are also worn, replace the cylinder head.
2. Inspect the tappets for wear and damage. Replace if necessary.
Installation
Sealing locations
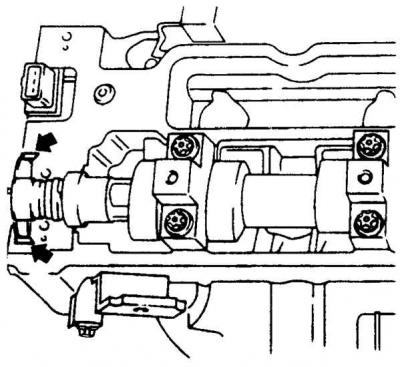
Apply sealant to shaded areas (indicated by arrows).
The sequence of tightening the bolts of the camshaft bearing caps

1. Lubricate the tappets and tappet bores with clean engine oil and install the tappets in place.
2. Check that the crankshaft is still rotated about 60°back.
3. Lubricate the cams and shaft bearing journals with clean engine oil. Install the camshafts into the cylinder head. Install bearing caps.
4. Apply sealant N15 03 170 to the surface of the cylinder head around the front camshaft bearing caps and into the semi-circular cutouts at the rear of the head (see fig. Sealing locations).
5. Tighten the intake camshaft cap nuts in the sequence shown in several steps. Tighten caps very carefully, half a turn at a time (see fig. The sequence of tightening the bolts of the camshaft bearing caps).
6. Tighten the exhaust camshaft cap nuts in the same way.
7. Install new shaft seals.
8. Install the shaft sprockets and remaining parts.
Visitor comments