
Removing
1. Remove the left cylinder head cover.
2. Remove the camshaft position sensors.
3. Remove the solenoid valves of the phase shifters.
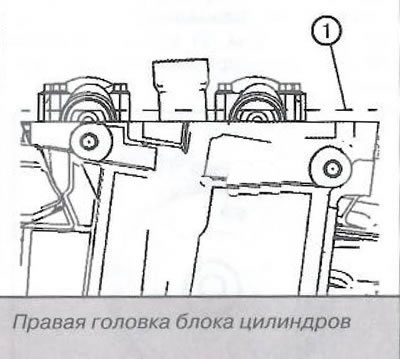
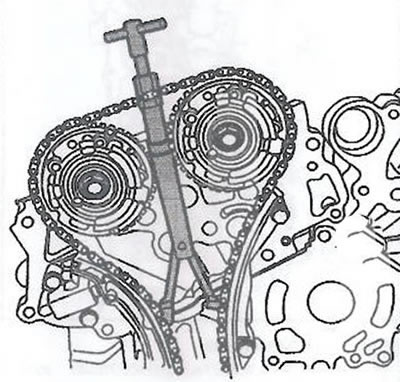
4. Rotate the crankshaft using the crankshaft balancer bolt to set the camshafts to the neutral position. The flat surfaces of the camshafts must be in line (1).
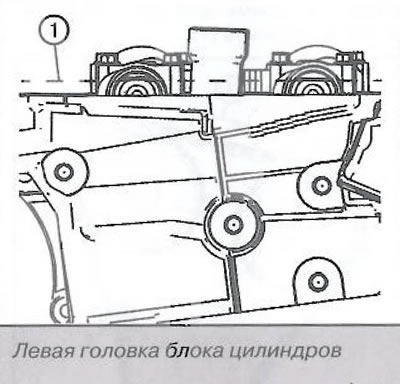
Attention. Turn the crankshaft pulley only clockwise.
5. Loosen the camshaft phase shifter bolt.
Note.
- Use an open end wrench on the camshaft hex to prevent the engine from turning.
- At this stage, do not completely unscrew the camshaft phase shifter bolt.
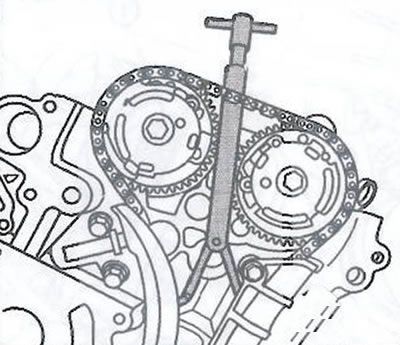
6. Unscrew the EN-48313 drive chain fixing tool so that its legs are removed.
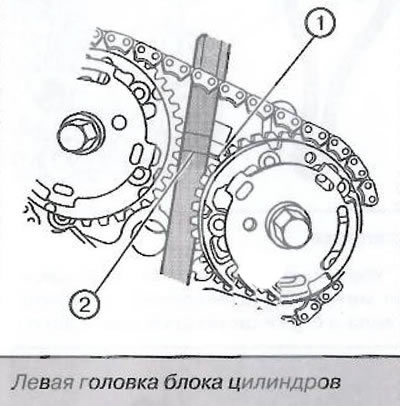
7. Insert the EN-48313 tool between the camshaft shifters behind the drive chain so that the bottom line on the tool body (2) coincided with the top surface of the cylinder head (1). This is an approximate installation position.

Note. In the illustrations below, the engine front cover is shown removed for ease of reference, but the engine front cover does not need to be removed.
8. Left cylinder head:
- Make sure the heel (4) the legs of the fixture are directed towards the front of the engine.
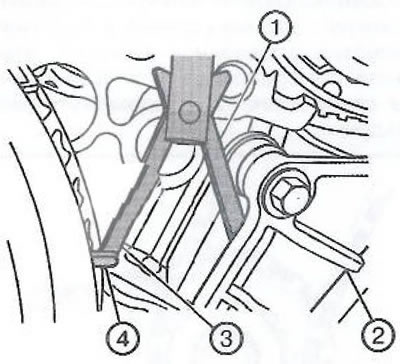
- Partially open paws (1, 3) EN-48313 fixtures by turning the T-handle clockwise,
- Insert fixture foot (1) for the guide (2) drive chain.
- Continue to open fixture EN-48313 until the legs (1, 3) do not touch the drive chain, then stop tensioning.
Note. Make sure the paw (1) of the EN-48313 tool is inserted into the recess of the link to prevent breakage when the EN-48313 tool is tightened.
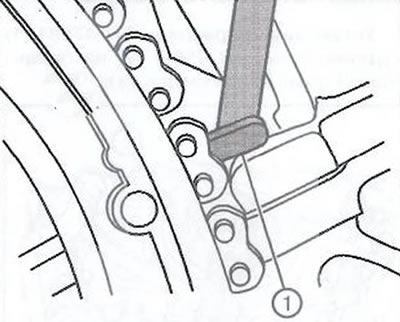
- Finger tighten tool EN-48313.
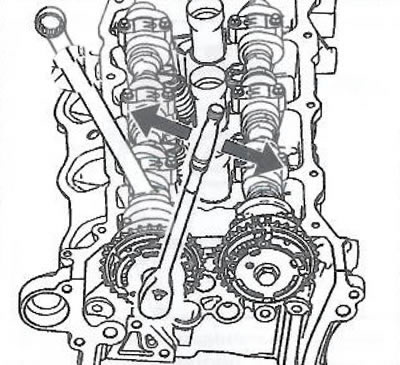
- Using an open-end wrench, turn the camshafts by the hex keys towards each other to create a slight slack in the chain between the phase shifters.
- The EN-48313 tool is now securely installed to hold the drive chain in one position.
9. Right cylinder head:
- Make sure the heel (2) the legs of the fixture are directed towards the front of the engine.
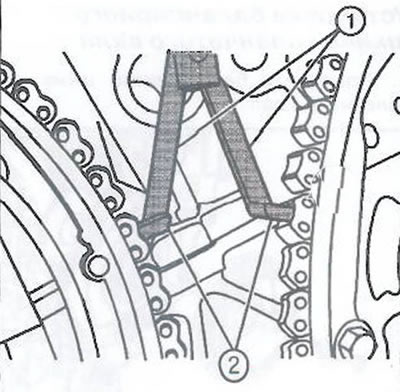
- Partially open paws (1) EN-48313 fixture by turning the T-handle clockwise.
- Continue to open fixture EN-48313 until the legs (1) do not touch the drive chain, then stop tensioning.
Note. Make sure the paw (1) of the EN-48313 tool is inserted into the recess of the link to prevent breakage when the EN-48313 tool is tightened.

- Finger tighten tool EN-48313.
- Using an open-end wrench, turn the camshafts by the hex keys towards each other to create a slight slack in the chain between the phase shifters.
- The EN-48313 tool is now securely installed to hold the drive chain in one position.
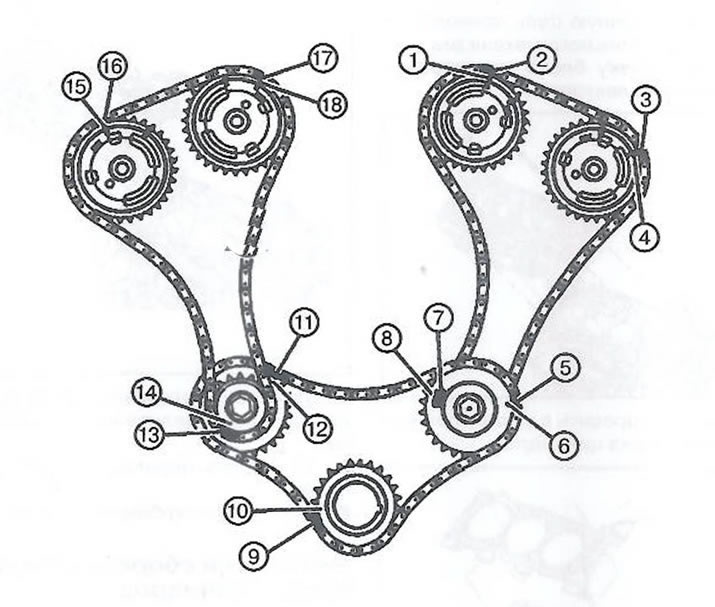
10. Mark the relative position of the drive chain and phase shifters.
Note. Verify that the camshaft drive chain and phase shifters are matched for correct assembly.
11. Unscrew the phase shifter bolt.
12. Remove the camshaft.
Installation
Note.
- Make sure that the alignment marks on the phase shifters and the drive chain match
- Do not tighten the phase shifter bolt at this stage.
1. Place the camshaft in the cylinder head and install the phase shifter.
2. Install the camshaft bearing caps.
3. Remove the EN-48313 drive chain fixing tool.
4. Install and tighten the phase shifter bolts.

Note. Use an open end wrench on the camshaft hex to prevent the engine from turning over.
5. Install the phase shift solenoid valve.
6. Install the camshaft position sensor.
7. Install the cylinder head cover.
Visitor comments