
2. Select the appropriate piston and connecting rod assembly for the specific cylinder.
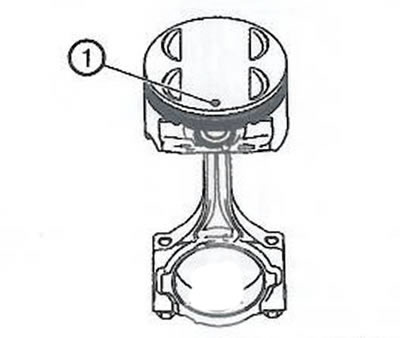
Note. The piston is not symmetrical, therefore it must be installed in the cylinder block in the correct position: dot (1) on the piston crown must point towards the front of the engine.
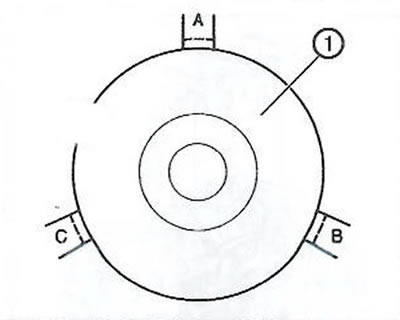
Note. Make sure that the piston ring locks are located according to the diagram shown in the figure (A, B, C).
3. Install the connecting rod bearing into the connecting rod.
Note. If the connecting rod bearings were used on a running engine, they must be replaced with new ones during reassembly.
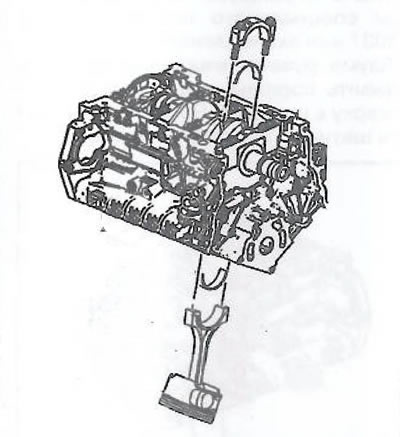
4. Install the EN 46121 connecting rod guide pins into the connecting rod bolt holes.

5. Compress piston rings using special tool EN 8037 or equivalent.
6. Using both hands, slowly insert and press the piston with connecting rod assembly from above into the cylinder. Avoid contact between the connecting rod and the cylinder bore.
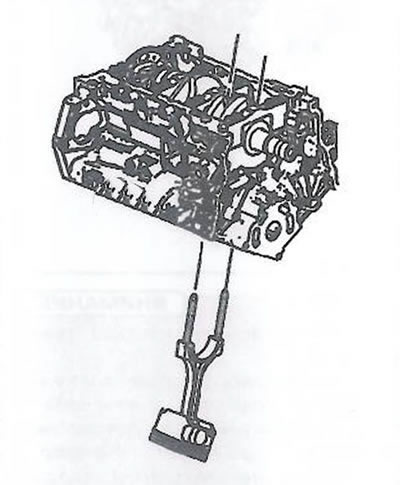
Attention. Extreme care must be taken when installing the piston with connecting rod so as not to damage the cylinder bore, oil nozzles or the crankshaft journal.
7. After the EN 8037 piston ring compressor contacts the surface of the cylinder block, carefully push the piston into the cylinder with a hammer handle. Guide the connecting rod onto the crankshaft journal using EN 46121 guide pins, carefully pushing the piston with a hammer handle.
8. Remove the EN 46121 guide pins from the connecting rod bolt holes.

9. Move the connecting rod away from the crankshaft journal to lubricate the connecting rod bearings and the crankpin.
10. Apply a moderate amount of clean engine oil to the connecting rod bearing and crankshaft journal.
11. Install the connecting rod on the crankshaft journal.
12. Install the connecting rod cover in its place and make sure that the tabs of the stoppers are on one side of the connecting rod.
Attention.
- Do not use old connecting rod bolts.
- Do not lubricate new connecting rod bolts as they are pre-coated with graphite grease. Applying grease to the connecting rod bolts will cause excessive stress on the connecting rod bolts when they are tightened, causing the proper torque to not be obtained, resulting in engine damage.
13. Install new connecting rod bolts in the connecting rod cap and tighten to 30 Nm.
14. Completely loosen the connecting rod bolts.
15. Retighten the connecting rod bolts in two steps:
- Tighten bolts to 25 Nm.
- Using tool EN 45059 tighten the bolts a further 110°.
16. During and after installation, make sure that all pistons are installed in their respective cylinders and in the correct direction. The point on the bottom of each piston must be at the front of the engine.
17. Install all other pistons with connecting rods in the same way, turning the crankshaft using tool EN 48589.
Visitor comments