


Contents: Removal ⬇ Installation ⬇
Removal
Caution: If the turbocharger has failed, it is necessary to carefully remove the gasket residue and excess oil from the intercooler system before installing a new turbocharger. Neglecting to remove the gasket residue can cause serious damage to the turbocharger and engine after starting. The presence of oil in the turbocharger air ducts can lead to increased speed engine during start-up and, as a result, serious damage to the engine.
1. Remove the front bumper trim.
2. Remove the air filter outlet duct.
3. Remove the upper intake manifold.
4. Remove the catalytic converter.
5. Remove the exhaust manifold bracket on the right side.
Note: Do not remove the right side exhaust manifold.
6. Remove the intercooler air duct.
7. Remove the generator.
8. Remove the forced crankcase ventilation pipe from the oil dipstick pipe.
9. Remove the secondary air inlet pipe.
10. Remove the secondary air outlet pipe.
11. Remove the oil dipstick with the guide pipe.
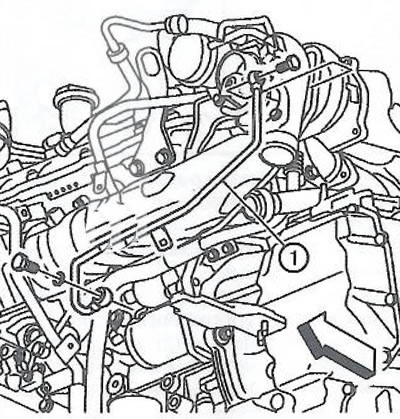
12. Remove the turbocharger cooling pressure pipe (1).
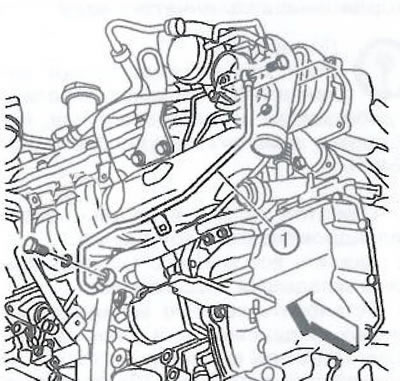
13. Loosen the fasteners (1) of the front heat shield of the exhaust manifold.
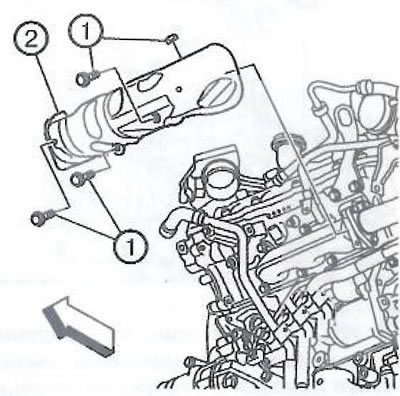
14. Remove the front heat shield (2) of the exhaust manifold.
15. Unscrew the three nuts (1) of the exhaust manifold bracket.
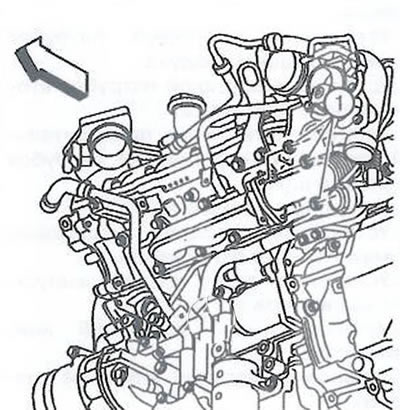
16. Loosen the nuts (1) of the turbocharger exhaust gas inlet pipe.
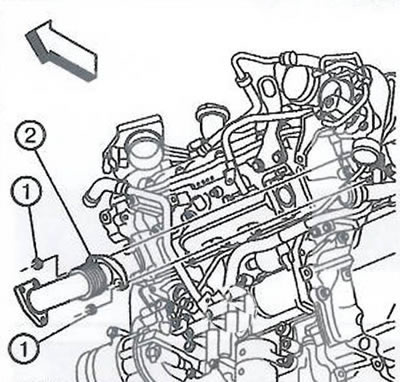
17. Remove the turbocharger exhaust inlet pipe (2).
18. Remove the turbocharger cooling inlet hose.
19. Disconnect the two turbocharger pressure oil line fasteners (2, 6) with gaskets (1, 3).
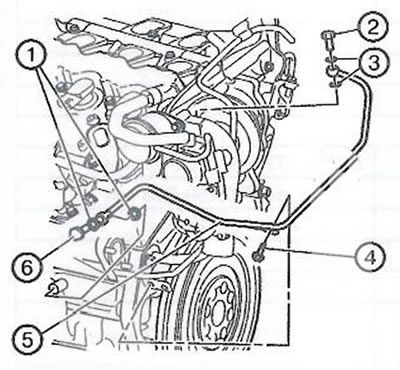
20. Remove the fastening (4) of the turbocharger pressure oil line.
21. Remove the turbocharger pressure oil line (5).
22. Loosen the mounting bolts (5) of the turbocharger return oil line.
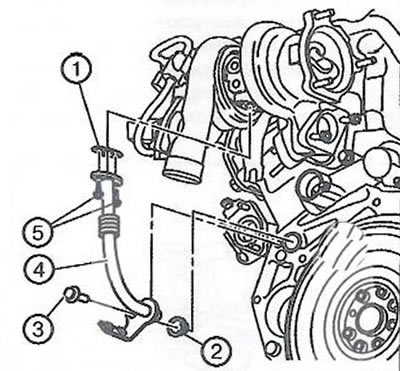
23. Loosen the mounting bolt (3) of the turbocharger return oil line.
24. Remove the turbocharger return oil line (4).
25. Remove the gasket (1) of the turbocharger return oil line.
26. Remove the seal (2) of the turbocharger return oil line.
27. Remove the forced crankcase ventilation pipe (1).
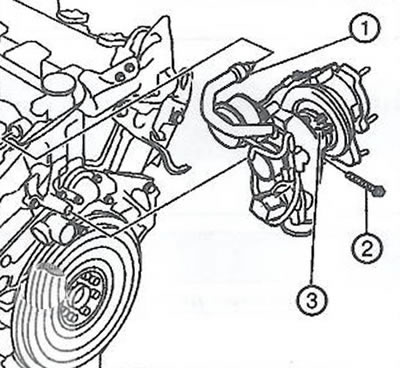
28. Loosen the turbocharger mounting bolt (2).
29. Remove the turbocharger (3).
Installation
1. Install the turbocharger and tighten its mounting bolt to a torque of 65 Nm.
2. Install the forced crankcase ventilation pipe.
3. Install a new seal (2) on the turbocharger return oil line.
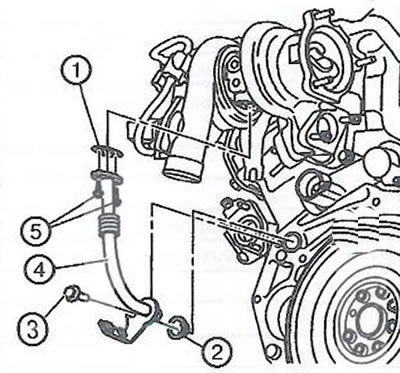
4. Install a new gasket (1) for the turbocharger return oil line.
5. Install the turbocharger return oil line (4).
6. Install two bolts (5) securing the turbocharger return oil line and tighten to a torque of 14 Nm.
7. Install the turbocharger return oil line mounting bolt (3) and tighten to a torque of 65 Nm.
8. Install the turbocharger pressure oil line (5).
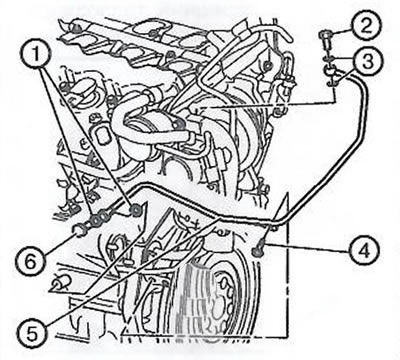
9. Install new gaskets (1, 3) of the turbocharger pressure oil line.
10. Install the bolt (4) securing the turbocharger pressure oil line.
11. Install the turbocharger pressure oil line banjo bolts (2, 6) and tighten to 30 Nm.
12. Install the turbocharger cooling inlet hose.
13. Install a new turbocharger inlet manifold gasket.
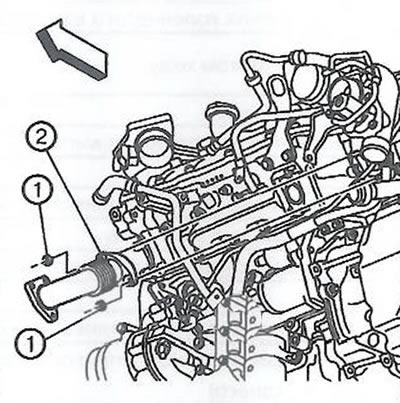
14. Install the turbocharger exhaust gas inlet pipe (2).
15. Install the exhaust gas inlet pipe mounting nuts (1) and tighten to a torque of 30 Nm.
16. Install the three nuts (1) securing the exhaust manifold bracket and tighten to a torque of 30 Nm.
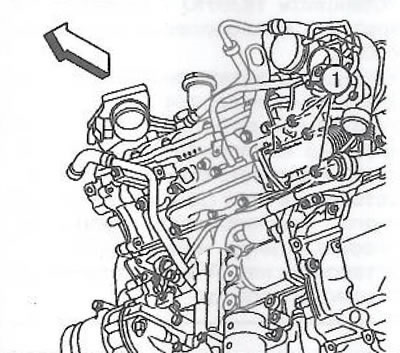
17. Install the front heat shield (2) of the exhaust manifold.
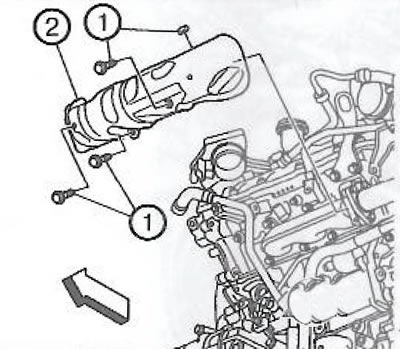
18. Install the fasteners (1) of the exhaust manifold heat shield and tighten to a torque of 10 Nm.
19. Install the turbocharger cooling pressure pipe (1) and tighten the M12 bolts to 30 Nm and the M14 bolts to 35 Nm.
20. Install the oil dipstick with the pipe.
21. Install the secondary air outlet pipe.
22. Install the secondary air inlet pipe.
23. Install the forced crankcase ventilation pipe onto the oil dipstick pipe.
24. Install the generator.
25. Install the intercooler air duct.
26. Install the right exhaust manifold bracket.
27. Install the catalytic converter.
28. Install the upper intake manifold.
29. Install the air filter outlet duct.
30. Install the front bumper trim.
31. Install a new oil filter and fill the R engine with fresh engine oil.
Visitor comments