


Installing crankshaft main bearing shells
Note: If the old crankshaft bearings were used in a runaway engine, they must be replaced with new ones during assembly.
1. Clean the slots in the cylinder block crankcase with a lint-free cloth.
2. Remove all oil from the back of the bearing shells.
3. Install the upper main bearing shells into the cylinder block. Note that the thrust bearing (1) is installed on the third main support (2).
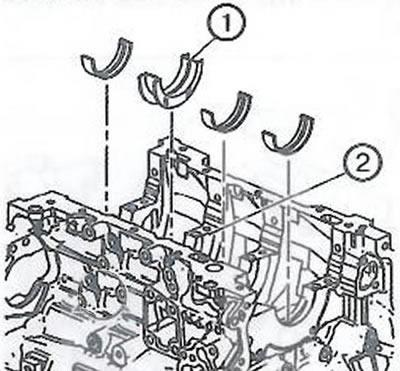
Note: Make sure the upper bearing shells have oil grooves and holes. Insert the shells with a twisting motion until the retainer tab fits into the slot. The shell should be flush with the cylinder block surface.
4. Install the lower main bearing shells into the caps.
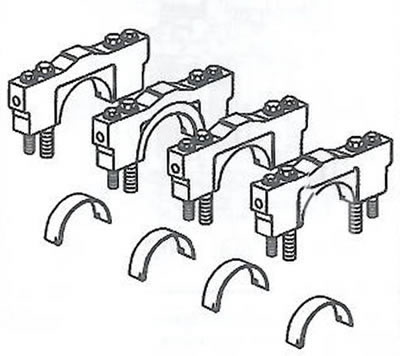
Note: Lower main bearing shells can be identified by the absence of oil grooves and holes. The shell should be installed flush with the bearing cap surface.
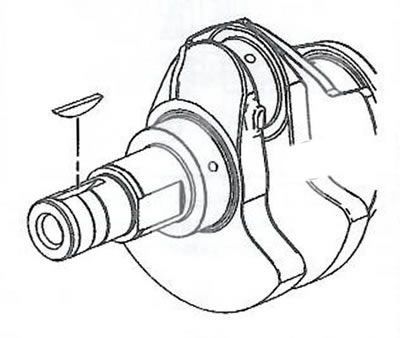
1. Install the crankshaft Woodruff key. Lightly tap the key with a brass/plastic hammer to seat it securely in place.
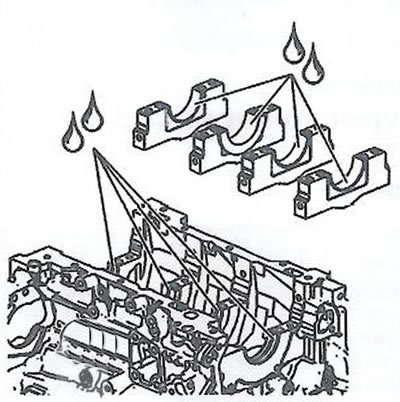
2. Apply a moderate amount of clean engine oil to the crankshaft main bearing shells.
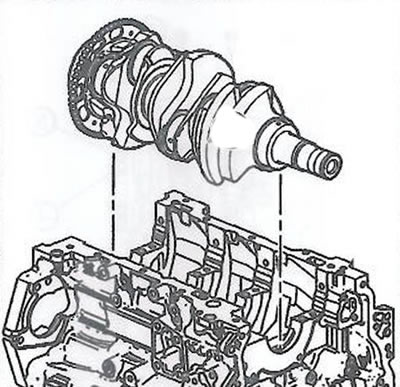
3. Carefully lower the crankshaft into place on the cylinder block.
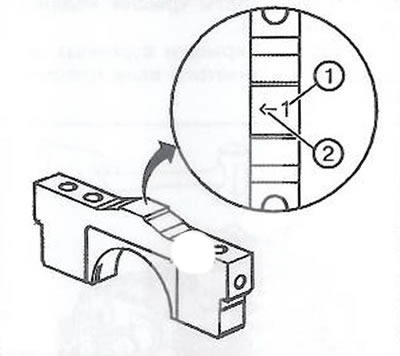
4. Determine the correct order of installation of the crankshaft main bearing caps. The caps are numbered (1) from 1 to 4, starting with the front main bearing. The arrow (2) serves to orient the bearing cap, it should point towards the front of the engine.
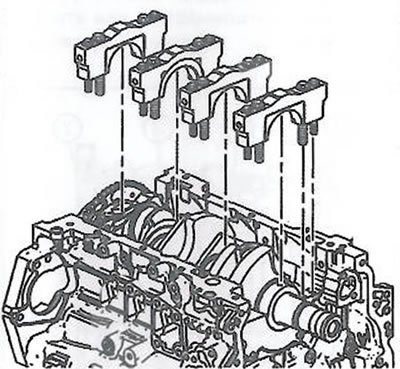
5. Install the crankshaft main bearing caps.
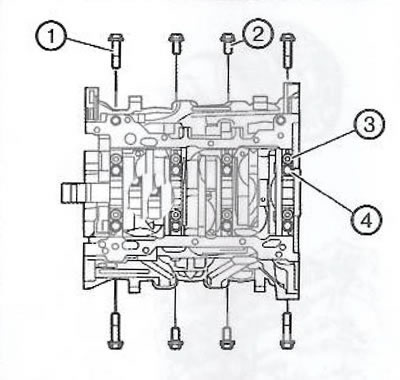
6. Install new inner main bearing cap bolts (4).
7. Install new outer main bearing cap bolts (3).
8. Install new short/inner side main bearing cap bolts (2).
The source is on the online website: OpelBook
Note: The side main bearing cap bolts have a special coating on the bolt head flange, so always use new bolts, otherwise oil leaks from the crankcase may occur.
9. Install new long/outer side main bearing cap bolts (1).
10. Tap the crankshaft main bearing caps with a plastic hammer.
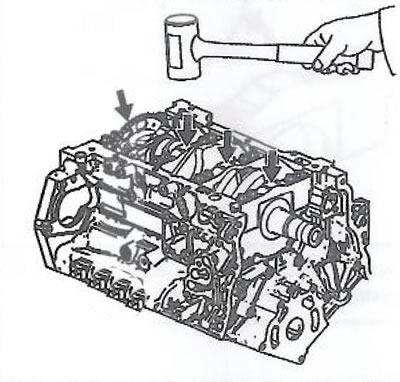
11. Tighten the inner main bearing cap bolts in the following sequence in two stages:
- Tighten the bolts to 20 Nm.
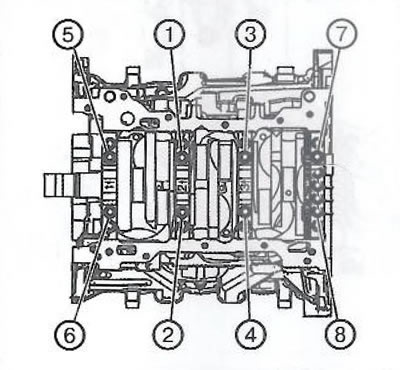
- Using the EN 45059 tool, tighten the bolts to 80.
12. Tighten the outer main bearing cap bolts in the following sequence in two stages:
- Tighten the bolts to 15 Nm.

- Using the EN 45059 tool, tighten the bolts by 110°.
13. Tighten the short side main bearing cap bolts (17-20) in the specified sequence in two stages:
- Tighten the bolts to 30 Nm.
- Using the EN 45059 tool, tighten the bolts by 60°.
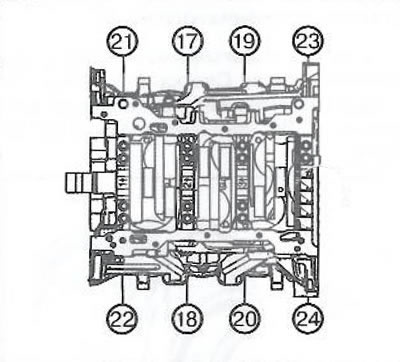
14. Tighten the long side main bearing cap bolts (21-24) in the following sequence in two stages:
- Tighten the bolts to 30 Nm.
- Using the EN 45059 tool, tighten the bolts by 60°.
15. Make sure that the crankshaft rotates quietly and evenly.
Visitor comments