
Note: Springs should be replaced as a set. Depending on the model, springs of the appropriate stiffness are installed - use only springs approved for this model.
Attention: The design of the rear suspension beam allows you to remove and install the shock absorbers only one by one, if you try to remove the shock absorbers at the same time, the rear suspension will fall!
Corsa C models
1. Support the front wheels with wheel chocks, jack up the rear of the vehicle and place it on jack stands (see chapter «Introduction»).
2. On models equipped with xenon headlights, disconnect the headlight range control rods from the holders on the rear suspension.
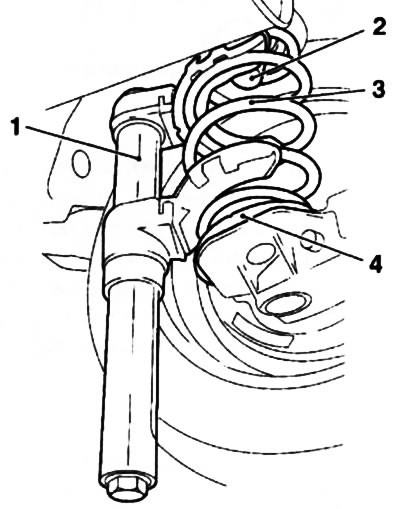
3. In order to prevent accidental release of the spring, support the corresponding trailing arm of the rear beam with a trolley jack in the area of the shock absorber (see resist. illustration).

9.3. Support the trailing arm (2) jack (1) near the shock absorber (4): 3. Bottom fixing bolt
4. Turn out the bottom bolt of fastening of the shock-absorber to the lever (see illustration 9.3)
5. Lower the jack just enough to relieve the helical spring.
6. Gently push the trailing arm down as far as possible, remove the spring and its damping seats, remove the components from under the car. Make sure that the brake hoses are not pinched or kinked. Note the position of the dampers. Check the condition of the spring and the wear of the dampers, replace if necessary.
7. Installation is done in the reverse order to the dismantling of the components. When installing dampers on a coil spring, make sure they are properly positioned. Tighten fasteners to the required torque.
8. Replace the second spring in the same way.
Corsa Combo models
9. Install the KM-6068 fixture with KM-6068-10 plates on the coil spring so that at least 3 turns of the spring are compressed (see resist. illustration).
9.9. Installing KM-6068 (1) with device KM-6068-10 on the rear coil spring (3): 2. Upper damper seat; 4. Lower damper seat
10. Compress the coil spring. Check for a secure fit on the compression tool spring.
11. Remove the spring with the upper and lower damping saddles (see illustration 9.9) from the wheel well. Slowly and carefully decompress the spring and remove it from the fixtures.
12. Check the condition of the helical spring and damper seats, if necessary, replace the relevant components.
13. Installation is carried out in the reverse order to the dismantling of the components. When installing the spring, make sure that it is correctly positioned in the upper and lower mounting sockets.
14. Similarly replace the second spring.
Meriva Models
15. Removal / installation of the helical spring on these models is carried out in the same way as on the Corsa C models. The only difference is in a slightly different design of the rear suspension elements and their location relative to each other (see resist. illustration).
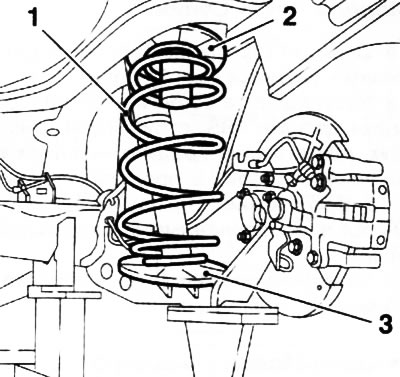
9.15. Rear coil spring (1) and damping saddles (2 and 3) on Meriva model
Visitor comments