
Removing
Astra models
Control Panel «Delphi»
1. Remove the ashtray and small stowage pocket (see chapter Body).
2. Remove the radio with mounting box (see chapter Onboard electrical equipment). If equipped, remove the navigation box.
3. Carefully prying with a suitable screwdriver, remove the decorative trim from the instrument panel.
4. Disconnect handles and wring out from a facing overlay of a lattice of deflectors. Remove the multifunction display assembly (see chapter Onboard electrical equipment).
5. Move the temperature mode selection handle to the vertical position and disconnect the control cable - try to remember the installation position of the cable.
6. Disconnect the wiring from the heater/air conditioner operation control switches.
7. Disconnect remaining control cables (try to remember the order of their connection) and remove the control panel from the trim.
Control Panel «Behr»
1. Remove the glove box (see chapter Body).
2. Remove the bottom finishing sections from both parties of the panel of devices.
3. Remove the air duct on the passenger side.
4. Remove the instrument panel (see chapter Body).
5. Disconnect the control cables from the top and bottom distribution flaps. Release the cables from the intermediate clamps.
6. Remove the ashtray and small stowage pocket (see chapter Body).
7. Remove the radio with mounting box (see chapter Onboard electrical equipment). If equipped, remove the navigation box.
8. Carefully prying with a suitable screwdriver, remove the decorative trim from the instrument panel.
9. Disconnect the electrical wiring and drive cables from the control panel - try to remember the installation position of the components.
10. Remove the control panel.
Models Zafira
Heating/Ventilation/Air Conditioning Control Cables (version A)
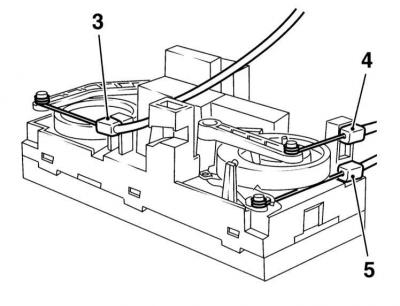
- When disconnecting a cable with a gray lock, the corresponding handle must be set to the position «Cold»
- When disconnecting a cable with a white lock, the corresponding handle must be set to the position «Windshield blower»
- When disconnecting a cable with a green lock, the corresponding handle must be set to the position «Air supply to footwells»
Heating/Ventilation/Air Conditioning Control Cables (version B)
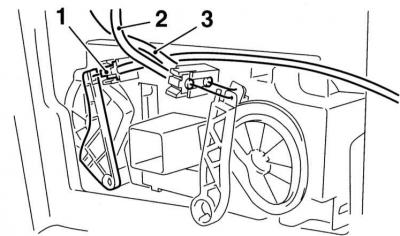
- When disconnecting a cable with a gray lock, the corresponding handle must be set to the position «Cold»
- When disconnecting a cable with a white lock, the corresponding handle must be set to the position «Windshield blower»
- When disconnecting a cable with a black lock, the corresponding handle must be set to the position «Air supply to footwells»
1. Remove the glove box (see chapter Body).
2. Remove the bottom finishing sections from both parties of the panel of devices.
3. Remove the front ashtray.
4. Turn out the lower screws and release from clamps the top part of the control panel. Release the control panel from the instrument panel.
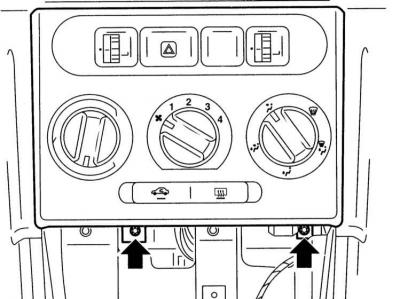
5. Using a screwdriver, carefully release the alarm switch, traction control switch (with appropriate equipment) and seat heating switch (with appropriate equipment).

6. Disconnect the control panel wiring.
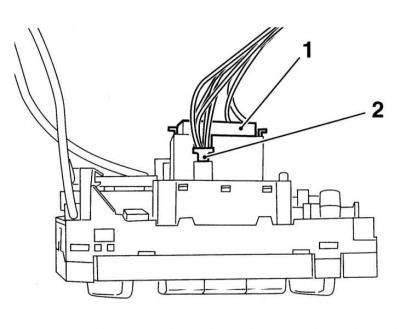
7. Release the clamps, disconnect the control rods and remove the control panel. Try to remember the order of connecting the drive cables (see illustrations Heating/Ventilation/Air Conditioning Control Cables (version A) and Heating/Ventilation/Air Conditioning Control Cables (version B)).
Installation
Installation is in the reverse order.
1. Track correctness of connection of electroconducting and cables of management. Make sure all indicator lamps are in place. When installing the Delphi panel, pay attention to the installation of the drive cable for controlling the functioning of the mixing damper - the control handle should not jump back in extreme positions.
Visitor comments