
The air conditioning system is constantly under high pressure. Never disconnect refrigeration lines or remove any system components without first discharging the system. The discharge of the air conditioning system must be carried out by an experienced specialist in a car service workshop. Always wear safety goggles when disconnecting refrigerant lines!
When replacing air conditioning system components, a certain amount of replacement refrigerant oil will be required to fill the volume of the new assembly. Use only oil suitable for use in R-134a systems (read the label on the container carefully).
Removing
Astra models
1. Discharge the air conditioning system in a specialized workshop.
2. On petrol engines 1.6 l SOHC remove the intake duct from the throttle body (see chapter Power and exhaust systems).
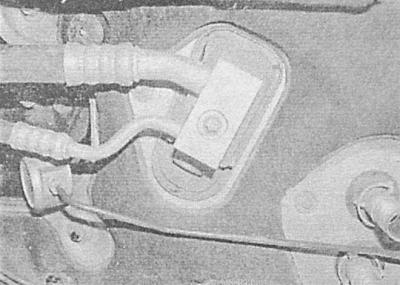
3. At the rear of the engine compartment, unscrew the nipple bolt securing the refrigeration line to the thermostatically controlled expansion valve. Screw in the bolt and remove the valve. Remove the sealing element. Tape or plug holes immediately to prevent dirt from entering the system.
When installing the valve, it is necessary to insert two guide rods - car service specialists, in order to prevent the risk of damage to the tube, usually use the Opel KM-6012 tool to press the connection into the valve.
4. Remove the glove box and the lower trim sections of the instrument panel (see chapter Body).
5. Remove the heater fan (see Removal and installation of the heater fan drive electric motor).
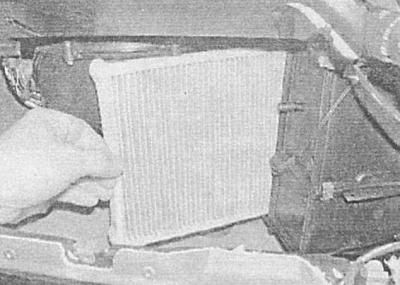
6. Remove the cabin filter (see chapter Current service), then, - if equipped, - disconnect the electrical wiring from the heated glass sensor.
7. Remove the fixing screws and remove the evaporator cover - note that the cover is seated on a sealant, all traces of which must be carefully removed from the mating surfaces.
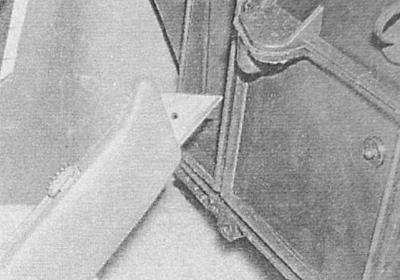
On some models, a knife must be used to remove the evaporator cover.
8. With the appropriate configuration, remove the glass heating sensor - try to remember its installation position. Carefully remove the evaporator from the heater body.
Models Zafira
Some models are also equipped with a rear evaporator mounted behind the rear quarter of the skid plate.
1. Discharge the air conditioning system in a specialized workshop.
2. At the rear of the engine compartment, unscrew the nipple bolt securing the refrigeration line to the thermostatically controlled expansion valve. Screw in the bolt and remove the valve. Remove the sealing element. Tape or plug holes immediately to prevent dirt from entering the system.
When installing the valve, it is necessary to insert two guide rods - car service specialists, in order to prevent the risk of damage to the tube, usually use the Opel KM-6012 tool to press the connection into the valve.
3. Turn out bolts of fastening of a cover of the salon filter and the evaporator, at the corresponding complete set, disconnect an electroconducting from the gauge of heating of glass.

4. Remove the filter.
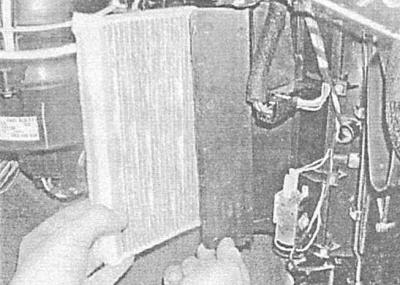
5. With the appropriate configuration, remove the glass heating sensor - try to remember its installation position. Carefully remove the evaporator from the heater housing.
Installation
Installation is carried out in the reverse order to the dismantling of the components. Charging the air conditioning system should be carried out in a car service workshop, whose specialists will also install an expansion valve.
To install the evaporator cover, you will need a special sealant - consult an Opel branded service station.
Visitor comments