
Models with 1.4 and 1.6 liter engines
For better access, remove the air cleaner cover from the right front fender as directed in chapter 4.
Remove the pump/alternator drive belt as directed in chapter 12.
Secure the pump pulley with an old drive belt, then remove the three bolts and remove the pulley.
To improve access, remove the top timing belt cover as directed in chapter 2.
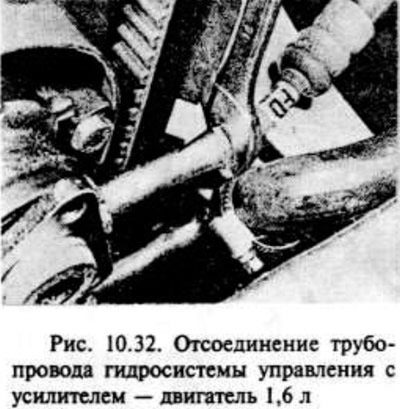
Disconnect the pipe fitting and flexible hydraulic hose from the pump. Possible fluid leakage, so shut off the pump, tube and hose (pic. 10.32.).
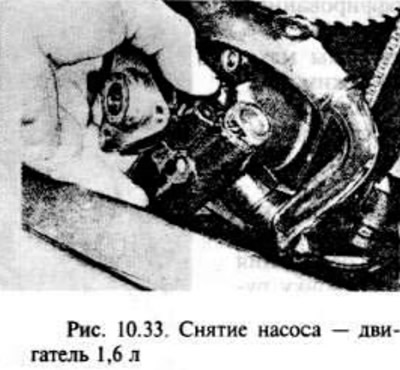
Carefully remove the pump from the engine compartment, being careful not to damage the painted surfaces (very small clearance between the engine and the body) (pic. 10.33.).
Repair of the pump is not provided, and if it fails, a new unit must be installed.
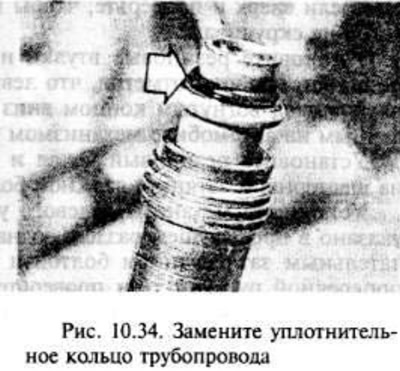
Installation is carried out in the reverse order of removal, however, it is necessary to replace the o-ring when connecting the fitting and tighten the pump drive belt as indicated in chapter 12.
Then top up the fluid level and bleed the hydraulic system as described in the previous section.
Models with 1.8 and 2.0 liter engines
Remove the pump drive belt as outlined in the previous section.
Disconnect the pipe fitting and flexible hydraulic hose from the pump. Fluid leakage is possible, therefore it is necessary to shut off the pump, tube and hose.
Loosen and remove the four pump mounting bolts. Remove the nuts, being careful not to lose the rubber seals.
Remove the pump from the vehicle.
Repair of the pump is not provided, if it fails, a new unit must be installed.
Installation is in the reverse order of removal, however, when connecting, replace the nipple O-ring and tension the drive belt before final tightening of the pump bolts as indicated in the previous section.
Then add fluid and bleed the hydraulic circuit as described above.
Visitor comments