
Removing
1. Drain the liquid from the cooling system (see related section).
2. Remove the intake manifold with flange (see related section).
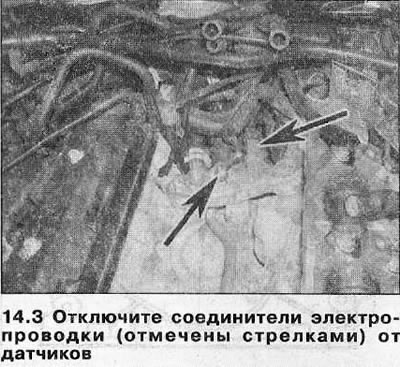
3. Disconnect the wiring connectors from the coolant temperature indicator sensor and the engine management system temperature sensor, which are screwed into the outlet pipes of the cooling system (see illustration).
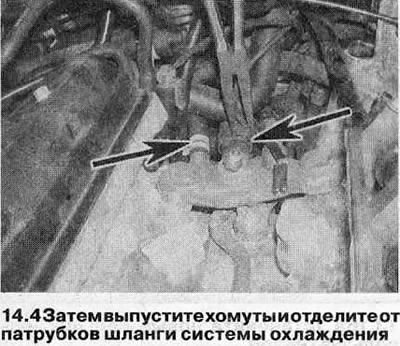
4. Loosen the clamps and separate the cooling system hoses from the pipes of the cylinder heads (see illustration).
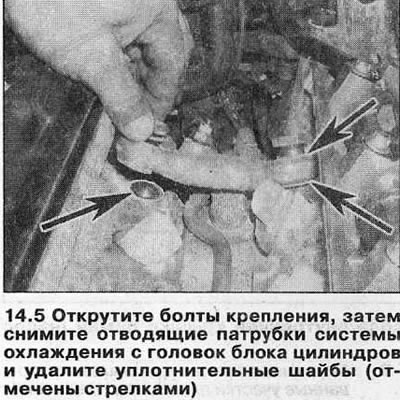
5. Turn off bolts of fastening and remove taking away branch pipes of system of cooling from heads of the block of cylinders. Remove o-rings and discard - they must be replaced (see illustration).
6. Turn off bolts of fastening and remove the top thermal insulation from a final collector of the left head of the block of cylinders. For easier access to the rear bolt, remove the front section of the exhaust system (see related section).
7. Place a suitable container under the oil filter. Unscrew the filter using the special tool if necessary and drain the oil into a container. If the filter was damaged or deformed during removal, replace it.
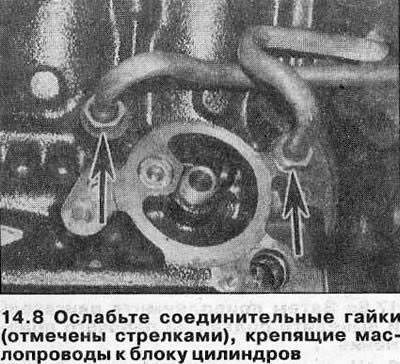
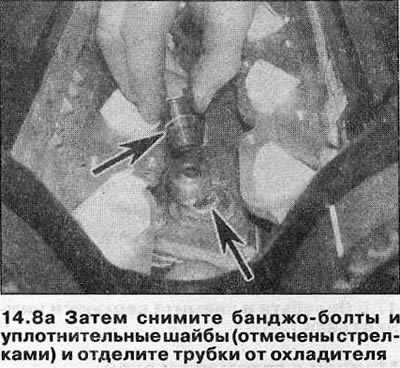
8. Unscrew the connecting nuts securing the cooler tubes to the cylinder block, then unscrew the banjo bolts securing the tubes to the cooler. Remove the sealing washers on each side of the couplings and move the pipes away from the cooler (see illustrations).
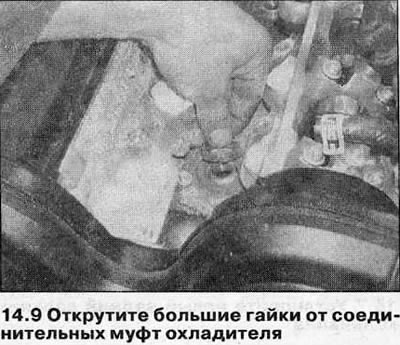
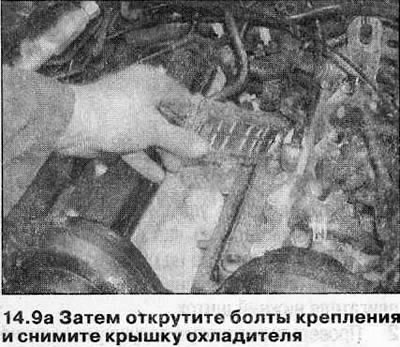
9. Remove the large nuts securing the cooler couplers to the cover, then remove the mounting bolts and remove the cover from the top of the cylinder block (see illustrations). Remove gasket (where available) - it needs to be replaced. Sealant will be required when installing a new gasket.
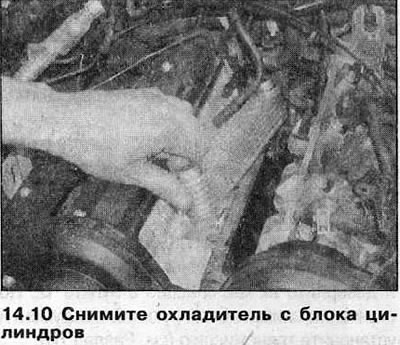
10. Lift the cooler and remove it from the engine, holding it vertically so as not to spill oil (see illustration). Remove the O-rings from the couplers and discard them - they must be replaced.
11. If the cooler is damaged, replace it.
Installation
12. Be convinced that contact surfaces of a cooler, a cover and the block of cylinders pure and dry.
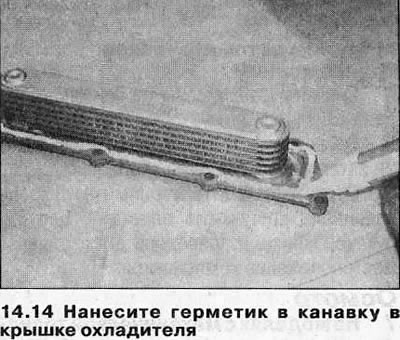
13. Place new 'O' rings on the cooler couplers, then install the cover and install the large nuts.
14. Apply a bead of suitable sealant (Opel recommends compound 15 03 296) approx. 2 mm thick into the groove on the cooler cover (see illustration).
15. Install the cooler assembly on the cylinder block and tighten the bolts of its cover evenly and gradually with the tightening force regulated specifications. Then tighten the cooler nuts with the specified tightening torque (see illustration).

16. Bring the cooler tubes into working position and screw their connecting nuts into the cylinder block a few turns. Place new sealing washers on each side of the couplers, then install the banjo bolts. Tighten the banjo bolts with a tightening torque specified specifications, then tighten the coupling nuts (see specs).
17. Place new O-rings on the outlet pipes of the cooling system, then install the pipes on the cylinder heads and tighten the fastening bolts with a tightening torque regulated specifications. Connect the hoses to the nozzles and fix them with clamps, then connect the sensor connectors.
18. Install the intake manifold (see related section), then put the exhaust manifold thermal insulation into position and (where filmed) front exhaust pipe.
19. Install a new oil filter and fill the cooling system (see related section).
20. Finally, check the engine oil level (see related section).
Visitor comments