
Outer cover
Attention! When installing, you will need new bolts securing the water pump pulleys and power steering pump.
Removing
1. Remove the stacker assembly of the multi-chamber air intake system (see related section).
2. Remove the front connecting pipe of the auxiliary air supply system (see related section).
3. Remove the auxiliary drive belt (see related section), having previously marked the direction of rotation on it, so that the belt can be correctly oriented during installation.
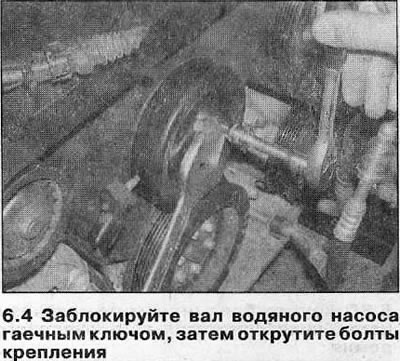
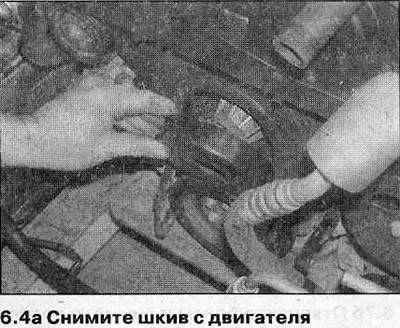
4. Loosen and remove the water pump pulley bolts by blocking the pump shaft with a wrench. Remove the pulley and discard the bolts - they must be replaced (see illustrations).
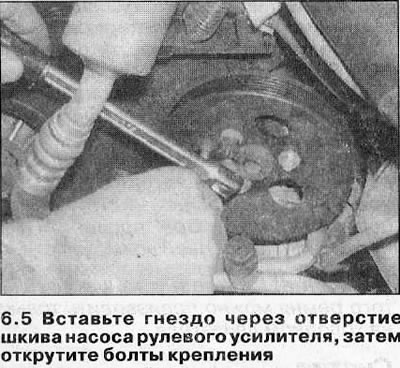
5. Insert a socket with an extension rod through one of the power steering pump pulley holes and place it on the pump mounting bolt to block the component. Unscrew the pulley mounting bolts and remove the pulley, remembering its orientation (see illustrations). Discard the bolts - they must be replaced.

6. Disconnect the right cylinder head knock sensor wiring connector and unfasten it from the toothed belt cover.
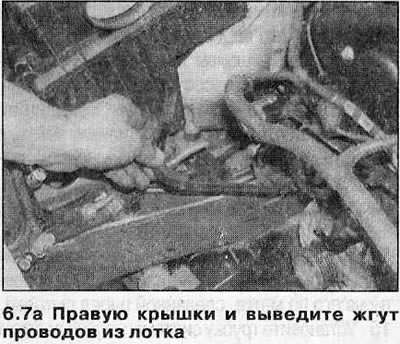
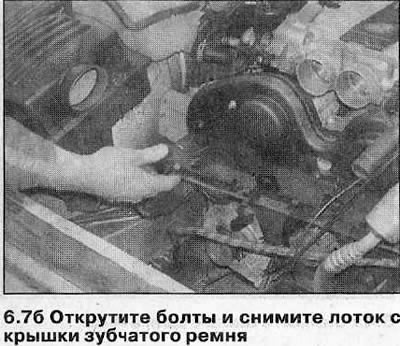
7. Unclip the covers from the front and right edges of the wire harness support tray across the timing belt cover. Disconnect the EGR valve harness connector and move the wire harness away from the toothed belt cover, then unscrew the mounting bolts and remove the tray from the belt cover (see illustrations).
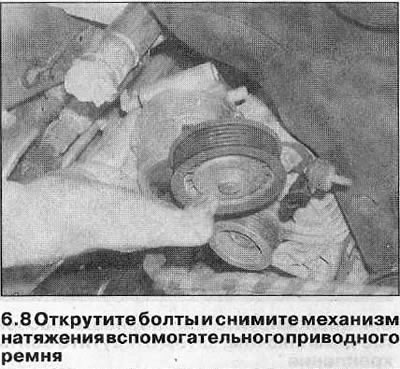
8. Turn off bolts of fastening and remove assembly of the mechanism of a tension of an auxiliary driving belt from the right head of the block of cylinders (see illustration).
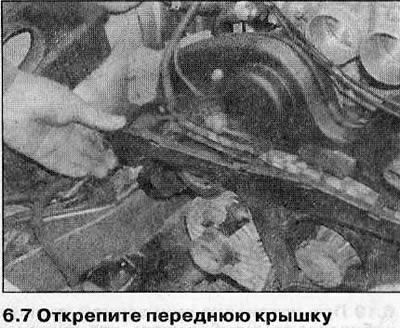
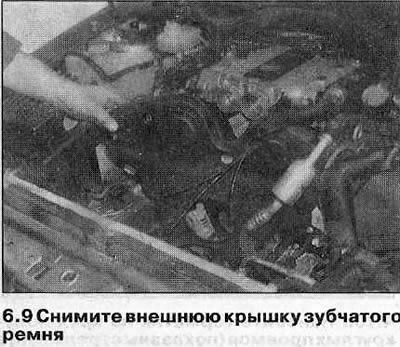
9. Unscrew the mounting bolts, then remove the outer belt cover along with the seal (see illustration).
Installation
10. Place the seal in the lid, seating it on a small amount of special glue (Opel recommends compound 08 983 341). Install the cover on the engine and tighten the fastening bolts with the tightening force regulated by the Specifications.
11. Install the auxiliary drive belt tensioner and tighten the fastening bolts with a tightening torque regulated specifications.
12. Install the wiring harness support tray onto the cover and tighten the mounting bolts securely. Place the wiring in the tray, then attach its front and right covers.
13. Install the drive belt pulleys on the water pump and power steering pump, then insert new mounting bolts. Tighten the bolts to the correct torque (see specs), then tighten them sequentially at the corners (see specs). It is recommended to use an angle gauge when doing this to ensure accuracy.
14. Install the auxiliary drive belt (see related section), orienting it to the mark made before removal.
15. Install the air supply tube and accumulator (see relevant sections).
Inner lid
Removing
16. Remove the toothed belt (see chapter 7).
17. Remove camshaft sprockets, tensioner pulley/top timing belt guide pulley assembly and bottom guide pulley (see chapter 8).
18. Drain the liquid from the cooling system and remove the water pump (see relevant sections).
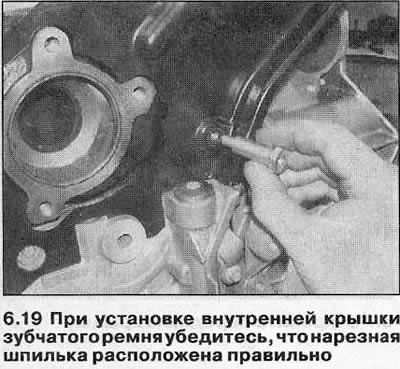
19. Unscrew the mounting bolts, marking the location of the threaded stud, and remove the inner cover from the engine (see illustration).
Installation
20. Install the cover on the engine and tighten the mounting bolts and threaded stud with a tightening torque regulated specifications.
21. Install the water pump (see related section).
22. Install idler pulley, tensioner assembly, camshaft sprockets and crankshaft sprocket (see chapter 8), then install the toothed belt (Chapter 7).
23. Finally, fill the cooling system (see related section).
Visitor comments