


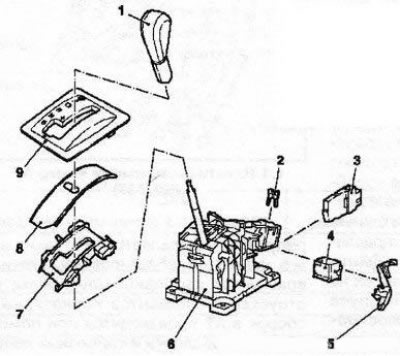
3.1 Selector lever assembly components: 1. Lever handle; 2. Retainer; 3. Control device; 4. Magnetic activator of the selector lever lock; 5. Emergency release lever; 6. Assembly body; 7. Lever guide; 8. Crawler; 9. Lid
2. Move the selector lever to position "P". Remove the center console (see Chapter 11).
3. Press the latch (see accompanying illustration) and remove the air supply hose for blowing the rear passenger seats. Disconnect the electrical wiring from the diagnostic connector, unscrew the 2 bolts and remove the connector mounting bracket.
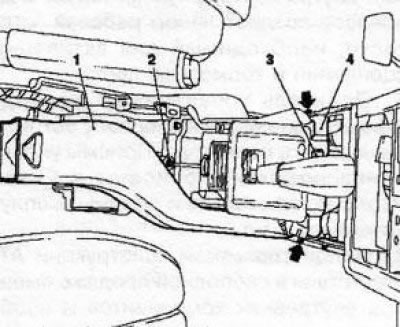
3.3 Freeing access to the selector lever assembly - the arrows indicate the diagnostic connector bracket mounting bolts: 1. Air supply hose for blowing the rear seats; 2. Retainer; 3. Diagnostic connector; 4. Bracket
4. Disconnect the gearshift actuator body from the selector lever assembly by first releasing the cable end from the latch (see illustration), and then, using a screwdriver, pry the cable retainer upward and disconnect the cable.
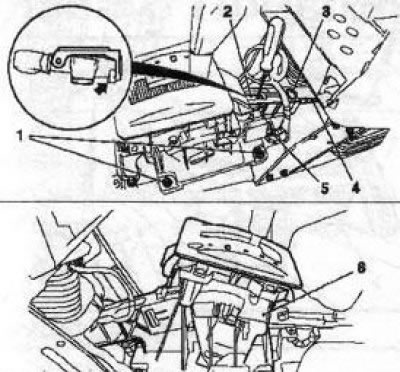
3.4 Removing the selector lever assembly (6): 1, 7. Mounting bolts; 2. Torso Latch/Tip; 3. Retainer; 4. Drive cable; 5. Electrical wiring connector
5. Release and disconnect the connector (see illustration 3.4) wiring, unscrew the 4 mounting bolts and remove the selector lever assembly. If necessary, release the control device from the clips and remove it.
[Original source on the website: OPELBOOK.ru]
6. To remove the drive cable, disconnect the cable guide sleeve from the rear bulkhead of the engine compartment, disconnect the cable end from the selector lever position sensor lever, remove the cable from the holder by slightly pulling the coupling back (see Section 2), and remove the cable.
7. Installation is carried out in reverse order. Do not forget to synchronize the drive.
Visitor comments