


Contents: Removal ⬇ Installation ⬇
Removal
Open the hood.
Disconnect the battery terminals.
Note: On vehicles from year 04 with ESP - after each battery disconnection the steering wheel angle sensor loses its basic setting. It must be recalibrated.
Disconnect the ground wire.
Drain the coolant.
Note: On the "ECO" model variant, remove the engine compartment cover at the bottom.
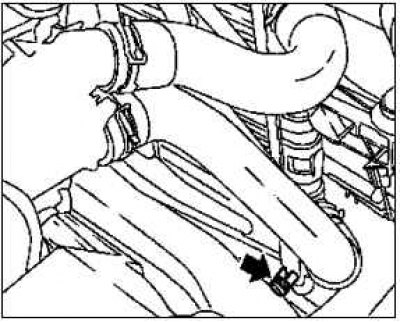
Place a receiving tray underneath.
Open the drain plug (arrow).
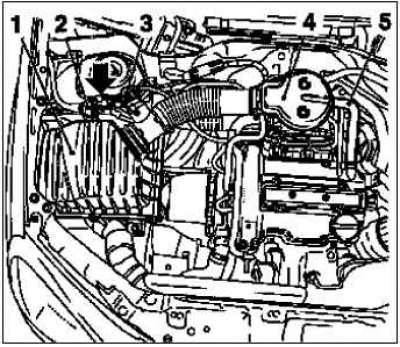
Remove the air filter housing 1.
Disconnect 2 wiring harness connectors, hot film air flow meter 3, tank vent valve 2.
Release the tank vent valve.
Remove the suction pipe 4.
Unscrew 2 nuts.
Remove the engine crankcase ventilation hose 5.
On Z 10 XEP engines: Remove the air intake hose.
Release the clamp.
Remove the bolt (arrow).
Free the front wheel on the right.
Raise the car.
Remove the front right wheel.
Unscrew the 4 mounting bolts.
Raise the car.
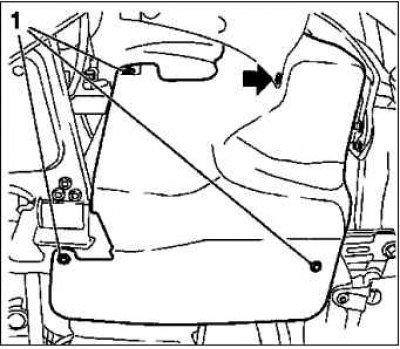
Remove the poly V-belt cover.
Remove 3 mounting bolts 1.
Remove the clamp (arrow).
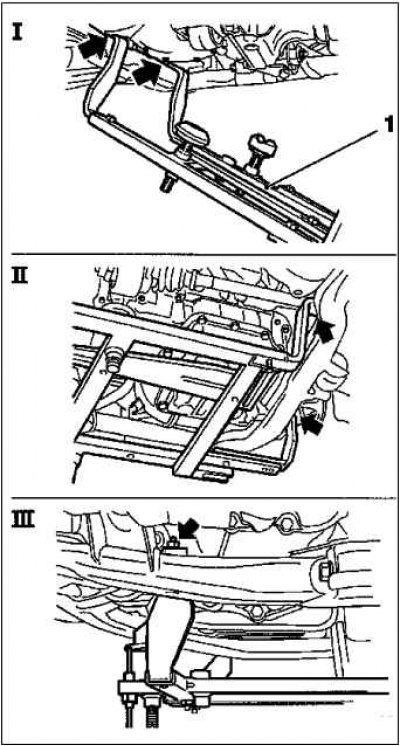
Install the KM-6169-2 tool on the gearbox.
Tighten the 2 mounting bolts to 95 Nm.
Install fixture KM-61691.
KM-6169 fit on the left side of the front axle housing (arrows, figure I).
The guide pin must be located in the hole in the front axle housing.
Install both holders on the right side onto the front axle housing (arrows, figure II).
The guide pin must be located in the hole in the front axle housing (arrow, figure III).
Tighten the 2 mounting bolts.
Install the support on the KM-6169 fixture.
Install the support bracket 2.
Tighten nut 1.
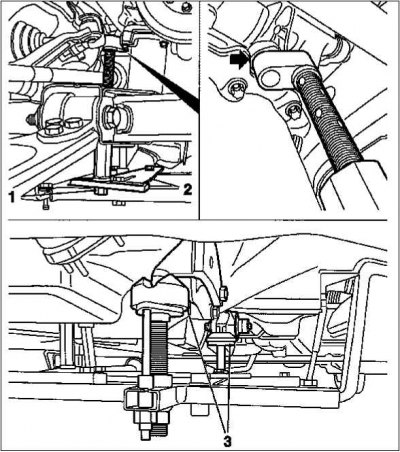
Adjust the supports.
From the gearbox side, tighten the spindles so that the fasteners 3 on the guide journals fit without a gap.
On the engine control side, insert the support journal into the cylinder block hole without clearance (arrow)
Tighten nut 1.
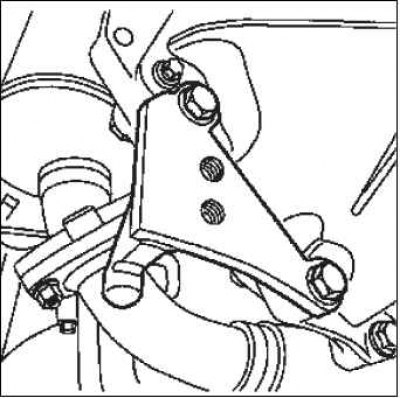
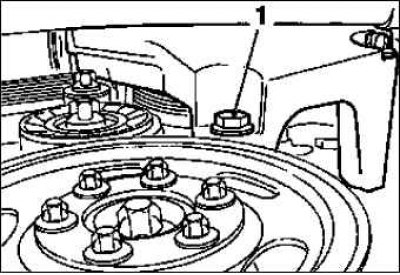
Unscrew the motor holder on the right.
Loosen the bolt at the bottom 1.
Lower the car.
Information taken from the website: OpelBook.ru
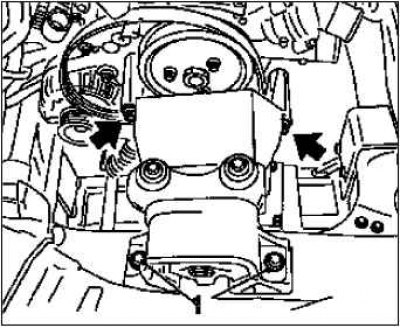
Remove the motor mount on the right.
Release the engine shock absorber block.
Unscrew 2 mounting bolts 1.
Unscrew the 2 mounting bolts (arrows).
Release the coolant pump poly V-belt pulley.
Unscrew the 3 mounting bolts.
Remove the poly V-belt.
Note: Mark the direction of rotation and observe the installation position.
Using the KM-6131 tool, tension the poly V-belt tensioner in the direction of the arrow.
Insert the KM-61301 tool.
Remove the coolant pump poly V-belt pulley.
Unscrew the 3 mounting bolts.
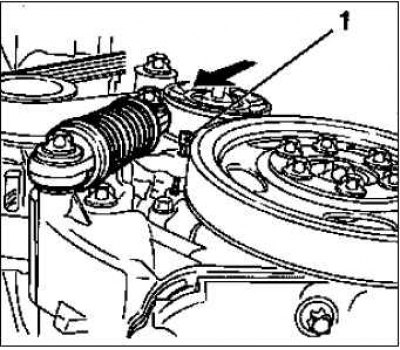
Remove the throttle body heating hose 1.
Remove the hot water supply hose 3 from the coolant pump.
Disconnect the coolant temperature sensor 2 wiring harness connector.
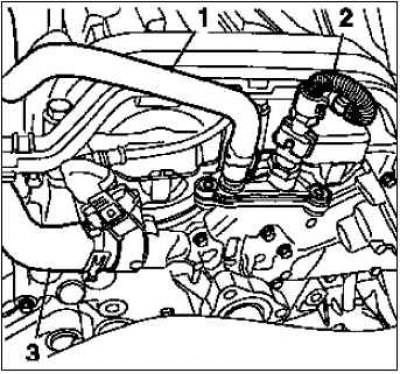
Disconnect radiator hoses 1 and 2 at the top and bottom from the coolant pump.
Release the clamps.
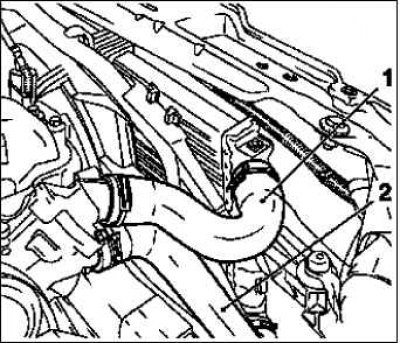
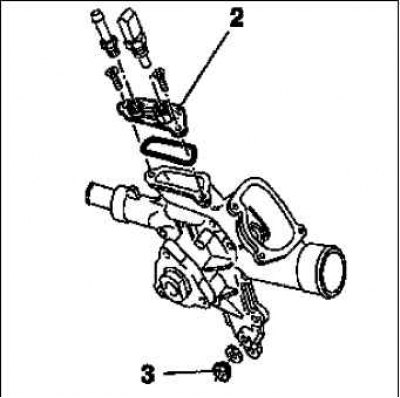
Remove the coolant pump 1.
Note: Pay attention to the guide bushings when removing.
Unscrew the 9 mounting bolts.
Note: Please note the different lengths of the mounting bolts (arrows – short bolts).
If equipped: Remove coolant pump cover 2.
Note: Consider different design options.
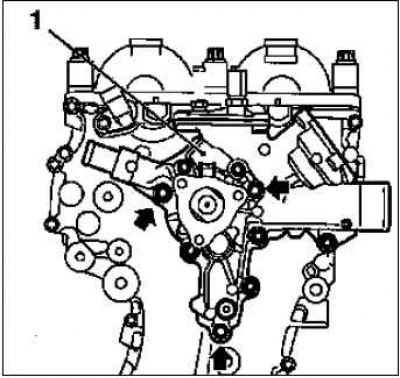
Unscrew the 2 mounting bolts.
Unscrew the threaded plug 3.
Remove the coolant hose.
Unscrew the 3 mounting bolts.
Clean the sealing surfaces of the coolant pump, coolant pump cover, coolant pipe, timing case.
Installation
When replacing parts, consider the different design options. Make sure the part numbers are correct.
Install the coolant hose.
Replace the seal.
Tighten the 3 mounting bolts to 8 Nm.
Tighten the threaded plug.
Replace the sealing ring.
Tighten the bolt to 15 Nm.
If equipped: Install the coolant pump cover.
Replace the seal.
Tighten the 2 mounting bolts to 8 Nm.
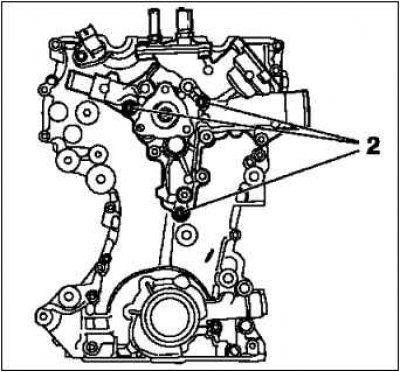
Install the coolant pump.
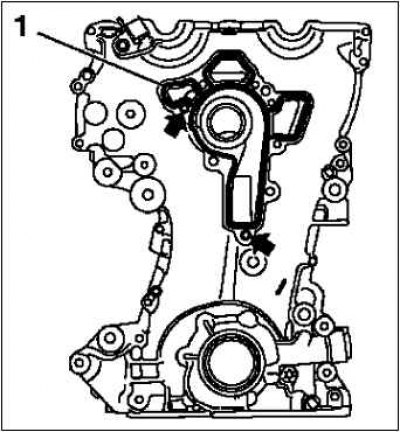
Note: Make sure the guide bushings (arrows) are seated correctly.
Replace seal 1.
Tighten the 3 mounting bolts to 28 Nm.
Connect the coolant temperature sensor wire harness connector.
Install the radiator hose at the bottom.
Secure the clamp.
Install the radiator hose at the top.
Secure the clamp.
Install the hot water supply hose.
Install the throttle body heater hose.
Secure the clamp.
Connect the flanges of the poly-V belt pulley of the coolant pump.
Tighten the 3 mounting bolts.
Install the poly V-belt.
Note: Observe the direction of rotation and installation position.
Tighten the poly V-belt tensioner using the KM-6131 tool.
Remove the KM-6130 tool.
Loosen the tension of the poly V-belt tensioner.
Secure the coolant pump poly V-belt pulley.
Tighten the 3 mounting bolts to a torque of 20 Nm.
Install the motor holder on the right.
Insert the bolt at the bottom.
Tighten the 2 top mounting bolts to 60 Nm.
Secure the engine shock absorber block.
Tighten the 2 mounting bolts to 40 Nm.
Raise the car.
Secure the motor holder to the right.
Tighten the bolt at the bottom to 60 Nm.
Remove the 2 engine and gearbox control side supports.
Remove the devices.
Close the threaded plug of the coolant drain port.
Install the poly V-belt cover.
Tighten the 3 mounting bolts.
Install the clamp.
Lower the car.
Note: On the "ECO" model variant, install the engine compartment cover at the bottom.
Install the front wheel on the right.
Tighten the 4 mounting bolts.
Lower the car.
Secure the front wheel on the right.
Tighten the 4 mounting bolts to 110 Nm.
Install the air filter housing.
Tighten the bolt.
Secure the suction pipe.
Replace the sealing ring.
Tighten the 2 nuts.
On Z 10 XEP engines: Install the air intake hose.
Tighten the clamp to 3.5 N·m.
Install the engine crankcase ventilation hose.
Connect the tank vent valve.
Connect the 2 wire harness connectors.
Connect the battery terminals.
Fill the cooling system and bleed air.
Program volatile memory.
Close the hood.
Visitor comments