
Attention: The luggage compartment must under no circumstances be used for the transport of passengers!
General information
The luggage compartment is provided for the carriage of hand luggage, bulky items and cargo. On models of the corresponding configuration, if necessary, the volume of the luggage compartment can be increased by folding the rear bench seat (see Section 12).
The dynamic characteristics of a loaded car are directly dependent on the correct distribution of the load. Try to stow heavy cargo as far forward as possible, reserving the back of the luggage compartment for carrying lighter items - remember, luggage should always be snug against the backs of the front or rear bench seats. Make sure that the stowed luggage does not rise above the top cuts of the seatbacks.
Note: Where possible, load should be placed behind unoccupied seats with their backs in an upright position.
Remember that the total mass of the vehicle, including the mass of passengers, must not exceed the maximum permissible value (see specs), the same applies to the distributed load on each of the vehicle axles.
Access
A description of how to access the luggage compartment of the car is given in Part A of this chapter (see Section 3).
Luggage shelf/curtain
To protect items stowed in the luggage compartment from prying eyes or from exposure to direct sunlight, a special decorative shelf is provided on Hatchback models, and a horizontal blind on Combo models.
Hatchback Models
decorative shelf (see illustration 17.34) from the passenger compartment, it is mounted in special side rails and held in a vertical position with the help of fixing cables, one end of which is fixed to the shelf, and the other is fixed to the tailgate. If dismantling is necessary, it is necessary to disconnect the upper ends of the cables from the fastening elements on the tailgate, lift the shelf and pull it towards you from the side guides. Installation is in the reverse order.
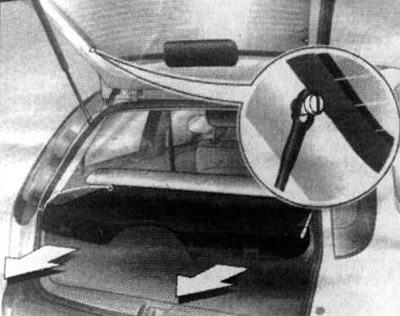
17.34. Removing the decorative luggage compartment shelf (Hatchback models)
Combo Models
Attention: Never put any, even very light, objects on a stretched horizontal curtain - the springy effect of the curtain can lead to these objects falling into the passenger compartment during sudden braking of the car and lead to unforeseen consequences!
The horizontal blind cover is mounted in a strut in front of the luggage compartment. The curtain is pulled out through the groove of the casing and fixed in special holders near the opening of the tailgate (see illustration 17.35).
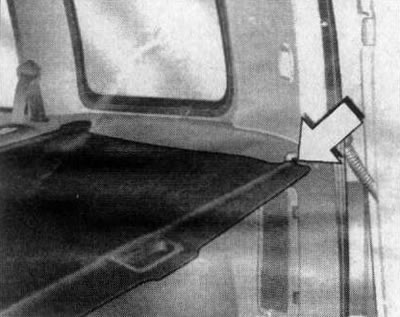
17.35. Horizontal blind (combo models)
If there is no need to use the curtain, it is rolled up inside its casing, for which it is necessary to release the edge of the curtain from the side of the tailgate from the holders - the curtain is wound automatically.
To close the shutter, it is necessary to pull it out of the casing by the handle and fix it in the end position in the holders.
To dismantle the curtain, you must first wind it into the casing, then press the button lock on the right (in the direction of the car) sides of the casing and, pulling to the left, fix the end element of the casing (see illustration 17.36). Remove the casing and from the fasteners - first the right and then the left edge. Do not leave the removed shade cover unsecured in the vehicle.
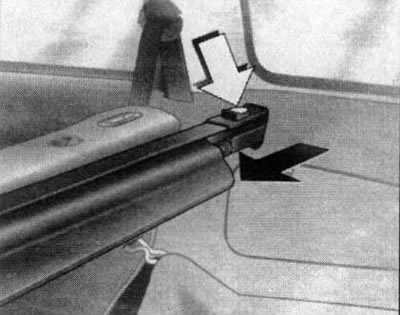
17.36. Removing the luggage cover (combo models)
Installation of the horizontal blind casing is carried out in the reverse order.
Removable barrier net (combo models)
To prevent accidental movement of cargo from the luggage compartment to the passenger compartment, Combo models can be equipped with a protective net. It is possible to install a net, both behind the rear bench seat and behind the front seats (with the rear seat fully folded see Section 12).
Installing the mesh behind the rear bench seat
Before installing the grid, it is necessary to dismantle the casing of the horizontal blind (see above).
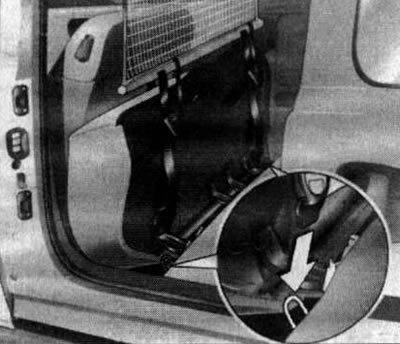
There are two mounting holes in the roof frame at the level of the backrest of the rear bench seat (see illustration 17.37), closed with decorative covers.
17.37. Mounting hole of the barrier mesh (combo models)
To install the mesh, remove the decorative covers, insert the upper anchor supports of the mesh into the mounting holes, first on one side and then on the other, fix them and close the covers. Then fold the backrest sections of the rear bench seat, adjust the length of the lashing straps on the underside of the net and secure them to the special eyelets on the floor of the luggage compartment on the right and left (see illustration 17.38). Return the rear seat back to the upright position and lock. Removing the mesh is done in reverse order.
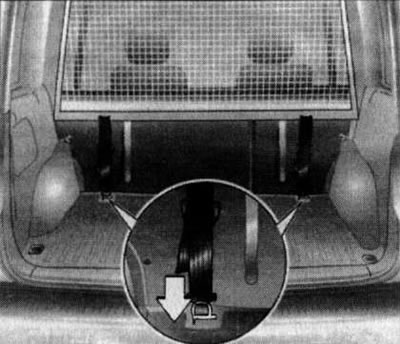
17.38. Fastening the barrier net to the eyelets in the luggage compartment (combo models)
Features of installing the grid behind the front seats
There are similar mounting holes in the roof frame at the level of the front seat backrests to install the safety net when the rear bench seat is fully folded down (see illustration 17.37). The lashing straps are attached to the eyelets under the raised rear seat cushions (see illustration 17.39).
17.39. Attaching the safety net belt when installed behind the front seats (combo models)
Permanently installed barrier net (combo models)
On Combo models of the cargo version, a barrier net is installed behind the front seats to prevent accidental movement of cargo from the luggage compartment, designed for permanent use.
To maximize the luggage compartment, the right section of the two-section luggage net can be rotated forward. Pre-fold the front passenger seat (see Section 12), then pull up the lower side latch (see illustration 17.40) right section of the barrier section and fix it in the upper position.
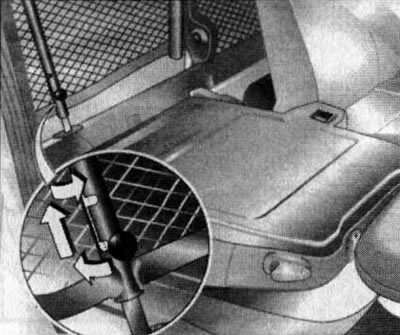
17.40. Lower side lock of the right section of the barrier net (combo models)
Attention: Moving the section of the barrier section with the lock released downwards can damage the backrest of the front passenger seat!
Pivot the net section around the pivot point forward, insert the lower side lock into the hole on the back of the folded front passenger seat backrest and secure the net. Thus, the mesh encloses the driver's seat and allows additional cargo to be placed in the front passenger's seat.
Placement and fixation of luggage
Fixation of cargo carried in the luggage compartment of the car should be carried out with the help of belts, elastic bandage tapes (for fastening light objects) or special straps (for fixing heavy objects), hooked to special anchor eyes fixed on the floor of the luggage compartment.
Bag hooks can be fitted to the back of the rear bench seat if equipped (see illustration 17.41).
17.41. Hooks (with appropriate equipment) for bags on the back of the rear seat
Storage space for spare wheel, jack, wheel wrench
Depending on the variant, the vehicle may be supplied with a spare, or a special compact wheel, or a tire repair kit (see Chapter 1, Section 5).
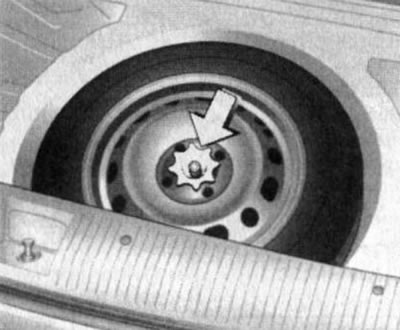
17.42. Spare / emergency wheel storage on Corsa C models - to remove the wheel, first unscrew the wing nut
On Corsa C models, space for a spare wheel is provided in the luggage compartment floor niche equipped with a removable cover (see illustration 17.42). On-board tool kit (including jack and wheel wrench) stored under the spare wheel (see illustration 17.43).
17.43. Space for storing a set of on-board tools (Corsa C models)
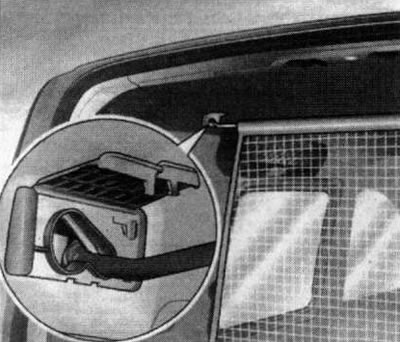
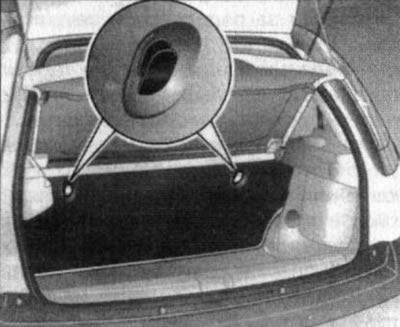
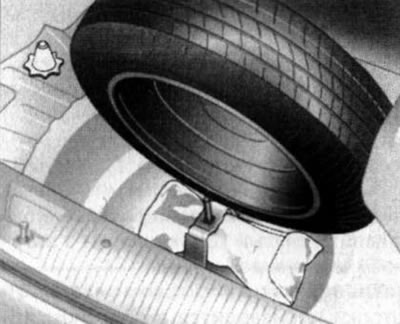
On Combo models, the spare/compact wheel is mounted with a special holder outside, under the bottom of the luggage compartment (see illustration 17.44). The on-board tool kit on these models is stored in a glove box built into the right side of the luggage compartment (see illustration 17.45).
17.44. Spare/compact wheel mounting on Combo models
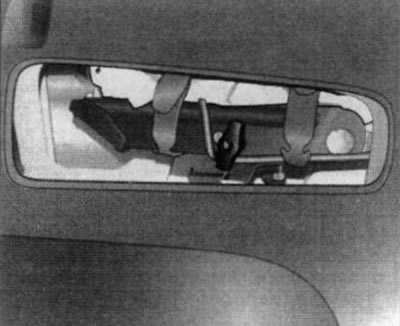
Note: On Combo Van models, the on-board tool kit is attached to the bottom of the vehicle under the front seats (see illustration 17.49).
17.45. On Combo models, the jack is attached to the glove box in the right side of the luggage compartment using a wing nut, and the tool kit is attached to the jack using elastic straps
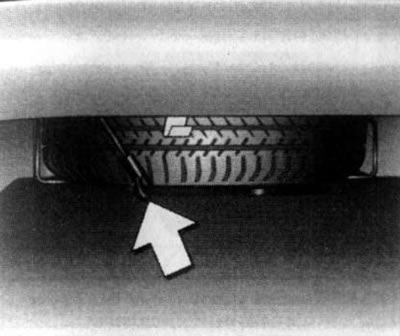
To remove the spare wheel, using the wheelbrace, unscrew the fixing screw counterclockwise until it stops (see illustration 17.46). Lift the holder with the spare wheel up and remove the holder from the hook. Slightly lower the holder and disconnect the safety cable from it, then lower the holder completely and remove the spare wheel.
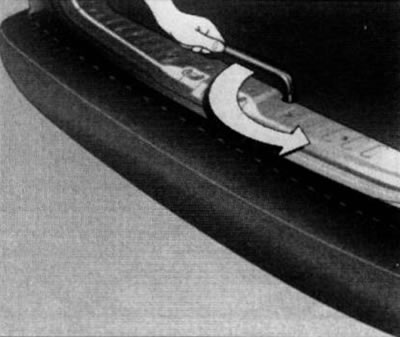
17.46. To remove the spare wheel, unscrew the fixing screw until it stops (combo models)
Installation is in the reverse order. After replacement, place the removed wheel in the holder with the outer side up.
When the car is equipped with a compact type spare wheel, a special spacer ring is installed between it and the bottom, designed to compensate for the smaller size of the wheel and securely fasten it in the storage position. If, after replacement, a full-size wheel is installed in the holder (damaged), the spacer ring does not need to be installed.
Storage space for first aid kit and warning sign
On all models described in this manual, the first-aid kit and the warning triangle are stored together.
On Corsa C models, the first aid kit and warning triangle are attached to the right (in the direction of the car) side of the luggage compartment with elastic straps (see illustration 17.47).
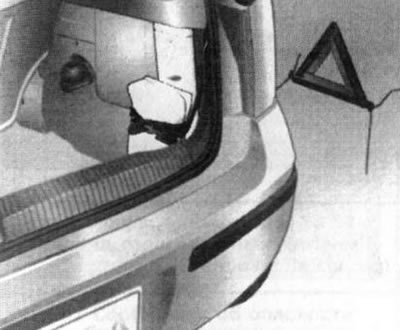
17.47. Storage space for first aid kit and warning triangle on Corsa C models
On Combo Combi/Tour models, first aid kit and badge are stored in the left glove box (see above) luggage compartment (see illustrations 17.48).
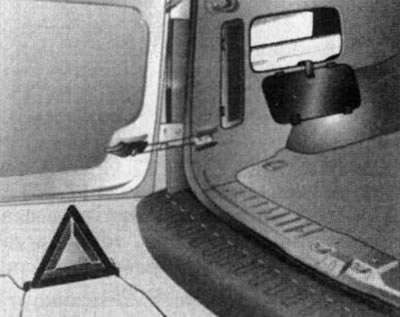
17.48. First aid kit and warning triangle on Combo Combi/Tour models are stored in the left storage compartment in the luggage compartment
On Combo van models, a first aid kit and a warning triangle are located in a glove box behind the front seat (see illustration 17.49).
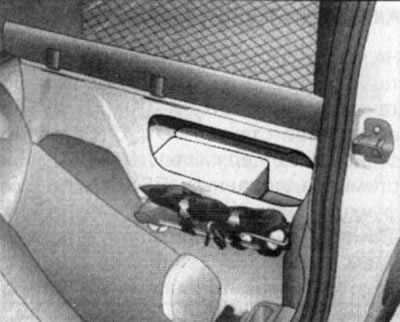
17.49. On Combo van models, there is a storage box behind the front seats to store a first aid kit and a warning triangle
Upper trunk
Note: The roof rack is not included with the vehicle and must be purchased separately.
Before purchasing a roof rack, consult your Opel Dealership about roof rack designs approved for your specific vehicle model. The installation of the trunk must be carried out in accordance with the requirements of the instructions attached to it and only with the use of special fasteners that are equipped with the roof of the car. To access the fasteners, you must first pry with a coin and remove the decorative covers. When installing, first insert the front edge of the appropriate cover, and then press the rear edge to lock the cover in place.
Seats
See Part A for information on adjusting and converting seats (see Section 12).
Visitor comments