


Window lift controls
The models covered by this manual may be equipped with manual or electric windows.
Manual drive
Manual control of the upper hatch is carried out using rotary handles located on the inside of the corresponding door (see illustration 17.21). Turn the handle clockwise or counterclockwise to set the glass to the required position.
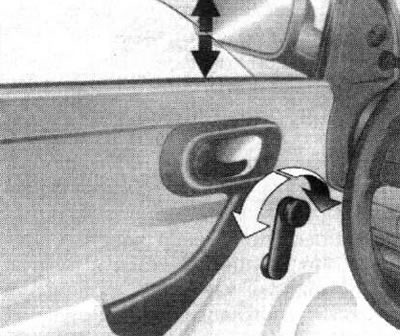
17.21. Driver's door window manual control rotary handle
Electric drive
Warning: Before closing the windows, make sure that none of the passengers have their hands or objects out of the window - it is recommended to explain to all passengers the rules for the safe use of window lifts!
On models with the corresponding configuration, the front door window lifters can be equipped with electric drives. The electric drive of the window lifters only functions when the ignition is on.
The driver's door armrest is equipped with key switches for controlling the electric windows of the driver's and front passenger doors (see illustration 17.22), and in the armrest of the front passenger door an individual switch for this door. The functional readiness of the switches is confirmed by the activation of the LEDs built into the keys.
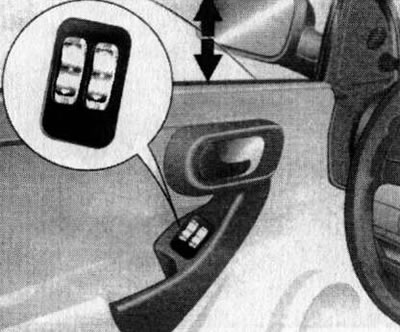
17.22. Key switches for controlling electric windows
To lower/raise the glass, you need to press the corresponding edge of the switch key. When pressed briefly, the glass will lower/raise a certain distance. If you hold the key longer, the glass will automatically lower/raise to the extreme position. In this case, to stop the glass in an intermediate position, you need to press the same edge of the key briefly.
If, when moving to the upper position, the control sensor detects increased resistance to lifting the glass due to foreign objects getting between the glass and the upper frame of the driver's door, the glass will stop moving forward and immediately lower.
If the resistance to lifting the glass is caused by other reasons (for example, due to the presence of ice on the outside of the glass) you need to press the button for the corresponding door repeatedly until the glass gradually rises completely.
Electric window lifter failures
In case of overload in the electric drive circuits due to too frequent repeated action on the switches or for other reasons, the power supply will be automatically interrupted for a short time. If after some time the electric drive does not activate, check the corresponding fuses (see Chapter 12).
After a power outage (for example, when the battery is disconnected) it is necessary to synchronize the electric drive mechanism as follows:
- Close all doors and turn on the ignition;
- Roll down the driver's door window;
- Press and hold the appropriate switch button until the glass is fully raised and for at least 5 seconds;
- Repeat the procedure for the front passenger door window.
If synchronization does not resolve the problem, contact the manufacturer's service station for assistance.
Control of electric windows from outside
On models equipped with electric windows, the windows can be raised from the outside using a key. Details see Section 8.
Door mirror adjustment controls
Attention: Checking and adjusting the rear-view mirrors should be done before starting to drive - adjusting the mirrors while the vehicle is moving may lead to loss of control over the traffic situation and an accident!
The exterior rear view mirrors have a spherical design (with appropriate equipment), allowing you to expand your field of view.
Caution: Spherical exterior rearview mirrors distort the size and distance of objects. Objects viewed through the mirrors appear further away than they actually are.
The position of the door mirrors can be adjusted manually using levers built into the triangular trims of the front doors (see illustration 17.23), or (with appropriate equipment) using an electric drive (see below). The combined switch for adjusting the position of the door rear-view mirrors is mounted in the armrest panel of the driver's door (see illustration 17.24). The choice of the mirror to be adjusted is made using the selector switch - when switching the toggle switch to one of the positions (left/right) control switches to the corresponding mirror. Changing the angle of the mirror in the horizontal and/or vertical plane is carried out by pressing the corresponding sector of the 4-position switch. Activation of the mirror drive becomes possible only when the ignition is on.
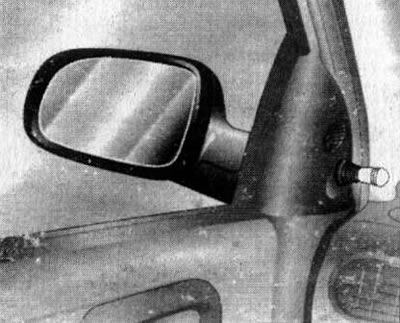
17.23. Manual control lever for adjusting the door rearview mirror |
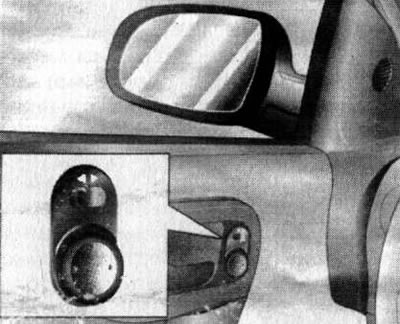
17.24. Control panel for electric door mirrors |
[Material copied from this portal www.opelbook.ru]
If necessary, the exterior mirrors can be pressed against the surface of the door glass. The exterior mirrors are folded and unfolded manually.
On models equipped with sports mirrors, the mirror housing separates from the holders when it hits an obstacle. To install the housing, insert it into the holders and press until it locks into place (see illustration 17.25).
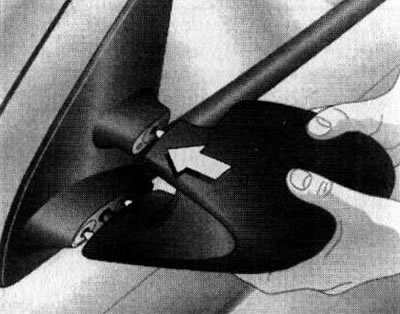
17.25. Installing a sports mirror housing
Visitor comments