


Contents: Unlocking and locking doors from the…⬇ Unlocking and locking doors with the…⬇ Unlocking and locking doors from the…⬇ Additional locking of rear side doors ⬇ Unlocking and locking the tailgate ⬇
Warning: When leaving the car, do not forget to remove the key from the ignition, set the parking brake, close all windows and lock the doors! It is also reasonable to lock the doors while driving to prevent them from being accidentally opened, as well as to prevent intruders from entering the car (for example, at traffic light stops). When transporting children in the back seat on models with the appropriate configuration, turn on the additional door lock from the passenger compartment!
Caution: To prevent engine exhaust gases from entering the vehicle interior, do not under any circumstances transport cargo that is too large to completely close the tailgate.
Caution: When stopping on slopes, be careful when opening/closing sliding doors (combo models) - they may spontaneously shift under the weight of their own weight!
Note: When the fuel filler flap is open, the right sliding door does not open fully to avoid damage (combo models).
Unlocking and locking doors from the outside using a key
On all models covered by this Manual, the driver's door and tailgate locks are equipped with cylinders that allow the respective door to be unlocked and locked from the outside using a key.
The driver's door is unlocked by turning the key counterclockwise in the lock cylinder, and the tailgate by turning the key clockwise until it stops. On models equipped with a single lock, turning the key in the driver's door lock cylinder automatically unlocks all doors (including the tailgate, if its lock has not been activated before (see below)), as well as the fuel filler flap - if equipped, the anti-theft alarm and double locking system will be simultaneously disabled (see Section 8).
To lock the driver's door, and on models with a single lock, the other doors and the fuel filler flap, turn the key clockwise in the driver's door lock cylinder. If, without removing the key from the lock cylinder, you turn it again in the same direction within 10 seconds, the anti-theft alarm/double locking system will be activated on models with the corresponding configuration (see Section 8).
Detailed information on unlocking/locking the tailgate is provided below.
Note: When the tailgate is unlocked with the key, the other doors are not unlocked.
Unlocking and locking doors with the remote control
See Section 8.
Unlocking and locking doors from the inside
The side doors are unlocked/locked from the inside using push-button locks built into the upper door trim panels. The locks are locked by pressing the button in - to unlock, pull the button out of the recess. When pressing/pulling the driver's door button, all doors are locked/unlocked - the driver's door must be tightly closed.
Note: If the double locking system has been previously activated (see section 8), unlocking the doors from the inside is not possible.
Additional locking of rear side doors
Warning: Always use the rear door lock when there are children in the rear seats! Inform passengers accordingly!
On models with the appropriate configuration, a special additional lock serves to prevent the possibility of accidental opening of the rear doors from the passenger compartment, which is especially important when there are young children in the car.
The lock is activated by turning a special cylinder mounted in the rear end wall of the door assembly (the cylinder groove must be positioned horizontally), - use a key or any other suitable tool (see illustration 3.1). To remove the lock, move the cylinder to its previous position - the groove should be located vertically.
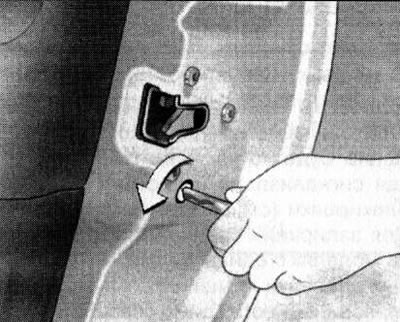
3.1. Activating the additional lock of the rear side door
Unlocking and locking the tailgate
In the upper position, the tailgate on the Hatchback models is held in place by special gas-filled struts, and there is a handle on the inside of the door for closing.
Note: Mounting additional equipment on the tailgate increases its weight, and the door may not be held open. The lock latches automatically when the door is slammed.
On models not equipped with a single locking system, the tailgate is unlocked by turning the key to the right - the lock groove must be in a horizontal position. The door opens by pressing the lock button.
To lock, you need to slam the door and turn the key counterclockwise - the groove of the lock should be in a vertical position (see illustration 3.2).
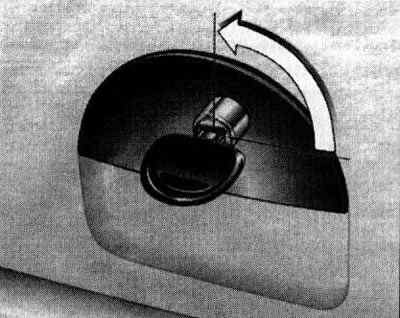
3.2. Locking the tailgate on models not equipped with a single lock
On models equipped with a single lock, when the key is removed, the rear door lock cylinder can be in one of two positions:
The cylinder groove is located horizontally;
The cylinder groove is located vertically.
To unlock the door using the key, turn it from the first or second position clockwise until it stops, overcoming the point of resistance (see illustration 3.3). In this position it is impossible to remove the key from the lock. The door is opened by pressing the button on the lock cylinder.
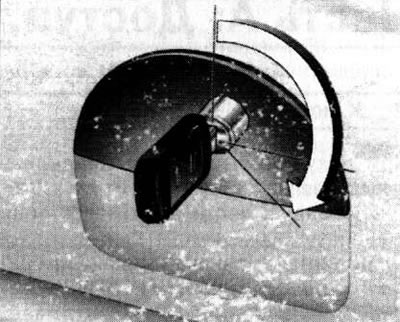
3.3. Unlocking the tailgate lock on models equipped with a single lock using a key
To lock, turn the key counterclockwise to set the groove of the lock cylinder to a horizontal or vertical position.
The tailgate can be unlocked with a key separately from the other doors when the anti-theft system is activated (see section 8). In this case, the control of the interior volume of the passenger compartment and the tilt of the vehicle will be automatically disabled and will be reactivated approximately 10 seconds after the tailgate is locked.
In addition, if the lock cylinder groove is set to a horizontal position, unlocking/locking the tailgate lock can be done using one of the standard methods of activating the single lock (See Section 8).
When the lock cylinder is set to the vertical position, the lock is locked and can only be opened with a key.
Note: If the lock cylinder is moved from the vertical to the horizontal position after the single lock has been unlocked, the lock will remain locked.
On Combo models, the tailgate is made in a double-leaf design. The right-hand leaf can be opened by pressing either the outer or inner handle, while the left-hand leaf is equipped with an inner handle only. The leaves are designed to be fixed when opened at an angle of 90°. In this case, when closing the leaves, it is necessary to apply a little more force to overcome the resistance of the latch. If necessary, the leaves can be opened completely (at an angle of 180°), for which, from the fixed position, slightly close the corresponding leaf and press the bracket of the corresponding latch with the guide (see illustration 3.4). When closing the sashes again, make sure that the retainer bracket is installed correctly.
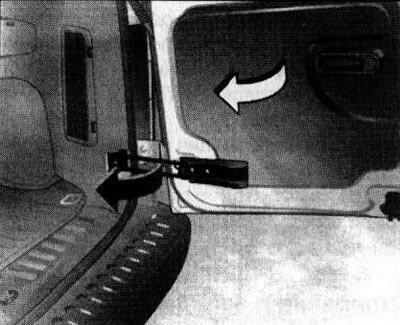
3.4. Pressing the rear door retainer bracket (combo models)
Caution: Fully open flaps (at an angle of 180°) cover the rear combination lights - the light signals and side lights are not visible to other road users! Do not allow the flaps to be fully opened at night or in poor visibility conditions.
Visitor comments