
Do not open the radiator cap and do not remove the thermostat until the engine has completely cooled down! See also the warning at the beginning of the section Antifreeze - general information.
Removing
Petrol models
Models with SOHC engines
1. Disconnect the negative cable from the battery.
2. Empty the cooling system (see chapter Current service).
If you are not going to add new fluid to the system, save the drained fluid for later use.
3. Remove the air cleaner assembly with air ducts (see chapter Power and exhaust systems).
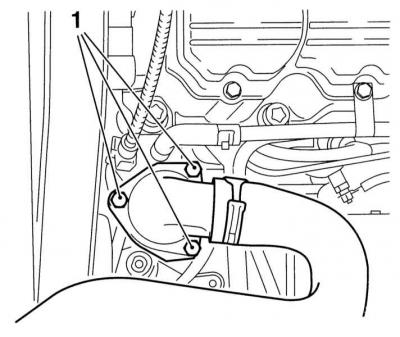
4. Loosen the mounting clamps and disconnect the upper radiator hose from the cover of the thermostat installed on the right side of the cylinder head.
5. Remove the timing belt with idler pulley, camshaft sprocket and rear timing cover.
6. Turn out fixing bolts and remove a cover of the thermostat.
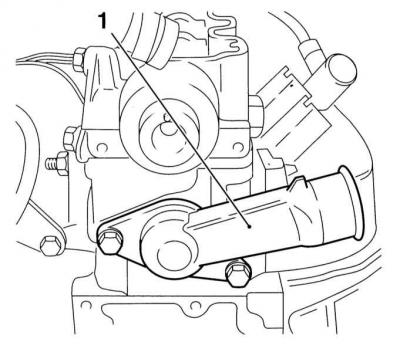
7. Remove the thermostat from the housing, remove the sealing ring - try to remember the installation position of the components.
Models with DOHC engines
1. Disconnect the negative cable from the battery (see chapter Engine electrical equipment).
2. Empty the cooling system (see chapter Current service).
If you are not going to add new fluid to the system, save the drained fluid for later use.
3. Loosen the clamps and disconnect the upper radiator hose from the thermostat cover.
On 1.4 and 1.6 liter models, the cover is mounted on a housing bolted to the right side of the engine. On 1.8 and 2.0 liter models, the cover is attached directly to the cylinder head - here you will have to disconnect another small hose.
4. On engines 1.8 l disconnect the electrical wiring from the temperature sensor mounted on the thermostat housing.
5. Turn out fixing bolts and remove the case together with the thermostat which is built in it.
A - Thermostat housing (3) engine 1.6 l DOHC
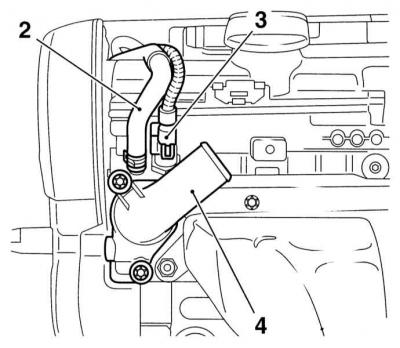
B - Engine thermostat housing 1.8L DOHC
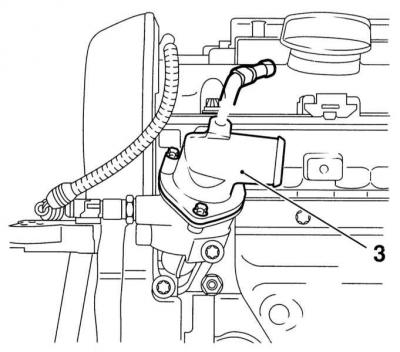
2 - Hose
3 — Wiring of the gauge of temperature of a cooling liquid
4 - Thermostat casing
6. On engines 1.4 and 1.6 l remove the sealing ring. On engines 2.0 l the cover is installed on the gasket, on engines 1.8 l - for sealant.
4. With the corresponding equipment on models 1.4 and 1.6 l disconnect the electrical wiring from the temperature sensor and remove the bolts securing the thermostat main body to the cylinder head. Remove the gasket. If required, unscrew the sensor from the housing.
5. If necessary, models 1.8 l unscrew the temperature sensor.

2 - Hose
3 — Wiring of the gauge of temperature of a cooling liquid
4 - Thermostat casing
Diesel models
Models with 1.7L engines
1. Remove the battery with support bracket (see chapter Engine electrical equipment).
2. Apply the parking brake, jack up the vehicle and place it on jack stands. If equipped, remove the crankcase protection.
3. Empty the cooling system (see chapter Current service).
If you are not going to add new fluid to the system, save the drained fluid for later use.
4. Loosen the mounting clamps and disconnect the upper radiator hose from the cover installed on the right (SOHC engines) / left (DOHC engines) on the thermostat cylinder head.
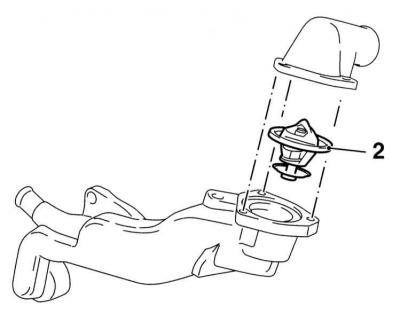
5. Turn out fixing bolts and remove a cover of the thermostat from the case.
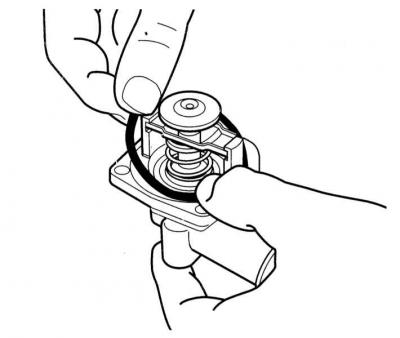
6. Remove the thermostat valve (2) from the housing and remove the O-ring.
Models with 2.0L engines
1. Remove the air cleaner, intake duct and air mass meter sensor (see Supply system).
2. Apply the parking brake, jack up the vehicle and place it on jack stands. If equipped, remove the crankcase protection.
3. Empty the cooling system (see chapter Current service).
If you are not going to add new fluid to the system, save the drained fluid for later use.
4. If equipped, disconnect the electrical wiring from the temperature sensor mounted on the thermostat housing.
5. Loosen the clamps and disconnect the upper and lower hoses, as well as the bleed hose from the thermostat housing - the thermostat is installed on the right side of the cylinder head.
6. Turn out fixing bolts and remove the case together with the thermostat which is built in it. Remove the pad.
Examination
1. Before finally establishing your opinion about the failure of the thermostat, check the coolant level in the system, the condition and tension of the drive belt (see chapter Current service), as well as the correct functioning of the temperature meter.
2. One of the possible reasons for the engine warming up too slowly (according to meter readings) is the thermostat sticking in the open position. Replace the thermostat with a new one.
3. If the engine overheats, feel the upper radiator hose with your hand. If the hose is not hot, the thermostat may be stuck closed, cutting off coolant circulation through the radiator. Replace thermostat.
Never operate the vehicle with the thermostat removed! This may break the feedback of the onboard processor, which will lead to increased toxicity of exhaust gases and an excessive increase in fuel consumption.
4. If the upper hose is hot, this means that the coolant is circulating through the radiator properly, i.e. thermostat is open. Refer to the section on diagnosing problems with the cooling system (see Troubleshooting).
5. The most accurate results are obtained by checking the thermostat on a workbench.
6. Remove the thermostat from the engine (see chapter Engine).
7. Tie a piece of wire to the thermostat assembly and lower it into a container filled with water. Put the thermometer in there.
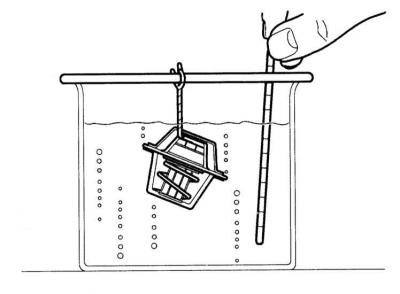
Make sure that the thermometer and thermostat do not come into contact with the walls and bottom of the container!
8. Start slowly heating the water, watching the change in the thermometer readings - the thermostat valve should actuate exactly in accordance with the requirements Specifications.
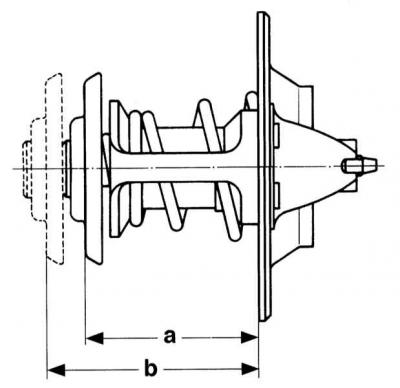
9. Estimate the value of the full opening of the valve, - the nominal value is b - a = 8 mm.
Installation
Installation is carried out in reverse order. Pay attention to the following points.
1. Thoroughly clean mating surfaces and replace seals/sealant.
2. Place the thermostat into the casing, orienting it correctly.
3. Tighten the cap screws to the required torque.
4. Restore original connection of all hoses and electrical wiring (where required, replace the removed sensors).
5. Fill the system with coolant (see chapter Current service).
6. Start engine, warm up to operating temperature and check for leaks.
Visitor comments