
When the engine is hot, the cooling fan can be activated at any time - be extremely careful!
Examination
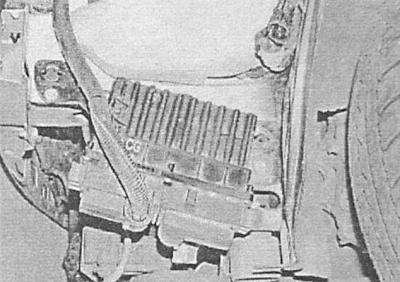
The electric fan is powered by a battery. Fan circuit includes safety fuse, ignition switch and relay (see chapter Onboard electrical equipment). The operation of the fan is controlled by an electronic control unit based on data from the coolant temperature sensor. The control unit is located on the left under the front spoiler, behind the front bumper.
1. To check that the fan is working properly, start the engine and warm it up at idle to normal operating temperature. The fan should work before the arrow of the engine temperature gauge on the car's instrument panel approaches the overheating sector of the dial. If the fan does not turn on, check the power supply on the corresponding wire of the fan and relay (see chapter Onboard electrical equipment). A power failure can result from a blown fuse, failed ignition switch, failed relay, or damaged wiring. It is also possible that the fan drive motor may fail.
Removing
Petrol models
Astra models without air conditioning
1. Disconnect the negative cable from the battery (see chapter Engine electrical equipment) and move it away from the pole terminal.
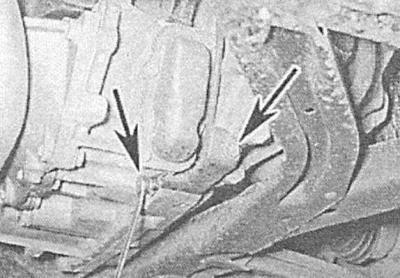
2. Disconnect the fan wiring connector and release the wiring harness from the intermediate clamps.
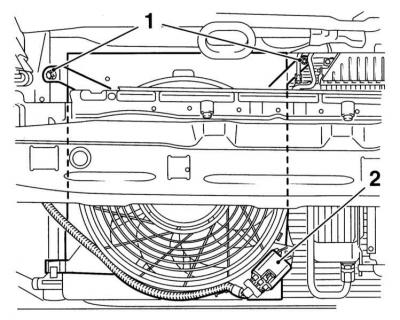
3. Turn out the top bolts of fastening of the fan to a radiator.
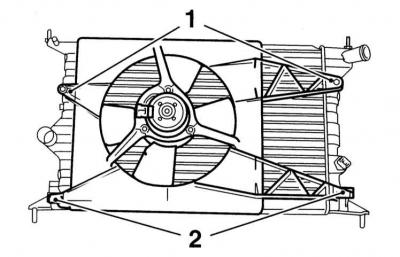
1 - Top mounting bolts
2 - Lower supports
4. Gently lift the engine compartment.
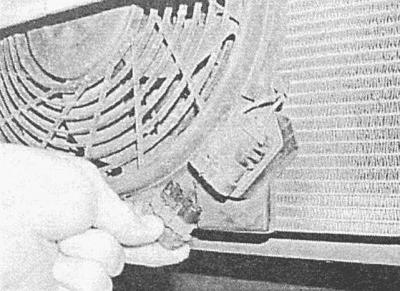
5. Transfer the fan to the workbench, unscrew the fixing screw, disconnect the connector and remove the preliminary resistor from the frame.
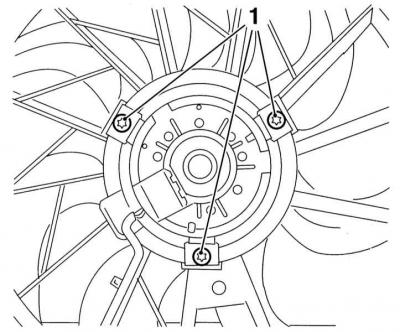
6. Remove the fixing screws (1) and remove the drive motor and impeller from the fan assembly frame.
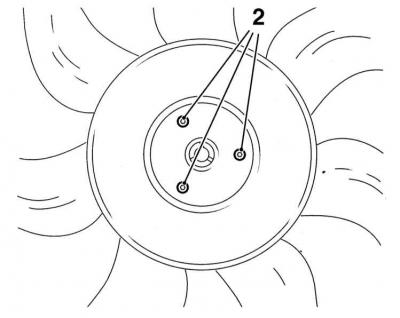
7. Loosen the screws if necessary (2) and separate the impeller from the motor.

Zafira models without air conditioning
1. Remove the front bumper (see chapter Body).
2. Disconnect the electrical wiring from the fan and release it from the intermediate clamps.
3. Turn out lateral bolts and, having lowered ventilatorny assembly, carefully take it from an impellent compartment.
4. Transfer the fan to the workbench, release the clamps and remove the diffuser, unscrew the three fixing bolts and remove the impeller. Remove the mounting screw, disconnect the connector and remove the preliminary resistor from the frame. If necessary, loosen the fasteners and remove the electric motor.
Astra models with air conditioning
1. Remove the battery with support bracket.
2. Remove air cleaner assembly with air duct (see chapter Power and exhaust systems).
3. Remove the front bumper (see chapter Body).
4. Empty the cooling system (see chapter Current service).
5. Disconnect the electrical wiring of the fan, pressure sensor and A/C compressor. also disconnect the rear connector from the cooling system control module located on the left under the front spoiler. Give a fixing nut and disconnect the earth tire from a mudguard.
6. Disconnect the upper and lower hoses from the radiator.
7. Turn out the top bolts of fastening of the fan to a radiator.

1 - Top mounting bolts
2 - Lower supports
8. While lifting, carefully release the fan assembly from the lower supports and remove it from the engine compartment.
9. Transfer the fan to the workbench, unscrew the mounting screw, disconnect the connector and remove the preliminary resistor from the frame.
10. Remove the fixing screws (1) and remove the drive motor and impeller from the frame of the fan assembly.

5. Loosen the screws if necessary (2) and separate the impeller from the motor.
Zafira models with air conditioning
1. Remove air cleaner assembly with air duct (see chapter Power and exhaust systems). Disconnect the electrical wiring from the air mass meter (see chapter Power and exhaust systems).
2. Release the clamp and disconnect the crankcase ventilation hose from the timing cover.
3. After unscrewing the bolts and releasing the clamps, remove the air resonator from the front panel.
4. Remove the front bumper (see chapter Body).
5. Disconnect the electrical wiring from the fan and release it from the intermediate clamps.
2. Turn out fixing bots and take fan assembly from an impellent compartment.

1 - Top mounting bolts
2 - Lower supports
3. Transfer the fan to the workbench, remove the protective grille if equipped, unscrew the fixing screws and remove the fan assembly. Disconnect the connector and remove the preliminary resistor from the frame.
4. Loosen the screws if necessary (2) and separate the impeller from the motor.

Diesel models
Models with 1.7L engines
1. Remove the battery with support bracket.
2. Remove the front bumper (see chapter Body).
3. Loosen the mounting clamps and disconnect the intake air duct and the intake air discharge sleeve from the intercooler.
4. Release a collar and disconnect from an intercooler the remained part of an inlet air duct. Take the air duct aside and tie it to the body elements.
5. Apply the parking brake, jack up the vehicle and place it on jack stands. If equipped, remove the crankcase protection.
6. On models equipped with an air conditioning system, disconnect the K/V wiring connector located near the klaxon horn on the right side of the front spoiler. In the same place, disconnect the contact connector of the electrical wiring of the pressure sensor.
7. Disconnect the multi-pin connector of the cooling system control module on the left side of the spoiler. Disconnect the ground bus from the body element.
8. If necessary, disconnect the electrical wiring of the additional fan located below in front of the radiator.
9. Turn out fixing bolts (1) and, lifting, carefully remove the fan assembly from the radiator and remove it from the engine compartment.
10. On models equipped with an additional electric fan, remove the resonator bulkhead panels, disconnect the wiring, lower the additional fan assembly and remove it from under the vehicle.
11. Transfer the fan to the workbench, remove the protective grill, if equipped, remove the fixing screws and remove the fan assembly. Disconnect the connector and remove the preliminary resistor from the frame.
12. Loosen the screws if necessary (2) and separate the impeller from the motor.

Models with 2.0L engines
1. Remove the heatsink/fan assembly (see Removal and installation of a radiator of system of cooling).
2. Release the latches and remove the fan cover from the radiator.
3. Disunite a contact socket of an electroconducting of the fan.
4. Turn out fixing bolts and remove the fan.
5. Turn out fixing bolts and remove an impeller.
6. On models equipped with an optional fan, remove the front bumper (see chapter Body), then disconnect the electrical wiring and give the bolt securing the contact connector. Loosen the fixing nuts and lower the fan down. Disconnect the grid and remove the preliminary resistor.
Installation
All models
Installation is carried out in the reverse order to the dismantling of the components.
After completing the installation, fill the cooling system with fresh mixture (see chapter Current service) and check it for signs of leaks.
Visitor comments