
Do not proceed with the procedures until the engine has completely cooled down. See also the warnings at the beginning of the section Antifreeze - general information.
Removing
Petrol models
1. On models without air conditioning, disconnect the negative cable from the battery (see chapter Engine electrical equipment).
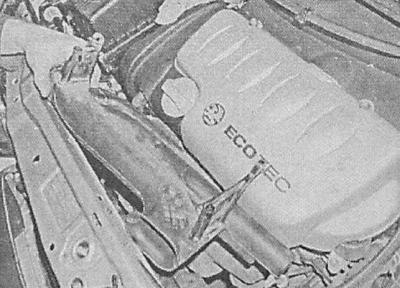
2. On models equipped with air conditioning remove battery with support bracket (see chapter Engine electrical equipment). Also remove the air cleaner assembly with air ducts.
3. On equipped with A/C Zafira models unscrew the fixing bolts, remove the front panel cover.
4. Separate the intake resonator from the cover and from the intake duct sleeve.
5. Apply the parking brake. Jack up the car and place it on jack stands. If equipped, remove the crankcase protection.
6. Empty the cooling system (see chapter Current service).
7. Remove the fan assembly (see Check of serviceability of functioning, removal and installation of the fan of system of cooling).
8. Loosen the clamp and disconnect the upper hose connected to the radiator on the right.
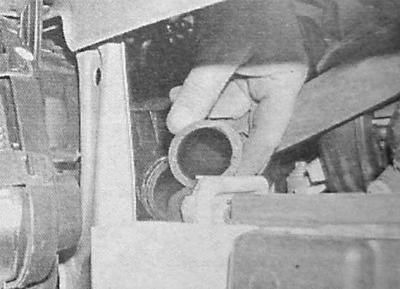
9. Disconnect the lower hose (connected to the radiator on the left).
10. Also disconnect a hose of a broad tank from the left side of a radiator.
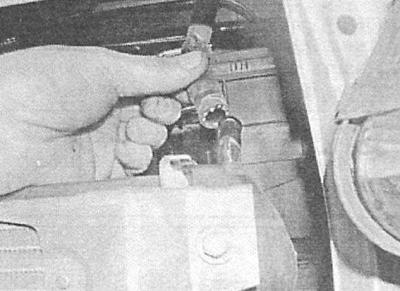
11. On models with AT unscrew the fixing bolts and disconnect the ATF cooling hoses from the left radiator tank. Remove copper sealing washers - prepare to collect spillage (install suitable drain containers under the nozzles). Try to remember the order in which all hoses are connected.
12. Remove the front bumper (see chapter Body).
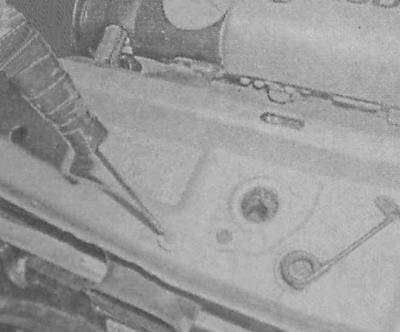
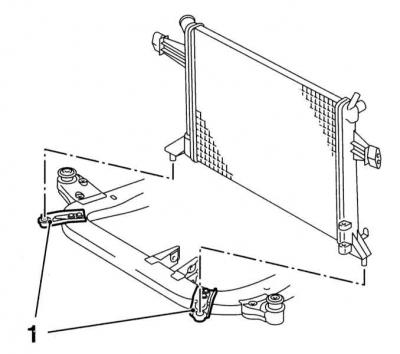
13. In order to fix the radiator while removing the lower support brackets, proceeding from the engine compartment, insert two welding electrodes or two screwdrivers into the radiator side mounts.
14. Turn out fixing bolts and separate from a radiator brackets of the bottom support of fastening of assembly to a stretcher, - brackets are removed in gathering with rubber pillows.
15. On models equipped with an air conditioning system, unscrew the bolts securing the air conditioner condenser to the front of the radiator, then tie the condenser to the front panel - do not disconnect the lines of the refrigeration path!
16. Holding the radiator, remove the fixing elements (screwdrivers or electrodes), then, by sliding down, release the radiator from the supports and remove it from the engine compartment.
17. If necessary, rearrange the hinged elements on the new radiator.
Diesel models
1. Apply the parking brake. Jack up the car and place it on jack stands. If equipped, remove the crankcase protection.
2. On DOHC models, remove battery with support bracket (see chapter Engine electrical equipment), - do not forget to unscrew the bolt that secures to the wiring harness bracket.
3. Remove the front bumper (see chapter Body).
4. On models with Y20DTH engines, remove the damper block under the bumper. Also remove the intercooler assembly (see chapter Power and exhaust systems).
5. Remove the engine guard, then, on 1.7L models, remove the fan assembly from the rear of the radiator (see Check of serviceability of functioning, removal and installation of the fan of system of cooling).
6. Remove the air cleaner, intake duct and air mass meter sensor (see chapter Power and exhaust systems).
7. On models equipped with an air conditioning system, disconnect the wiring from the A/C compressor, receiver/drier, auxiliary fan, and cooling fan control unit. Disconnect the ground bus from the body element and take all wiring to the side.
8. empty the cooling system (see chapter Current service).
9. Disconnect the upper and lower hoses from the radiator. Disconnect the purge hose.
10. In order to fix the radiator while removing the lower support brackets, proceeding from the engine compartment, insert two welding electrodes or two screwdrivers into the radiator side mounts.
11. Turn out fixing bolts and separate from a radiator brackets of the bottom support of fastening of assembly to a stretcher, - brackets are removed in gathering with rubber pillows.
12. On models equipped with an air conditioning system, unscrew the bolts securing the air conditioner condenser to the front of the radiator, then tie the condenser to the front panel - do not disconnect the lines of the refrigeration path! Remove the intercooler support bracket bolts.
13. Holding the radiator, remove the fixing elements (screwdrivers or electrodes), then, by sliding down, release the radiator from the supports and remove it from the engine compartment.
14. If necessary, rearrange the hinged elements on the new radiator (cooling fan and intercooler).
Examination
1. Once removed from the vehicle, the radiator can be inspected for signs of leaks, damage, and heat exchanger leaks.
2. The remains of insects and vegetation can be removed from the space between the heat exchanger plates by blowing with compressed air (don't forget to wear safety goggles!), or scrubbing with a soft brush. Take care not to bend the thin heat exchanger plates or cut your fingers on them. Before installation, the radiator must be flushed by introducing water from a garden hose into the interior (see chapter Current service).
3. Check up a condition of rubber support of a radiator, in case of need make replacement of the failed components.
4. Sources of small leaks can be sealed with a suitable sealant (act in accordance with the manufacturer's instructions). Any more complex repairs should be carried out only in a specialized workshop using the necessary equipment.
Installation
Installation is carried out in the reverse order to the dismantling of the components. Pay attention to the following points:
1. Track correctness of installation of rubber pillows of the bottom support of a radiator.
2. Track correctness of connection and reliability of fixing by fixing collars of all hoses.
3. Finally, charge the cooling system (see chapter Current service) and inspect its components for signs of leaks.
Visitor comments