
The ball joints are riveted to the lever at the factory. Bolts are used to fasten the interchangeable supports.
1. Remove the lower suspension arm (see Removal, refurbishment and installation of the lower arm of the front suspension).
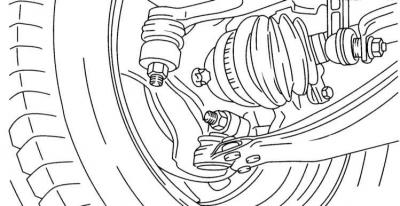
If the installed ball joint is bolted, there is no need to remove the lever - just release the support pin from the collar on the steering knuckle.
2. Clamp the lower arm in a soft-jawed vise and drill out the rivets securing the support with a 12 mm drill.
3. Remove the remains of the rivets and remove the support.
4. Clean the surface of the lever from traces of corrosion and lubricate it with a rust converter.
5. The replacement support is attached to the lever with three bolts with nuts and spring washers - the required fasteners can always be purchased at branded automotive accessories stores.
6. When installing fasteners, make sure that the nuts are on the bottom. Tighten the nuts to the required torque.
7. Install the lever in its regular place (see Removal, refurbishment and installation of the lower arm of the front suspension).
Visitor comments