
OpelBook.ru
Cars AvtoVAZ Cars Mitsubishi Cars BMW Cars Mercedes Cars Nissan Cars Toyota Cars Chevrolet
English Русский
Български
Беларускі
Український
Српски
Hrvatski
Română
Polski
Slovenský
Magyar
 |  Sitemap  |  Contacts  |    


Main Astra Corsa Insignia Kadett Omega Vectra Zafira Others Articles
Astra F (1991-1998, petrol) Astra G (1998-2004, petrol) Astra G (1998-2004) Astra H (2004-2009) Astra J (2009-2015, petrol)
  • Main
  • Astra
  • Astra F
  • Power unit
  • Fuel supply (injector)
  • Electronic Traction Control (ETC) Components

Electronic Traction Control (ETC) Components (Opel Astra F)

            0

Contents: Throttle body - removal and…⬇ Electric motor for controlling the…⬇ Electronic control unit - removal…⬇ Manual Simplification Switch ⬇ Removal ⬇ Installation ⬇

Throttle body - removal and installation


Disconnect the negative battery terminal.

Remove the main throttle body as described in the previous section "Fuel injection system Motronic M2.5".

Disconnect the breather hose on the camshaft cover on the right side of the throttle body.

Disconnect the coolant hoses from the throttle body, marking their location for ease of installation. Coolant may leak, so clamp the hoses to reduce coolant loss.

Remove the two bolts securing the throttle control motor to its housing.

Disconnect the two vacuum hoses from the front of the throttle body, marking their locations for later installation.

Disconnect the throttle control motor drive rod from the lever located on the side of the throttle body.

Remove the throttle body from the intake manifold. Remove the gasket.

Before installation, carefully wipe the mating surfaces of the throttle body and intake manifold.

Install the throttle body onto the intake manifold with a new gasket.

Further installation is carried out in the reverse order of removal, taking into account the following.

Check that the cooling hoses are connected as they were before removal.

When connecting the actuator rod (AR) to the lever on the throttle body, check to see if the clamp is engaged.

When connecting the vacuum hoses to the throttle body (TB), check that they are installed correctly.


Install the main throttle body with a new gasket as previously shown.

After finishing the work, check the refrigerant level and, if necessary, top it up to the required level.

Electric motor for controlling the throttle valve of the RTU system - removal and installation


Disconnect the negative battery terminal.

Remove the air box from the top of the throttle body as previously shown.

Disconnect the crankcase ventilation hose from the main throttle body.

Loosen the alternator bolts, then remove the top bolt, remove the drive belt from the alternator pulley and move the alternator to the side.

Remove the two screws and remove the throttle cable bracket from the intake manifold.

Disconnect the throttle control motor plug connector (access to which is possible from the generator side) from the throttle body.

Disconnect the RTU throttle control rod from the throttle body (fig. 4.113).
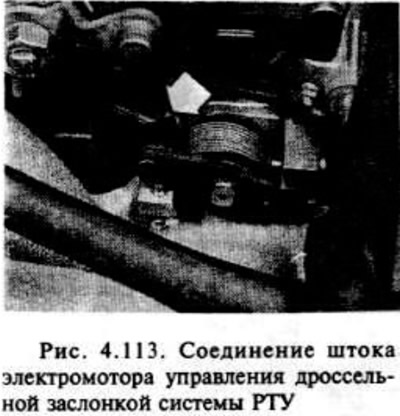
Disconnect the RTU throttle control rod from the throttle body (fig. 4.113).


Loosen and remove the two bolts securing the throttle control motor to the throttle body, then carefully remove the motor (fig. 4.115).
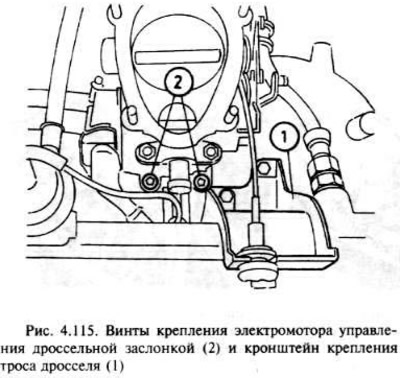
Loosen and remove the two bolts securing the throttle control motor to the throttle body, then…


If the throttle control rod is disconnected from the electric motor, note its location for subsequent installation.


Installation is carried out in the reverse order of removal, taking into account the following.

Information taken from the website OpelBook

If necessary, check the correct position of the throttle control rod.

Before tightening the alternator bolts, tension the drive belt as shown in chapter 12.

Install the air box as previously described.

Electronic control unit - removal and installation


The electronic control unit for the RTU system is located inside the car next to the left front seat under the cover near the threshold.

Make sure the ignition is off, then disconnect the negative battery terminal.

Open the two control unit cover locking nuts with a screwdriver, then remove the nuts (fig. 4.114).
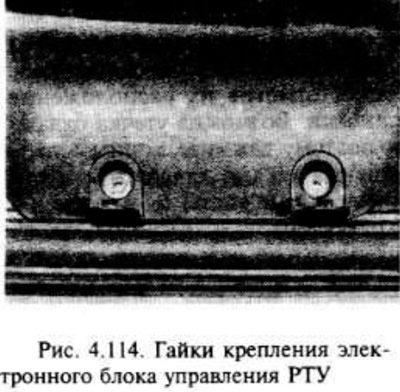
Open the two control unit cover locking nuts with a screwdriver, then remove the nuts (fig. 4.114).


Carefully remove the control unit cover, noticing how it is secured.

Remove the control unit and holes, then remove the clamp screw of the plug connector. Release the clamps and remove the unit.

Installation is the reverse of removal, but make sure the cover snaps into place correctly in the panel.

Manual Simplification Switch


Removal


The manual control switch is located on the central console in the passenger compartment.


Disconnect the negative battery terminal.

Carefully remove the tray from the center console. Disconnect the wire from the switch. Carefully push the switch through the top of the center console.

Installation


Installation is carried out in the reverse order of removal.


This article is available at russian, bulgarian, belarusian, ukrainian, serbian, croatian, romanian, polish, slovak, hungarian
Checking the article: Trifonova Emilia

Share information:

Previous articles
Opel Astra F: Fuel supply (injector)
Next articles

Electronic Traction Control (ETC)
Fuel injection system parts (Motronic M2.5) — removal and installation
Motronic M1.5.2 Fuel Injection System Components — Removal and Installation
Multec Multi-Point Fuel Injection System Components — Removal and Installation
Electronic control unit
Multec Single Point Fuel Injection System Components — Removal and Installation
Intake manifold (single point injection Multec) — removal and installation
Intake manifold (Multec multipoint injection) — removal and installation
Intake manifold (Motronic M1.5.2 injection system) — removal and installation
Intake manifold (Motronic M2.5 injection system) — removal and installation
Exhaust manifold — removal and installation
Exhaust system — general information


See similar ones from other Opel car manuals:
▶ ABS and Traction Control System — Removal and Installation… Opel Omega B2 (1999-2003)
▶ Electronic ignition (and injection) control system for… Opel Corsa B (1993-2000)
▶ Electronic engine control unit Opel Insignia A (2008-2017)
▶ Electronic control and measuring devices Opel Kadett E (1984-1995)
▶ Electronic control device — removal and installation Opel Vectra B (1995-2002)
Link to this page in different formats

Visitor comments


No comments yet


How much will 35 + 13 =


Astra J (2009-2015, petrol) 
  • General information
  • Vehicle device
  • User manual
  • Faults en route
  • Maintenance
  • Power unit
  • Engine repair
  • Cooling and lubrication system
  • Engine power system
  • Exhaust system
  • Transmission
  • Clutch
  • Car gearbox
  • Drive shafts
  • Chassis
  • Front suspension
  • Rear suspension
  • Steering
  • Brake system
  • Wheels and tires
  • Body
  • Exterior
  • Interior
  • Doors and windows
  • Body Care
  • Heating and air conditioning
  • Security systems
  • Electrical equipment
  • Equipment and devices
  • Lighting and signaling
  • Power devices
  • Electrical circuits
Astra H (2004-2009) 
  • General information
  • Introduction to the guide
  • Troubleshooting
  • User manual
  • Maintenance
  • Power unit
  • Engine repair
  • Cooling and heating
  • Power and exhaust system
  • Ignition system
  • Launch and charge system
  • Transmission
  • Mechanical gearbox
  • Automatic gearbox
  • Drive shafts
  • Chassis
  • Brake system
  • Car suspension
  • Steering
  • Body
  • Interior
  • Exterior
  • Electrical equipment
  • Equipment and devices
  • Electrical circuits
Astra G (1998-2004) 
  • General information
  • Introduction to manual
  • User manual
  • Maintenance
  • Power unit
  • SOHC gasoline engines
  • DOHC gasoline engines
  • Diesel engines 1.7 and 2.0
  • Engine repair
  • Cooling system
  • Supply system
  • Injection system (gasoline)
  • Injection system (diesel)
  • Exhaust system
  • Charge and launch system
  • Ignition system (gasoline)
  • Preheat system (diesel)
  • Transmission
  • Manual gearbox
  • Automatic gearbox
  • Clutch
  • Drive shafts
  • Chassis
  • Brake system
  • Wheel suspension
  • Steering
  • Body
  • Exterior
  • Interior
  • Doors and windows
  • Ventilation and heating
  • Electrical equipment
  • Equipment and devices
  • Electrical circuits
Astra G (1998-2004, petrol) 
  • General information
  • User manual
  • Car care
  • Maintenance
  • Power unit
  • Single shaft engines
  • Twin shaft engines
  • Engine repair
  • Cooling and heating
  • Fuel and exhaust systems
  • Starting and charging system
  • Ignition system
  • Transmission
  • Clutch
  • Mechanical gearbox
  • Automatic gearbox
  • Drive shafts
  • Chassis
  • Brake system
  • Car suspension
  • Steering
  • Body
  • Interior
  • Exterior
  • Electrical equipment
  • Equipment and devices
  • Wiring diagrams Opel Astra
  • Wiring diagrams Opel Zafira
Astra F (1991-1998, petrol) 
  • General information
  • Maintenance
  • Power unit
  • Engine in car
  • Engine removed
  • Cooling system
  • Heating and ventilation
  • Fuel supply (carburetor)
  • Fuel supply (injector)
  • Emission control
  • Ignition system
  • Transmission
  • Clutch
  • Mechanical gearbox
  • Automatic gearbox
  • Drive shafts
  • Chassis
  • Brake system
  • Car suspension
  • Steering
  • Body
  • Exterior
  • Interior
  • Electrical equipment
  • Equipment and devices
  • Electrical circuits
OpelBook.ru © 2017–2026 · Mobile version · · Sitemap: EN BG BY UA RS HR RO PL SK HU · Feedback · Site search
Astra F, petrol · Astra G, petrol · Astra G · Astra H · Astra J, petrol · Corsa B · Corsa C, petrol · Corsa C · Insignia A · Kadett D · Kadett E · Omega A · Omega B · Omega B2 · Vectra A, petrol · Vectra A · Vectra B, petrol · Vectra B · Vectra C · Zafira A, petrol · Frontera A, petrol · Frontera B · Ascona C · Vivaro A ·
We want your visit to be comfortable 🤝! We use cookies 🍪 to make that happen.