
To do the job, you will need a multimeter and a thermometer.
Warning! Before performing the operation, be sure to read the section «Safety measures for the maintenance and repair of the engine management system».
Examination
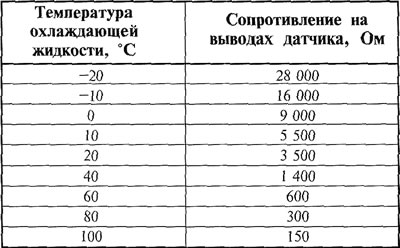
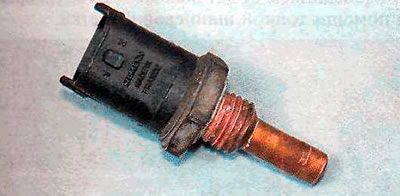
Checking the coolant temperature sensor consists in measuring its resistance at various temperatures and comparing them with reference values (are shown in the table). Remove the sensor to check (see below), connect a multimeter to it in ohmmeter mode and lower the thermocouple into a glass of hot water. We also lower the thermometer into the glass. As the water cools, we fix the readings of the ohmmeter at the temperatures given in the table. If the values obtained differ from those given, replace the sensor.
Table 9.2.3. Coolant sensor resistance versus temperature
Replacing the sensor on engines 1.4 and 1.6 DOHC
1. We prepare the car for work (see «Preparing the car for maintenance and repair»).
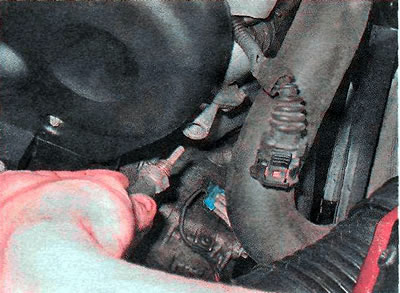
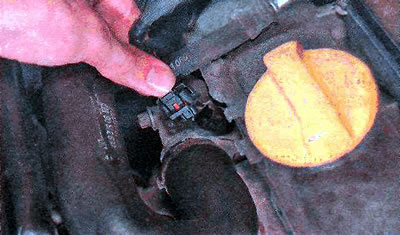
2. Disconnect the wiring harness block from the sensor.
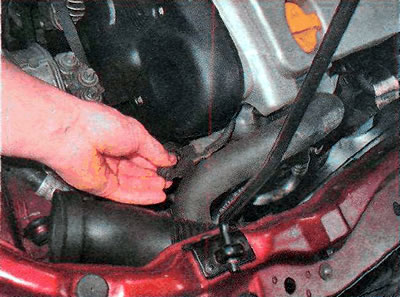
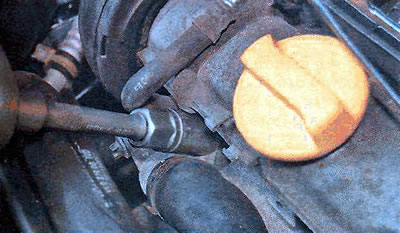
3. Use a 19 mm socket wrench to loosen the sensor.
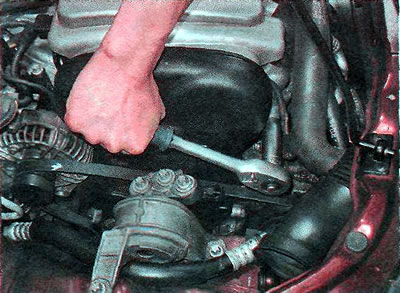
4. We turn the sensor out of the block head and remove it.
5. Install the sensor in reverse order.
Replacing the sensor on the 1.8 DOHC engine
1. We prepare the car for work (see «Preparing the car for maintenance and repair»).
2. For convenience, remove the decorative trim of the engine (see «Decorative overlay of the engine - removal and installation»).
3. Disconnect the wiring harness from the sensor located in the thermostat housing.
4. Use a 21 mm socket wrench to loosen the sensor.
5. We turn the sensor out of the block head and remove it.
6. Install the sensor in reverse order.
Visitor comments